14
01
15
01
Getting Ready I
Installation
Getting Ready I
Installation
Installation
Make sure to review the mounting precautions thoroughly prior to installation (dashboard attachment recommended).
Dashboard Attachment
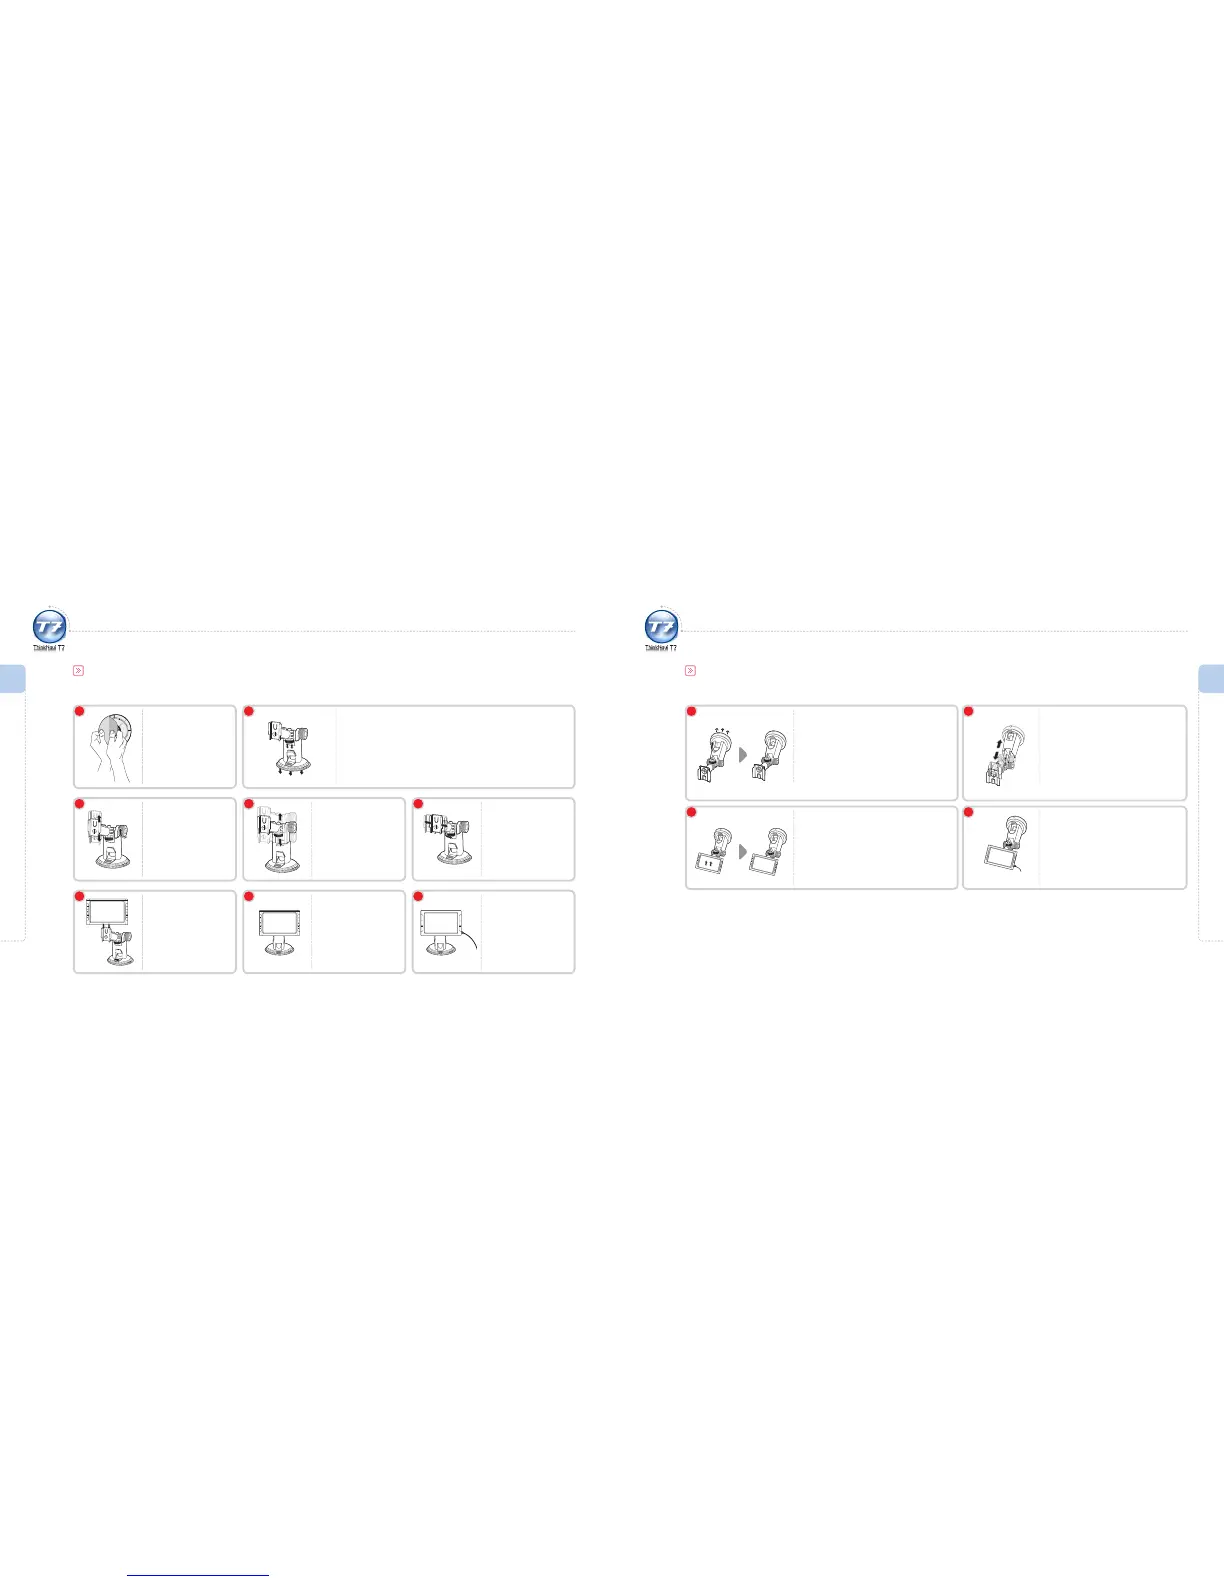
Adjust the height.
3
Adjust the angle and
fasten both screws in
the opposite direction
to x the mount
tightly.
4
Adjust the angle and
fasten the screw in the
direction of the arrow.
5
Once the mount is
rmly xed, ax the
ThinkNavi T7 main
unit.
6
Wipe and clean the
area and then ax the
urethane sticker on
the dashboard.
1
Fix the mount on the urethane sticker by pressing on it.
Adhere the suction cup on the sticker and press vertically to remove air.
Press the xing lever until you hear a click sound.
2
Check to see that the
ThinkNavi T7 main
unit and mounting
unit are securely
fastened.
7
Connect the unit to
the power adapter
(cigarette-lighter port)
and ThinkNavi T7 will
be ready to use.
8
Installation
Windscreen Attachment
1 2
Wipe and clean the area and then
ax the mount to the windscreen in a
position that does not interfere with the
driver’s view.
Turn the compression lever in the direction of
the arrow until you hear a clicking sound.
3
Adjust the height.
Connect the unit to the power
adapter (cigarette-lighter port)
and ThinkNavi T7 will be ready to
use.
4
Attach the ThinkNavi T7 main unit
securely to the mount. Make sure that
the main unit is attached correctly.
Refer to 4 and 5 on page 14 for adjusting angle
and securing the mount.