3-13
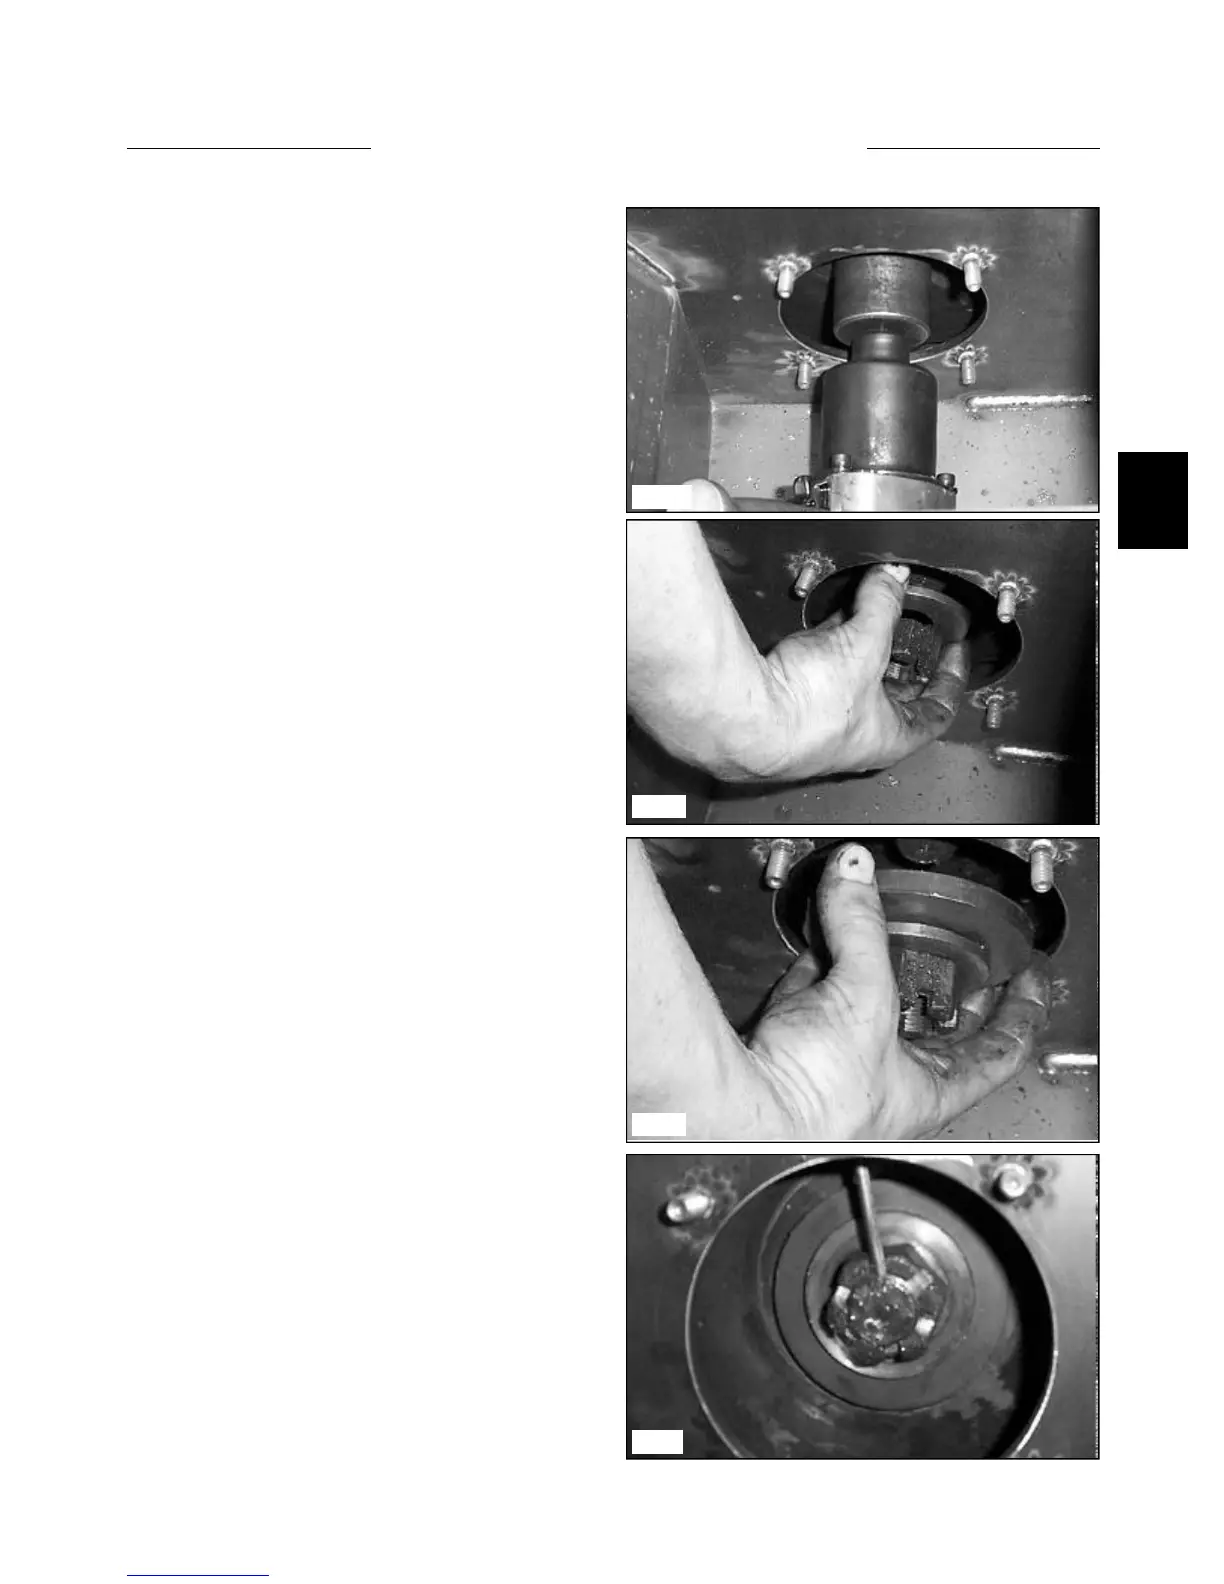
14 Tighten the castle nut and guide the axle into the
final drive housing as straight as possible to prevent dam-
aging the seal. Tap the axle flange with a hammer if nec-
essary to assist the installation.
As the castle nut is being tightened the rear (inside) bear-
ing is being pressed into place and the axle oil seal is
simultaneously pulled into the proper location into the
final drive housing.
15 When the castle nut will not turn on any further tap
the face of the flange with a hammer to ensure the seal
and bearing has seated into place.
16 Remove the castle nut, remove the small washer and
add the large axle washer..
AXLE ASSEMBLY 3.5
C3816
C3817
17 Install the axle washer and castle nut. Tighten the
castle nut to remove all axle bearing end play. (Zero pre-
load) Continue tightening until the split pin hole in the
axle will align with the castle nut.
18 Install the split pin. Bend the end of the split pin
straight back against the axle washer.
19 Install the axle cover using silicone to seal the mat-
ting surfaces. Do not over tighten the retaining nuts. 11
lbs/ft maximum. (15 nm)
20 Install the drive chain. Refer to Section 3.3 page 3-7.
21 Fill the final drive housing to the correct level using
10W30 API classification SJ oil. Refer to Section 3.2
page 3-3 for procedure.
22 Install the inspection cover using silicone to seal the
matting surfaces. Do not over tighten the retaining nuts.
11 lbs/ft maximum. (15 nm)
23 Install the wheels. Torque the wheel nuts to 100 to
110 lbs/ft. (135 to 149 nm).
C3819
C3818