9
English
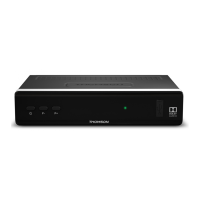
3.2 Basic connection using a Scart cable
Fig. 6
a) Connect the LNB of your satellite antenna to the SAT IN connector of your receiver using a
good quality coax cable and suitable ‘F-connector’ plugs.
b) Connect one end of a good quality Scart cable to the TV SCART connector on your receiver
and the other end to the SCART input of your TV.
c) Plug the power adapter to a suitable wall outlet.
3.3 Connecting multiple xed LNBs using a DiSEqC
switch
Fig. 7
a) Connect the LNBs of your xed antenna to the inputs of a DiSEqC switch
b) Connect the output or “to receiver” connector of the DiSEqC switch to the SAT IN connector
on your receiver.
c) Refer to section 3.1 or 3.2 for TV and mains connections.
3.4 Connecting to digital audio amplier
Fig. 8
Connect one end of a good quality coaxial audio cable to the S/PDIF output of your receiver
and the other end to the coaxial audio input of your home theatre, amplier or any other device
supporting digital audio.
3.5 Connecting a USB storage device
Fig. 8
NOTE It is recommended to use USB 2.0 or higher storage devices for
recording and play back of TV programmes or HD movies.*
NOTE Timeshift/recording and playback only works properly when a fast
USB storage device such as a USB2.0 HDD is connected to the
receiver. Timeshift/recording and playback of HD content requires
a sucient read/write speed of the used USB storage device.*
*This user manual describes the full functionality including the recording function and may not be applicable if the
software for recording via USB has not yet been installed.
4.0 FIRST TIME INSTALLATION
After all connections have been made properly, switch on your TV and make sure the receiver
is connected to the main power. If you are using the receiver for the rst time or restored to
factory default, the Installation guide menu will appear on your TV screen. Use tu to select