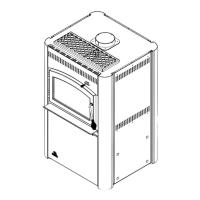
1. Remove rear louvre inlet panel.
• Remove the (9) mounting screws.
• Remove the variable speed control knob.
• To remove the power cord/strain relief from the louvre panel.
○ Flex louvre panel outwards to allow access through the
opening in the furnace rear panel.
○ Locate rear portion of strain relief. Squeeze together the
two halves of the strain relief and simultaneously push
strain relief out of the rear panel of the furnace.
○ Repeat the process to work the wire harness/strain relief
out of the louvre panel.
○ Once the strain relief is free of the panel, the power cord wires can slide out of the slot in the louvre
panel leading away from the strain relief mounting hole.
• Set the rear louvre inlet panel aside as it is no longer required.
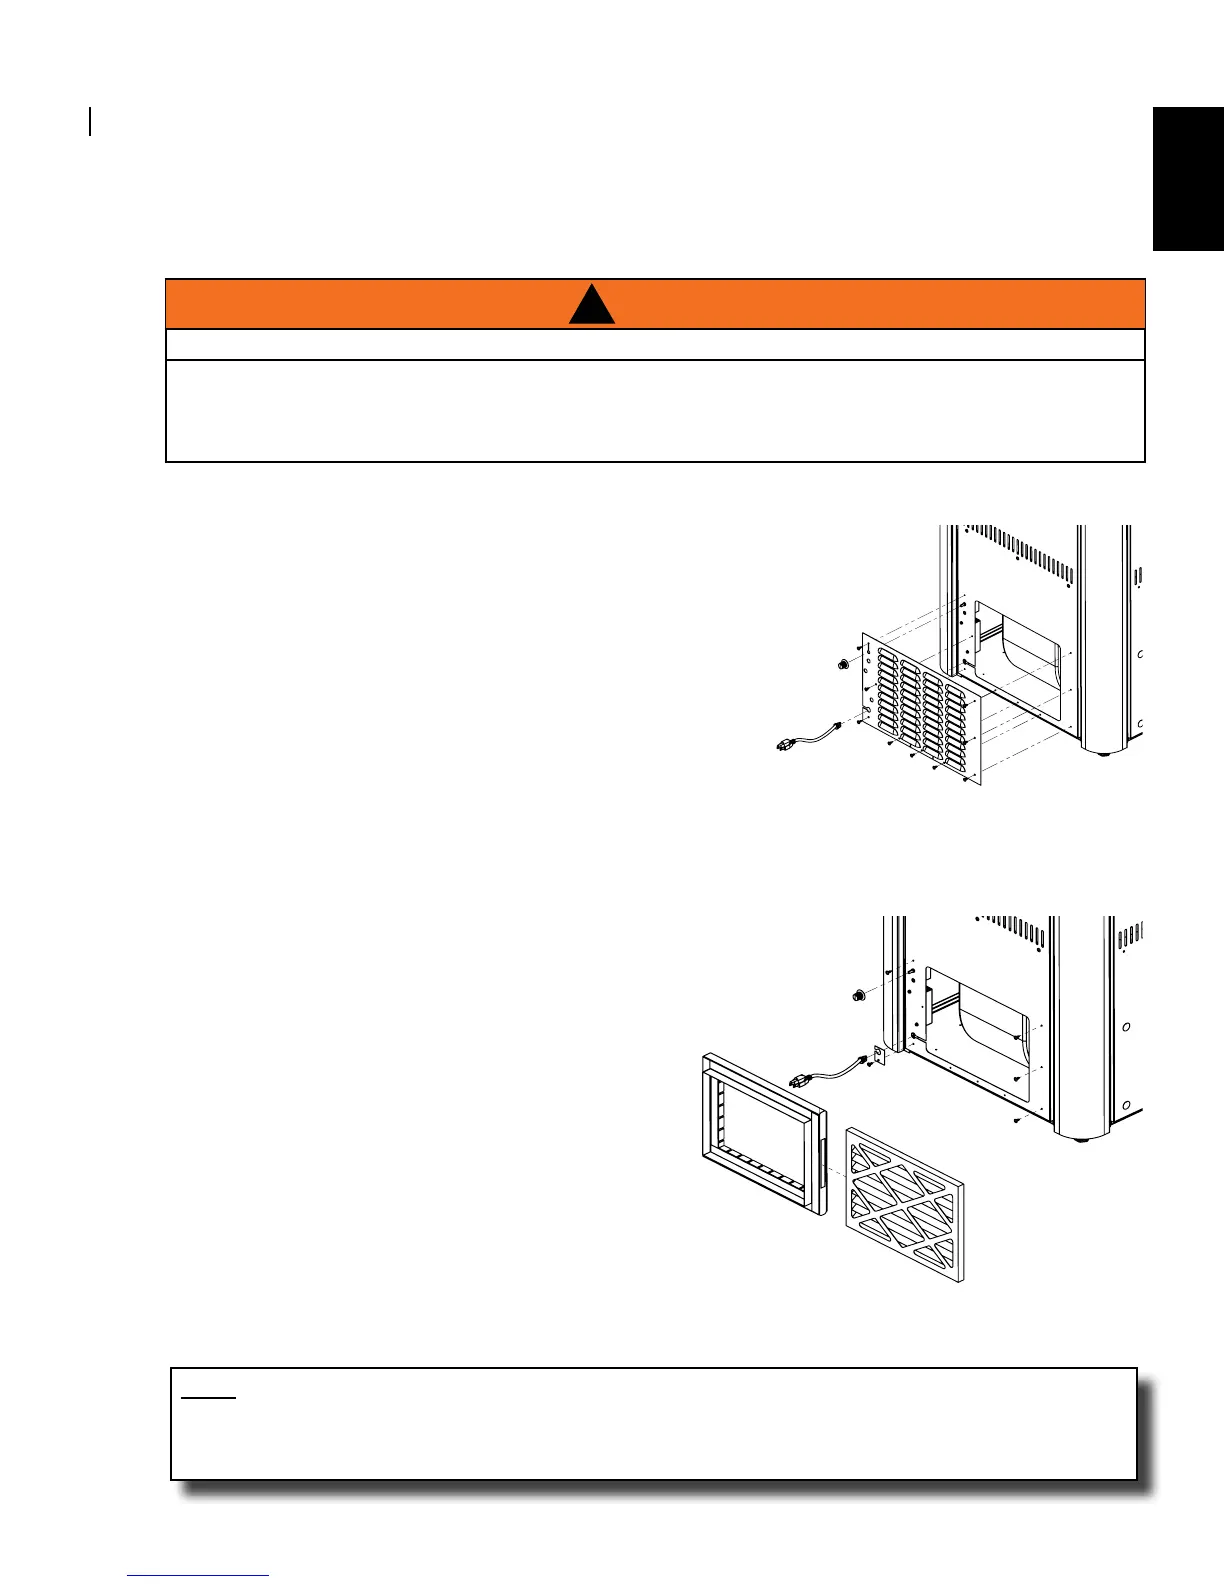
2. Replace the variable speed control knob.
3. Using the new strain relief provided, mount the
power cord/strain relief into strain relief bracket and
the furnace rear panel. Secure the bracket to the
furnace rear panel with a screw.
4. Replace (4) more screws as shown per diagram.
DO NOT replace the (3) screws located along the
lower edge of the lter opening or the (1) centre
screw on the left side of the lter opening in the rear
panel.
5. Insert the lter frame into the lter opening of the
rear panel and bend over the ange tabs of the lter
frame to secure. Ensure the opening for the lter is
facing the left side of the furnace.
6. Slide the lter into the lter frame and secure
the end cap. Ensure the lter is facing the correct direction. Markings on the lter should show airow
direction into the appliance.
6.2.1 INSTALLING OPTIONAL AIR FILTER KIT (TFK-AF)
6.2 AIR FILTER KIT
An optional air lter kit is available for this appliance to use in place of the supplied inlet panel. An air lter kit
offers a high level of air ltration for all the room air that is circulated through the appliance. This is effective at
removing many airborne irritants such as pollens, molds, dander and dust.
The lter kit contains: lter frame, lter, new strain relief, and strain relief bracket.
IN THE UNITED STATES.
NOTE
The air lter should be inspected frequently and cleaned or replaced as necessary; use standard capacity
pleated air lters (12” x 16” x 1”) (305mm x 406mm x 25mm). Replacement air lters are available, contact
your dealer.
W415-1133 / A / 06.12.13
21
EN