Check for any foreign material or water inside the
chamber.
<
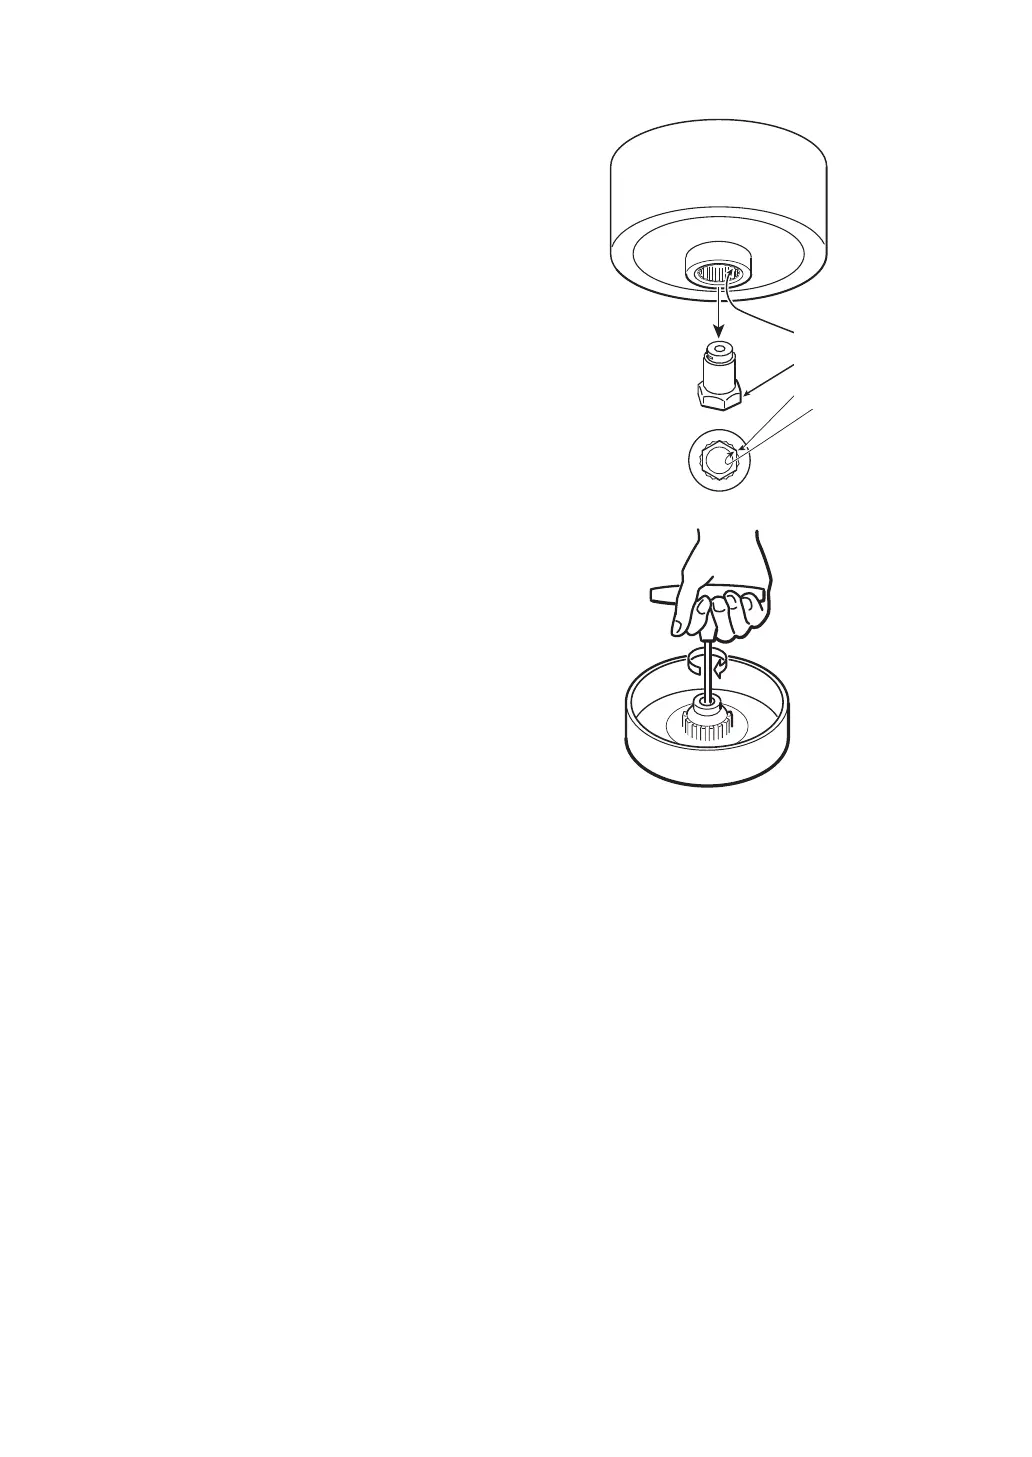
To mount the rotor
>
①
※
If any, remove or drain it away from the chamber
referring to "8-1. Cleaning and Disinfecting the Main
Unit".
Observe the shapes
of the motor shaft
and the bottom of
the rotor.
Place the rotor straight down onto the motor shaft
ensuring that the rotor is seated fully in place by
matching the convex portion on the motor shaft with
the concave portion in the bottom of the rotor as
shown in the illustration on the right.
②
※
When the rotor is properly seated on the motor shaft,
tighten up a rotor xing screw.
Lightly tighten the rotor xing screw on the motor
shaft by turning it clockwise using the hexagon
wrench supplied.
③
Hold the rotor and attempt to move it up and down
to verify that the rotor is properly seated on the
shaft. Tighten the screw an additional 45 degree turn.
If the rotor clatters, rmly tighten the screw until
resistance is met and it quiets down. Then tighten it
an additional 45 degree turn.
④
Using the hexagon wrench supplied, loosen the rotor
xing screw by turning it counterclockwise.
<
To dismount the rotor
>
①
Lift the rotor directly upward in a straight vertical
motion to remove it from the motor shaft.
②