7.Runthemachineatlowidlefor15minutestoallow
anyairtopurgeoutofthesystemandwarmtheuid;
refertoStartingandShuttingOfftheEngine(page24).
Note:Checktheuidlevelwhiletheuidiswarm.
Theuidshouldbebetweencoldandhot.
8.Ifrequired,adduidtothehydraulictank.
Note:Theuidlevelshouldbetothetopofthehot
levelofthebafe,whentheuidishot(Figure91).
9.Installcaponllerneck.
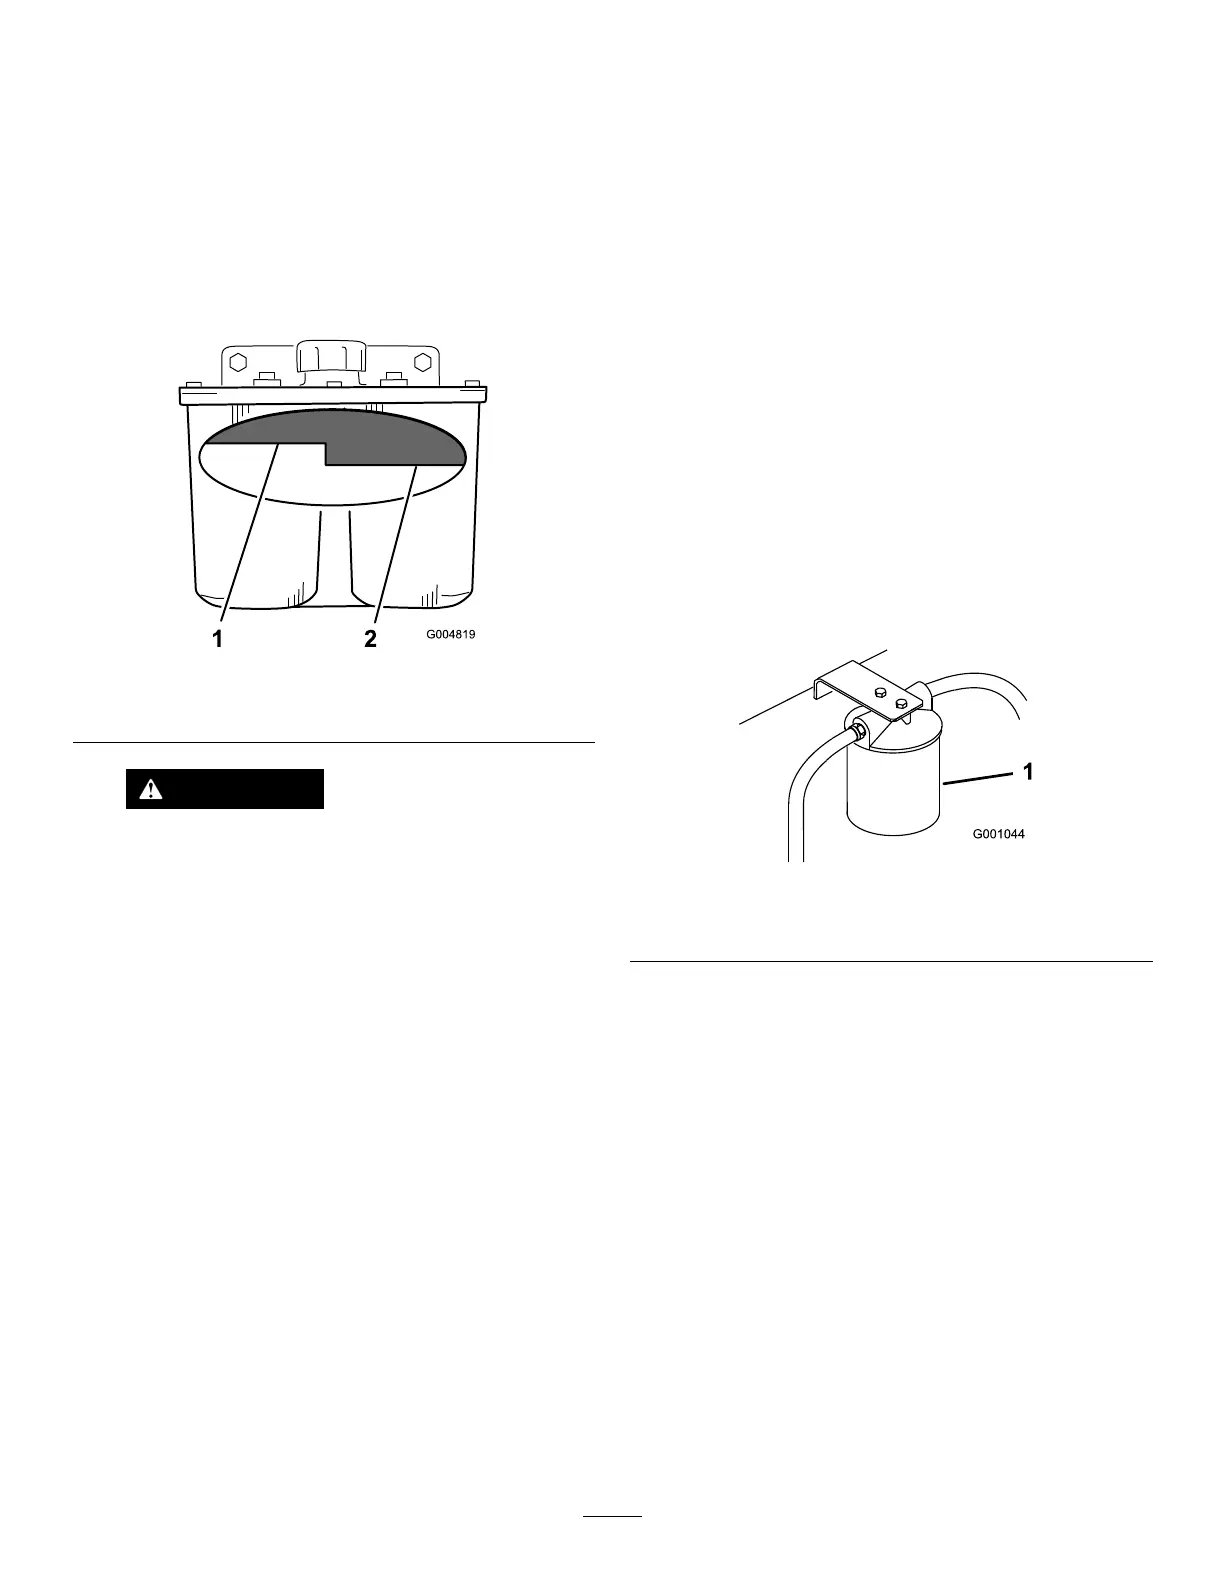
g004819
Figure91
1.Hotuidlevel-full2.Colduidlevel-full
WARNING
Hydraulicuidescapingunderpressurecan
penetrateskinandcauseinjury.
•Ifhydraulicuidisinjectedintotheskinit
mustbesurgicallyremovedwithinafew
hoursbyadoctorfamiliarwiththistype
ofinjury.Gangrenemayresultifthisis
notdone.
•Keepbodyandhandsawayfrompinhole
leaksornozzlesthatejecthigh-pressure
hydraulicuid.
•Usecardboardorpapertondhydraulic
leaks.
•Safelyrelieveallpressureinthehydraulic
systembeforeperforminganyworkonthe
hydraulicsystem.
•Makesurethatallhydraulic-uidhoses
andlinesareingoodconditionandall
hydraulicconnectionsandttingsare
tightbeforeapplyingpressuretohydraulic
system.
ReplacingtheHydraulicFilterandFluid
ServiceInterval:Aftertherst25hours
Every250hours—Changethehydrauliclterand
hydraulicuidwhenusingMobil
®
1uid.
Every500hours—Changethehydrauliclterand
hydraulicuidwhenusingToro
®
HYPR-OIL
™
500
hydraulicuid.
Usesummerlterabove0°C(32°F)
Usewinterlterbelow0°C(32°F)
1.Disengagetheblade-controlswitch(PTO),movethe
motion-controlleverstotheNEUTRAL-LOCKposition,
andengagetheparkingbrake.
2.Shutofftheengine,removethekey,andwaitforall
movingpartstostopbeforeleavingtheoperating
position.
Important:Donotsubstituteautomotiveoillter
orseverehydraulicsystemdamagemayresult.
3.Placedrainpanunderlter,removetheoldlterand
wipethelteradaptergasketsurfaceclean(Figure92).
g001044
Figure92
1.Hydrauliclter
4.Removetherighthydrauliclinethatcomesintothe
adapter(Figure93).
5.Allowtheuidtodrainoutofthesystemintothe
drainpan.
6.Installtherighthydrauliclinetotheadapter(Figure93).
61