Important:Ifyoumusttemporarilyparkthe
machineonaslopeoranincline,positionthe
machineatarightangletotheslope,withthe
frontofthemachinetowardthebottomofthehill.
Ensurethatthemachineisbehindanobjectthat
willnotmove.
2.Supportorlowerallattachmentstotheground.
3.Settheparkingbrake.
4.Ifthemachinehasbeenoperatingunderaheavyload,
decreasetheenginespeedtoidleandallowittorunfor
3to5minutestocooltheengine;refertoSettingthe
EngineSpeed(page33).
5.TurnthekeyswitchtotheOffposition.
6.Removethekeyfromtheignitionswitch.
Note:Fillthefueltankattheendofeachworkday
topreventcondensationinthetank.
OperatingtheTransmission
OperatingtheGear-SelectorSwitchfor
theTransmission
Note:Whenyourststartthemachine,gear1isselected.
Performthefollowingtoshiftthetransmissionfromalower
geartoahighergearortoshiftfromahighergeartoalower
gear:
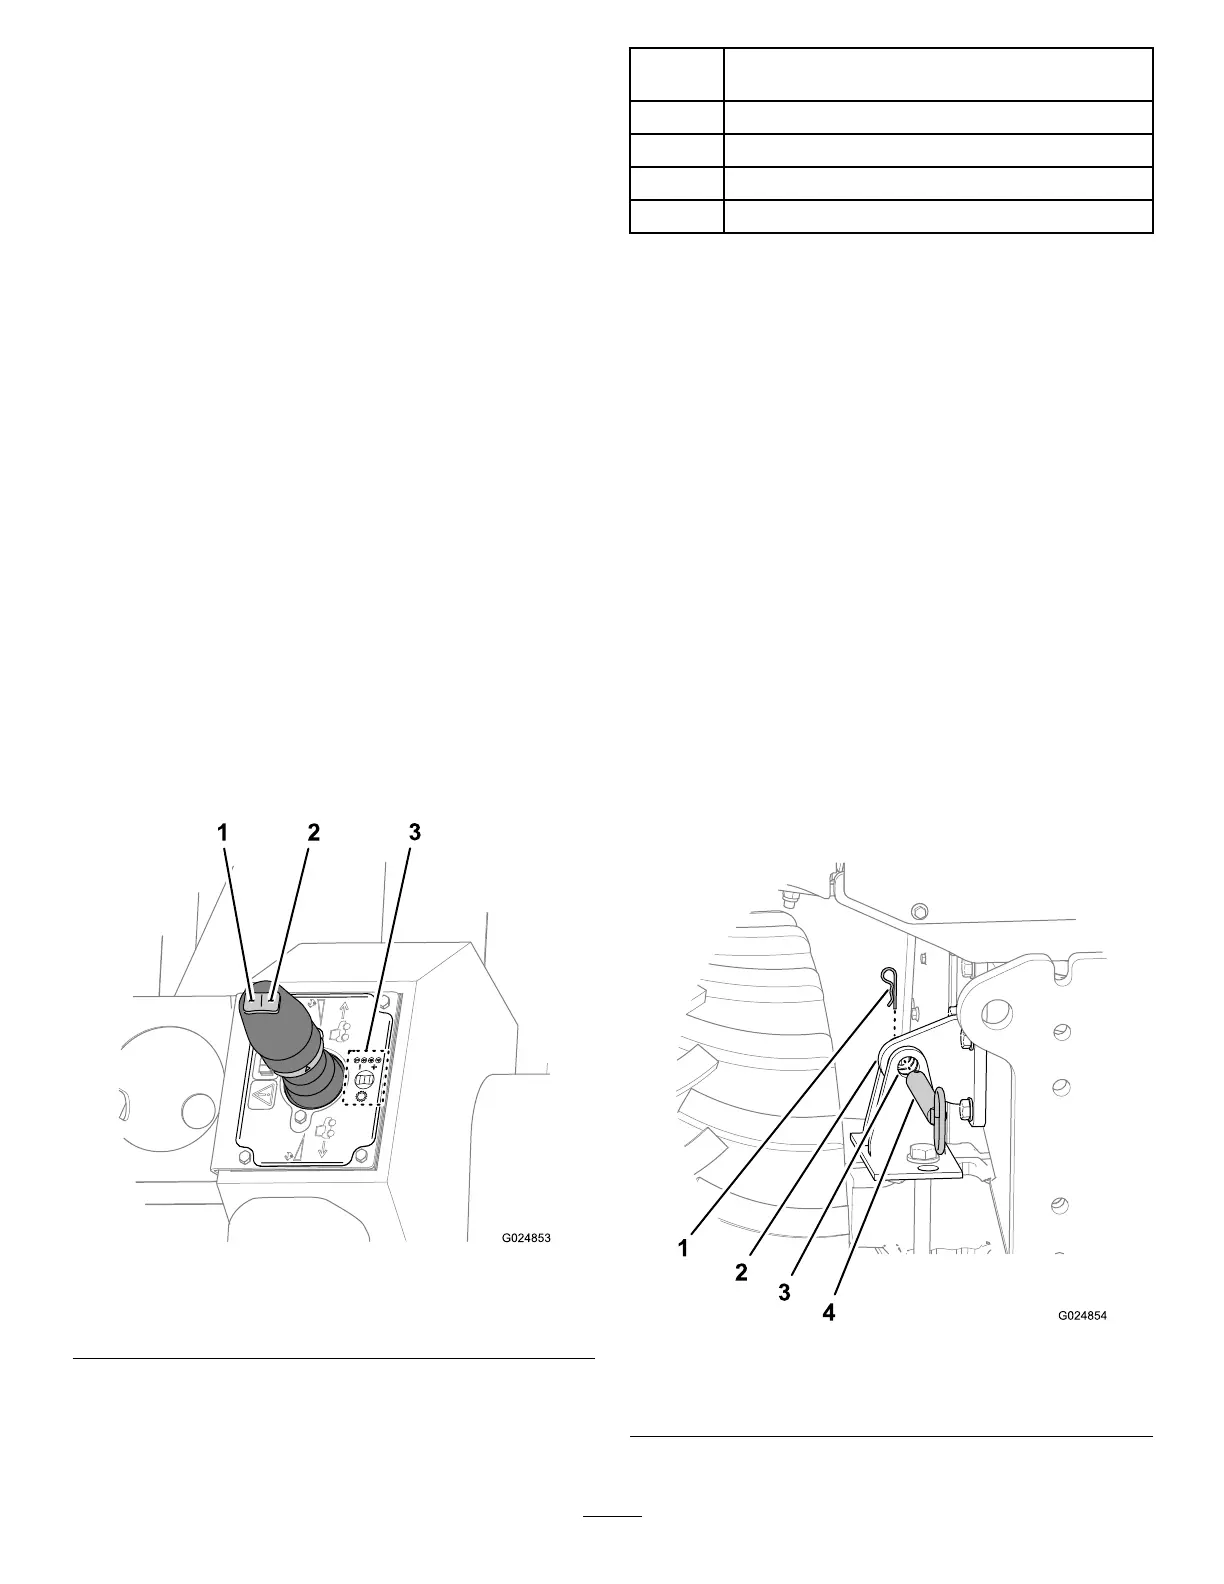
•Toselectahighergear,presstheup-shift(right)button
ontherockerswitch(Figure43).
Figure43
1.Down-shiftbutton3.Icon—gear-shiftpattern
2.Up-shiftbutton
•Toselectalowergear,pressthedown-shift(left)button
ontherockerswitch(Figure43).
•Cyclethegear-selectorswitchupordownuntilthe
desiredgearisdisplayedinthecommandcenter.
Gear
Selection
MachineTask
1Trenching,hardplowing,andboring
2
Lighttrenchingandbacklling
3
Lightbacklling
4Transporting
Note:Youmustsitintheoperatorseatwhenmovingeither
oftheground-drivecontrolsfromtheNeutralposition;
otherwise,themachinewillnotmove.
Shiftingduringoperation—youcanshiftgearswhilethe
machineismoving.Presstheshiftselectorrockerswitchup
ordowntothedesiredgear,1gearatatime.
Note:Donotshiftthetransmissionfrom4thgearwhile
operatingathighspeed.Decreasetheforwardspeedofthe
machinewiththefootpedalbeforeshiftingthetransmission
toalowergear.
OperatingtheMachineTilt
Feature
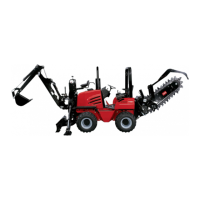
RemovingtheTilt-lockoutPin
1.Removethehairpinthatsecuresthetilt-lockoutpinto
thechassis-lockoutbracket(Figure44).
2.Removethetilt-lockoutpinfromtheholesinthe
chassis-lockoutbracketandtheaxle-lockoutbracket
(Figure44).
Figure44
1.Hairpin3.Axle-lockoutbracket
2.Chassis-lockoutbracket
4.Tilt-lockoutpin
37