6.Connectthenegative(-)jumpercabletoaground
point,suchasthenutatthepivotpointforthe
alternator(Figure78).
7.Starttheengine;refertosteps1through4inStarting
theEngine(page33).
Note:Iftheenginestartsandthenstops,donot
operatethestartermotoruntilthestartermotorstops
turning.Donotoperatethestartermotorformore
than30secondsatonetime.Wait30secondsbefore
operatingthestartermotortocoolthemotorandto
buildupthechargeinthebattery.
8.Whentheenginestarts,havetheotherperson
disconnectthenegative(-)jumpercablefromtheframe
andthendisconnectthepositive(+)jumpercable.
ChargingtheBattery
WARNING
Chargingthebatteryproducesgassesthatcan
explode.
Neversmokenearthebattery,andkeepsparksand
amesawayfromthebattery.
Important:Alwayskeepthebatteryfullycharged.This
isespeciallyimportanttopreventbatterydamagewhen
thetemperatureisbelow32°F(0°C).
1.Cleantheexteriorofthebatterycaseandthebattery
posts.
Note:Connecttheleadsofthebatterychargerto
batterypostsbeforeconnectingthechargertothe
electricalsource.
2.Connectthepositiveleadofthebatterychargertothe
positive-batterypost(Figure80).
Figure79
1.Positive-batterypost
3.Red(+)chargerlead
2.Negative-batterypost
4.Black(-)chargerlead
3.Connectthenegativeleadofthebatterychargertothe
negative-batterypost(Figure79).
4.Connectthebatterychargertotheelectricalsource.
Important:Donotoverchargethebattery.
Note:Chargethebatteryasshowninthefollowing
table:
BatteryChargingSettingsandTimes
ChargerSettingChargingTime
4to6amperes30minutes
25to30amperes10to15minutes
5.Whenthebatteryisfullycharged,unplugthecharger
fromtheelectricalsource,thendisconnectthecharger
leadsfromthebatteryposts(Figure79).
ReplacingaFuse
1.Removetheleftandrightsidepanel;refertoRemoving
theSidePanels(page45).
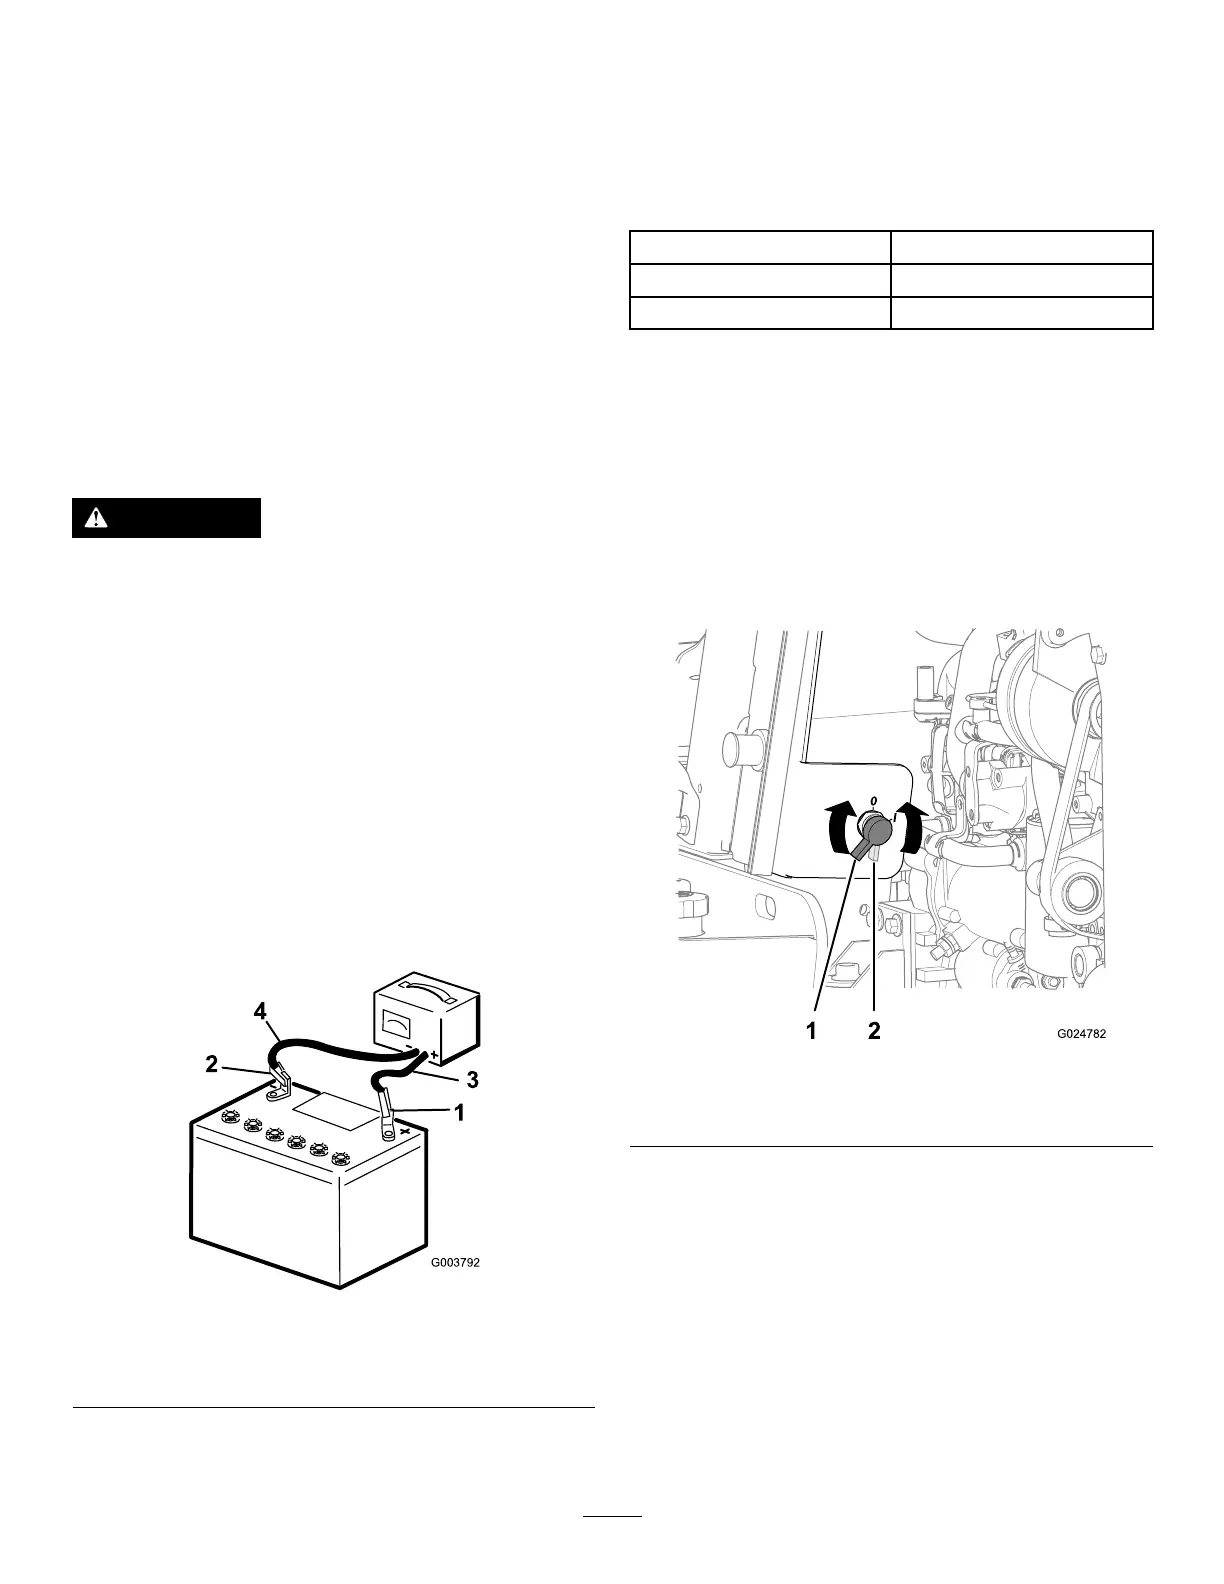
2.Rotatethebattery-disconnectswitchcounterclockwise
totheOffposition(Figure80).
Figure80
1.Battery-disconnectswitch
intheOnposition
2.Battery-disconnectswitch
intheOffposition
3.Removethe4hex-angedbolts(5/16x3/4inch)that
securethecovertotheconsoleandremovethecover
(Figure81).
55