3. DISASSEMBLY AND REASSEMBLY
SPAA-214-R1
3.2 DISASSEMBLING THE MAIN BODY
3-10
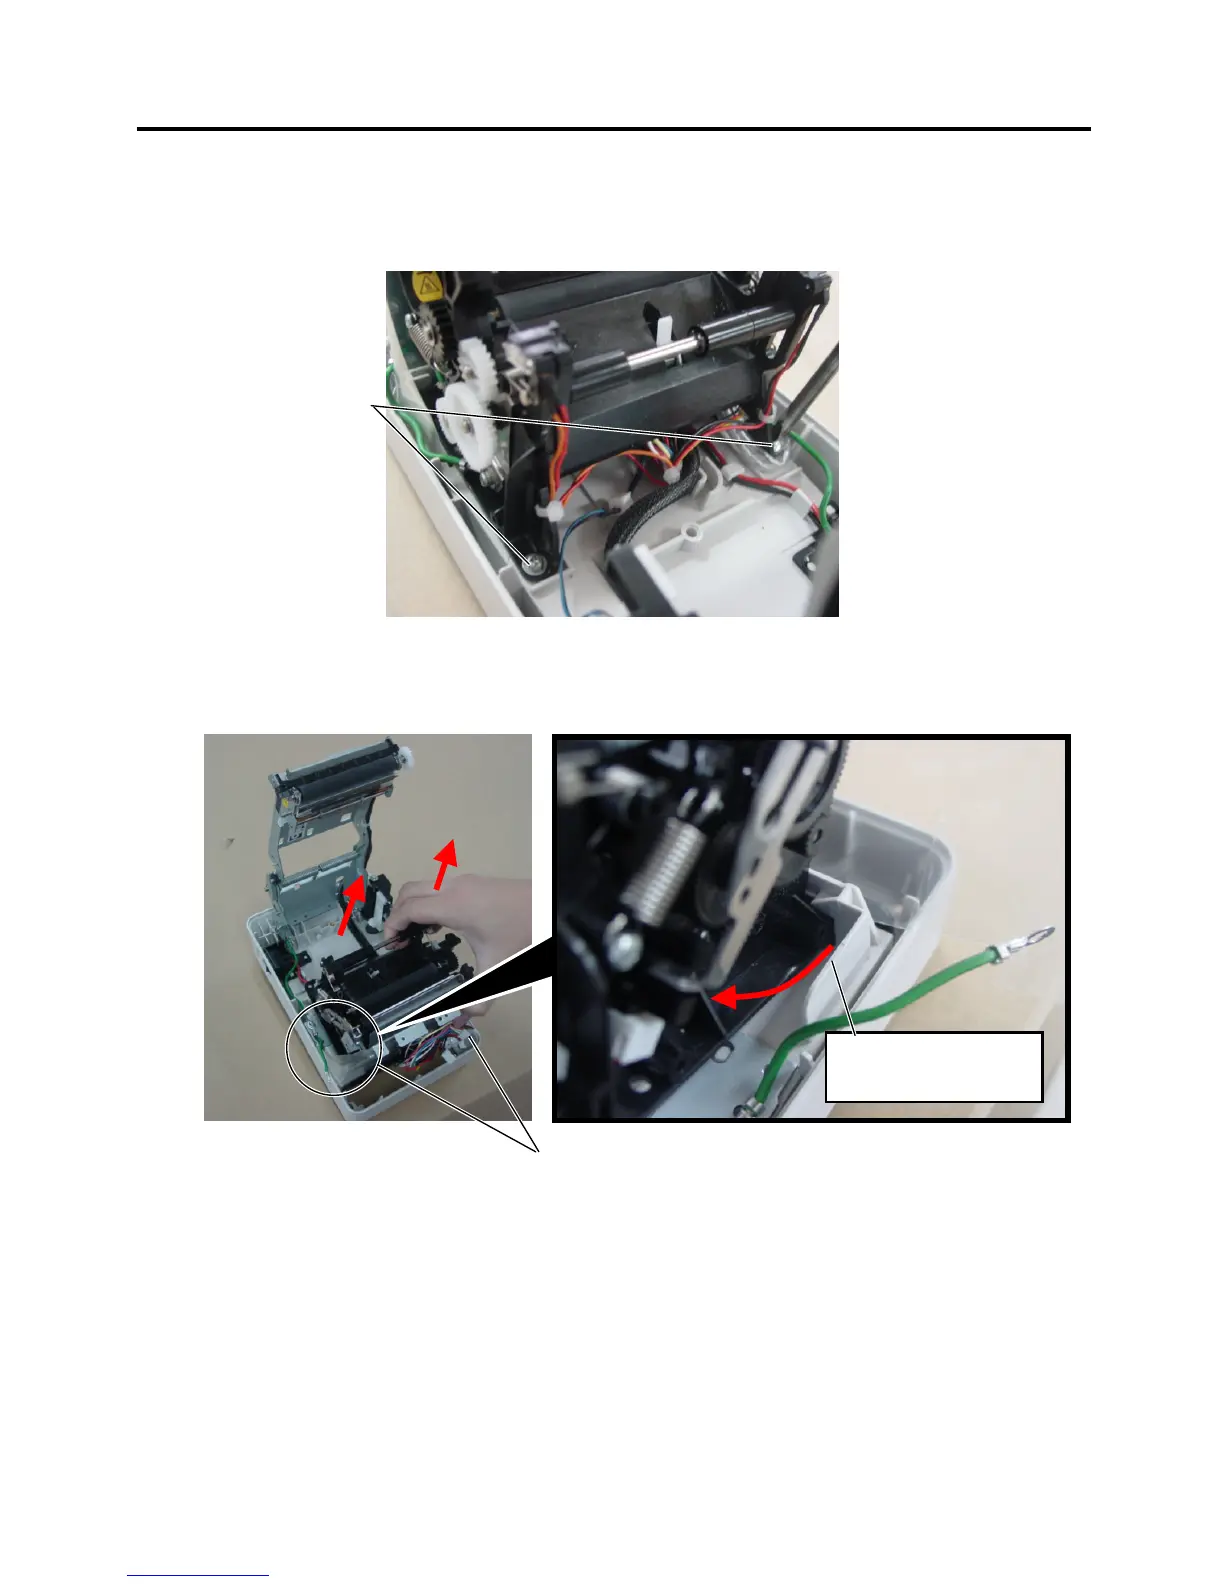
2. Remove both M3x8 double-sems screws connecting the Print Block to the Cover Bottom.
NOTE: When removing the screw, be careful not to touch the print head elements with the
screwdriver.
3. Tilt the Print Block approximately 20 degrees forward to release it from the catch connecting
it to the Cover Bottom. You may then slide the Print Block from the Cover Bottom.
M3x8 double
sems screws
Catch
Sliding motion to
release the Print Block
from the Cover Bottom
 Loading...