Installation
RT-SVX21AC-EN 29
Verify that appropriate materials were used in the
construction of roof and ductwork. Combustible materials
should not be used in the construction of ductwork or roof
curb that is in close proximity to heater elements or any
hot surface. Any combustible material on the inside of the
unit base should be removed and replaced with
appropriate material.
Step-by-step curb assembly and
installation instructions
ship with each accessory roof curb kit. Follow the
instructions carefully to assure proper fit-up when the unit
is set into place.
Note: T
o assure proper condensate flow during
oper
ation, as well as proper operation of the
condensate overflow switch (if equipped), the unit
and curb must be level.
If the unit is elevated, a field constructed catwalk around
the u
nit is stro
ngly recommended to provide easy access
for unit maintenance and service.
Recommendations for installing the Supply Air and Return
Air d
uctwork jo
ining the roof curb are included in the curb
instruction booklet. Curb ductwork must be fabricated and
installed by the installing contractor before the unit is set
into place.
Note: Fo
r sound consideration, cut only the holes in the
roof de
ck for the ductwork penetrations. Do not cut
out the entire roof deck within the curb perimeter.
If a Curb Accessory Kit is not used:
• The ductwork can be attached directly to the factory-
provided flanges around the unit’s supply and return
air openings. Be sure to use flexible duct connections
at the unit.
• For “built-up” curbs supplied by others, gaskets must
be
instal
led around the curb perimeter flange and the
supply and return air opening flanges.
Rigging
A rigging illustration and center-of-gravity dimensional
data table is shown in the weights section. Refer to the
typical unit operating weights table before proceeding.
1. Remove all drill screws fastening wood protection to
metal base
rail. Remove all screws
securing wooden
protection to wooden top crate.
2. Remove Wooden Top Crate.
WARNING
Combustible Materials!
Failure to maintain proper clearance between the unit
heat exchanger, vent surfaces and combustible
materials could cause a fire which could result in death
or serious injury or property damage. Refer to unit
nameplate and installation instructions for proper
clearances.
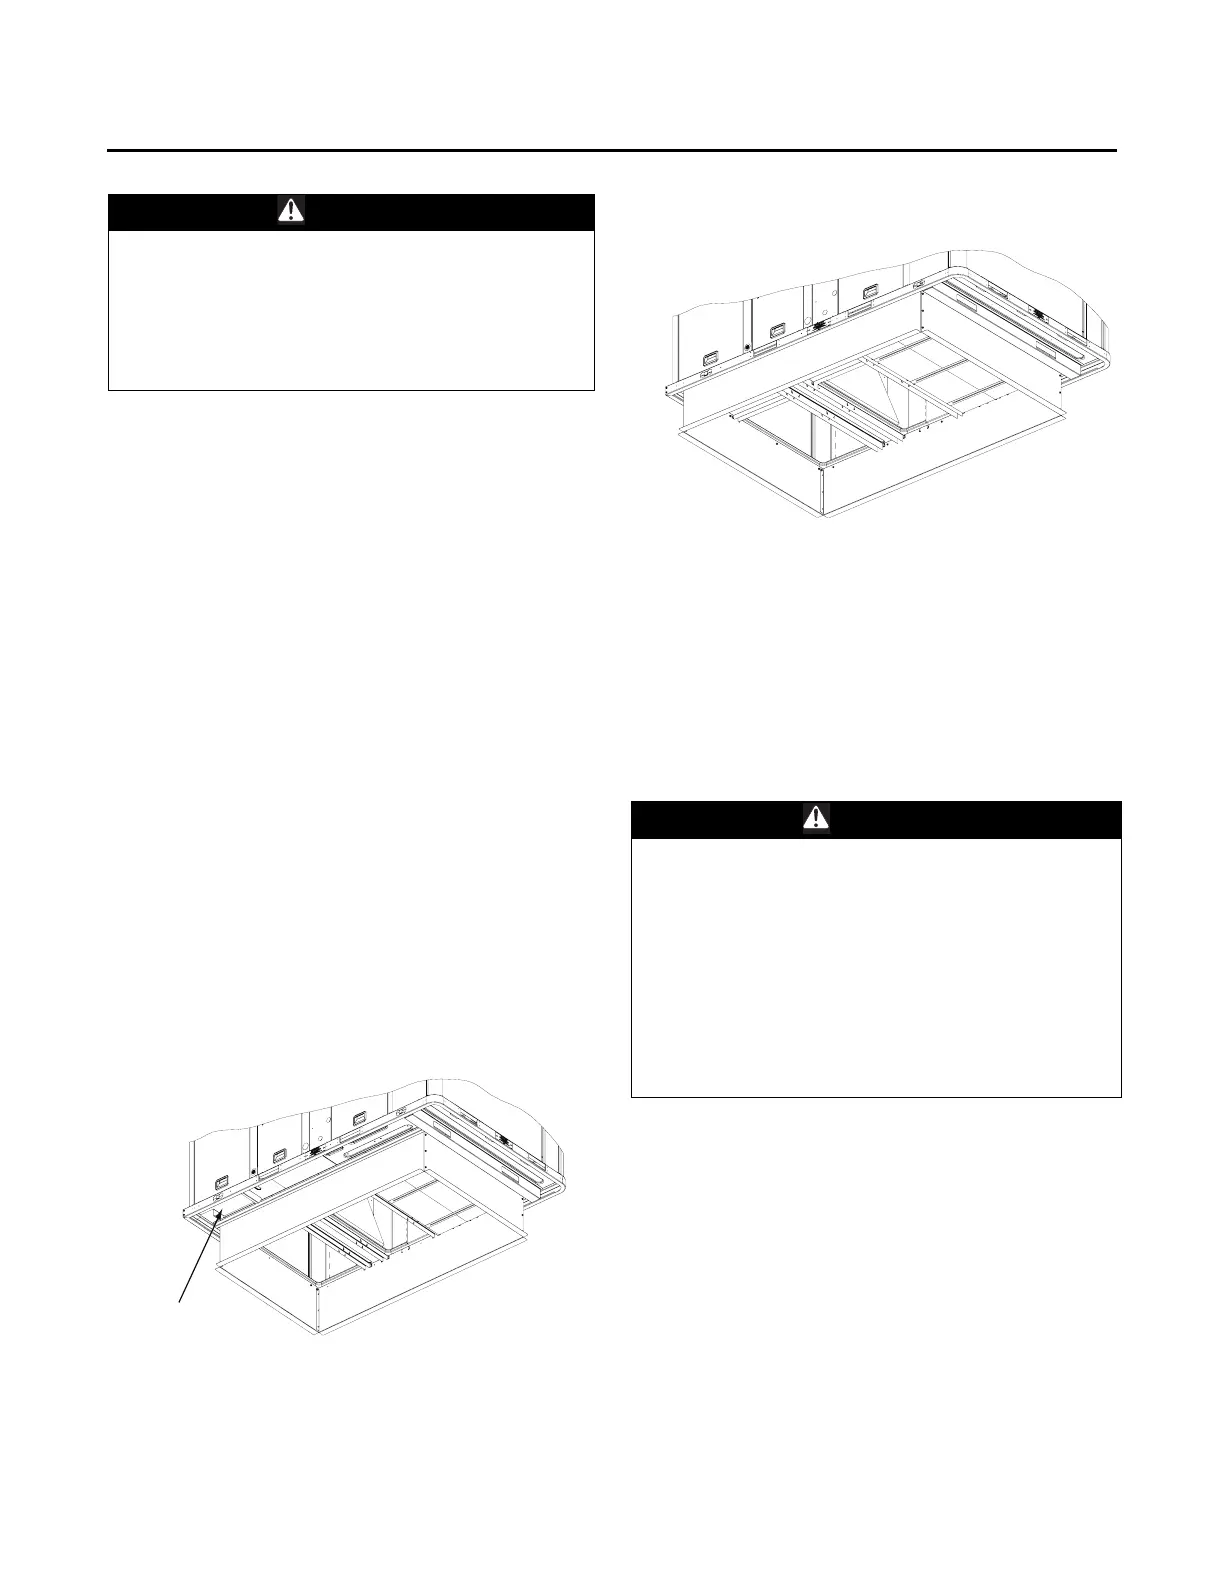
Figure 38. View for base to roof cur
b alignment
YHC120F on
50" x 84" roof curb
Figure 39. View for base to roof curb alignment
YHC120F on 60" x 84" roof curb
WARNING
Heavy Objects!
Failure to follow instructions below or properly lift unit
could result in unit dropping and possibly crushing
operator/technician which could result in death or
serious injury, and equipment or property-only damage.
Ensure that all the lifting equipment used is properly
rated for the weight of the unit being lifted. Each of the
cables (chains or slings), hooks, and shackles used to lift
the unit must be capable of supporting the entire
weight of the unit. Lifting cables (chains or slings) may
not be of the same length. Adjust as necessary for even
unit lift.