Page 44 of 63 Pages
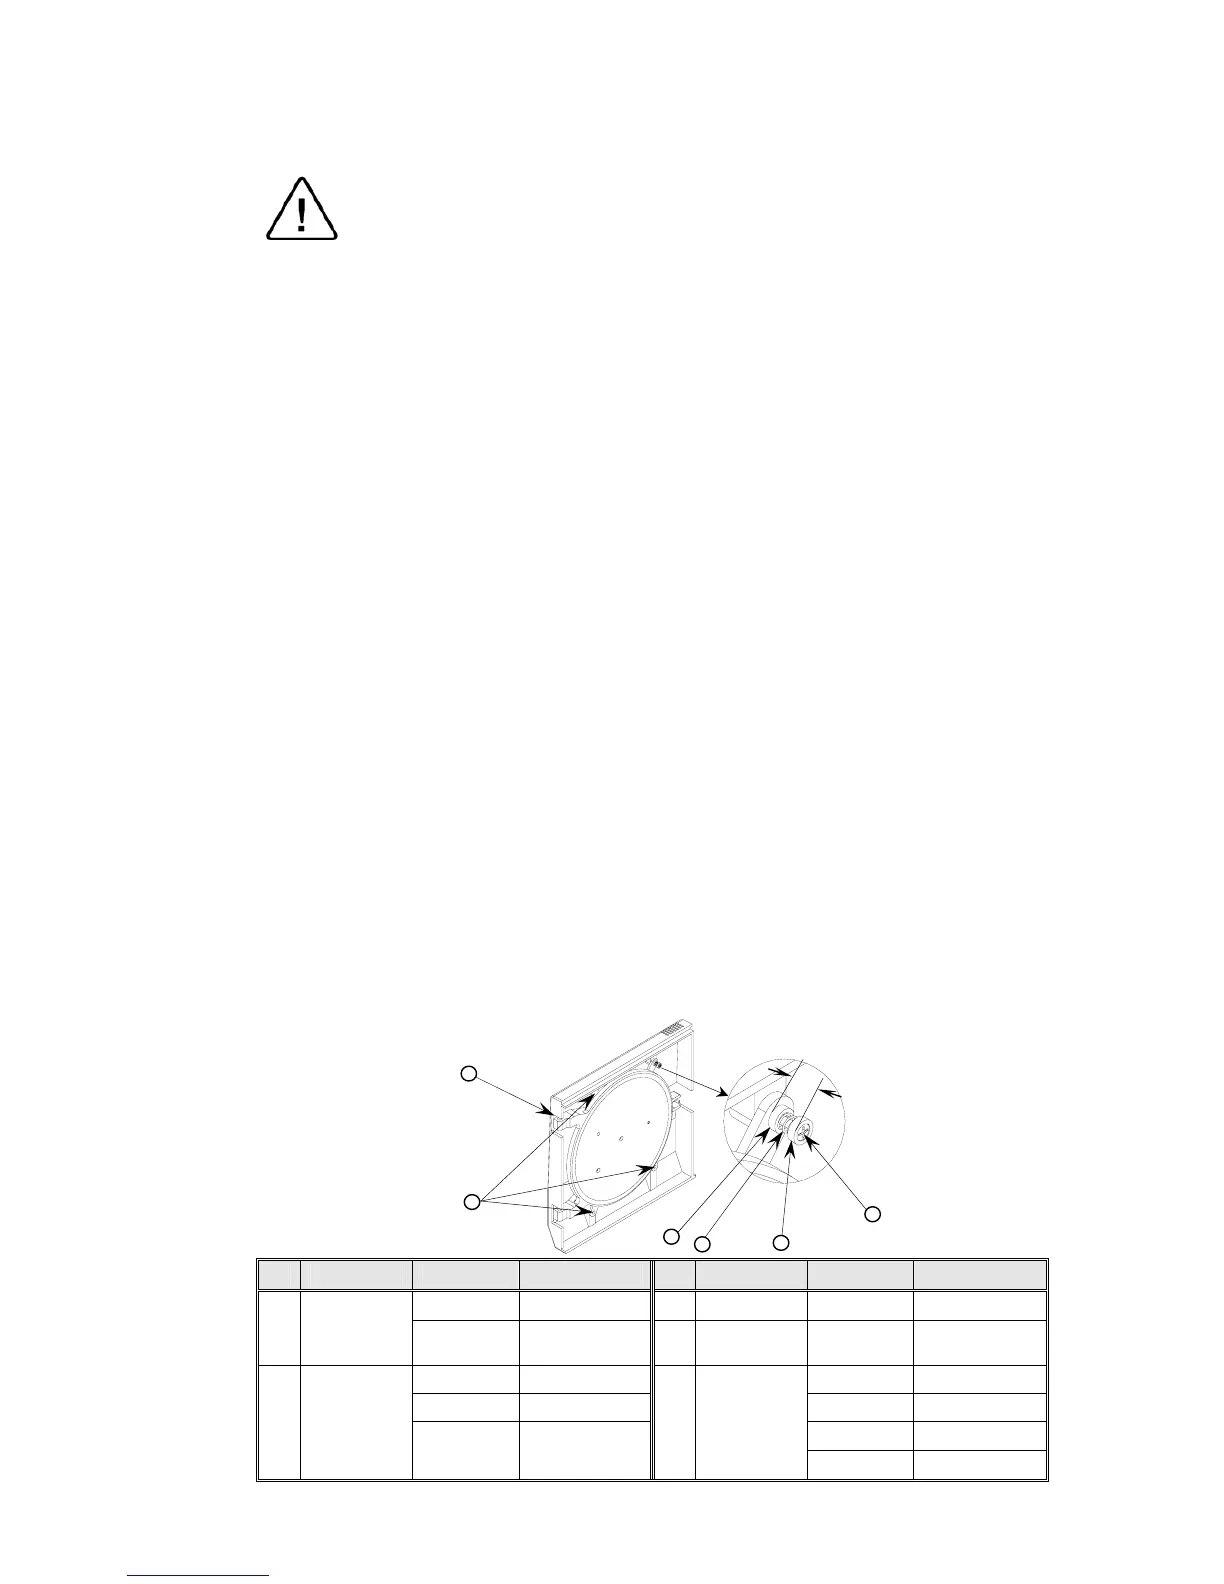
11.15 Replacement of the Door Cover
Caution:
Before starting, be sure that the electric cord is disconnected from the
power source and that there is no pressure in the autoclave chamber.
1. Unscrew the four screws attaching the door cover and remove the
door cover. Since the screw pressing the door microswitch
includes two washers and a spring, be aware not to lose them.
2. Reassemble the new cover.
3. Insert screw (1) until dimension A is approximately 15 mm.
3.1 Please note that on model 3140 two washers (2) are placed
between the spring (4) and the door.
4. Perform final adjustment of the screw as follows:
4.1 While the autoclave is disconnected from electricity turn on
the circuit breaker.
4.2 Connect the electrical plug to a multi-meter.
4.3 Press the microswitch and verify that the microswitch
functions as required.
4.4 Close the door and verify that the microswitch operates.
4.5 If the microswitch does not operate unscrew the screw one
turn counter-clockwise and check per para. 4.4. Repeat until
microswitch operates.
4.6 Connect the autoclave to electricity.
4.7 Close the door until the microswitch indicates that the door is
closed. Operate the autoclave and verify that there is no steam
or pressure leak.
4.8 If there is steam leak, stop the autoclave’s operation, reduce
steam pressure, open the door and turn the screw one turn
clockwise and check per para. 4.7. Repeat until leakage
ceases.
No. Description Model Cat. No. No. Description Model Cat. No.
2340, 2540 BOL191-0032
3 Washer
All models ELE036-0009
1 Screw
1730, 3545,
3850, 3870
BOL191-0091
4 Spring
All models SPR177-0012
2340, 2540 BOL191-0033 1730 POL065-0001
3545 BOL191-0115 2340, 2540 POL066-0002
3545 COV314-0001
2 Screw
1730, 3850,
3870
BOL191-0140
5
Door
cover
3850, 3870 POL065-0004
4
1
3
3