- 46 -
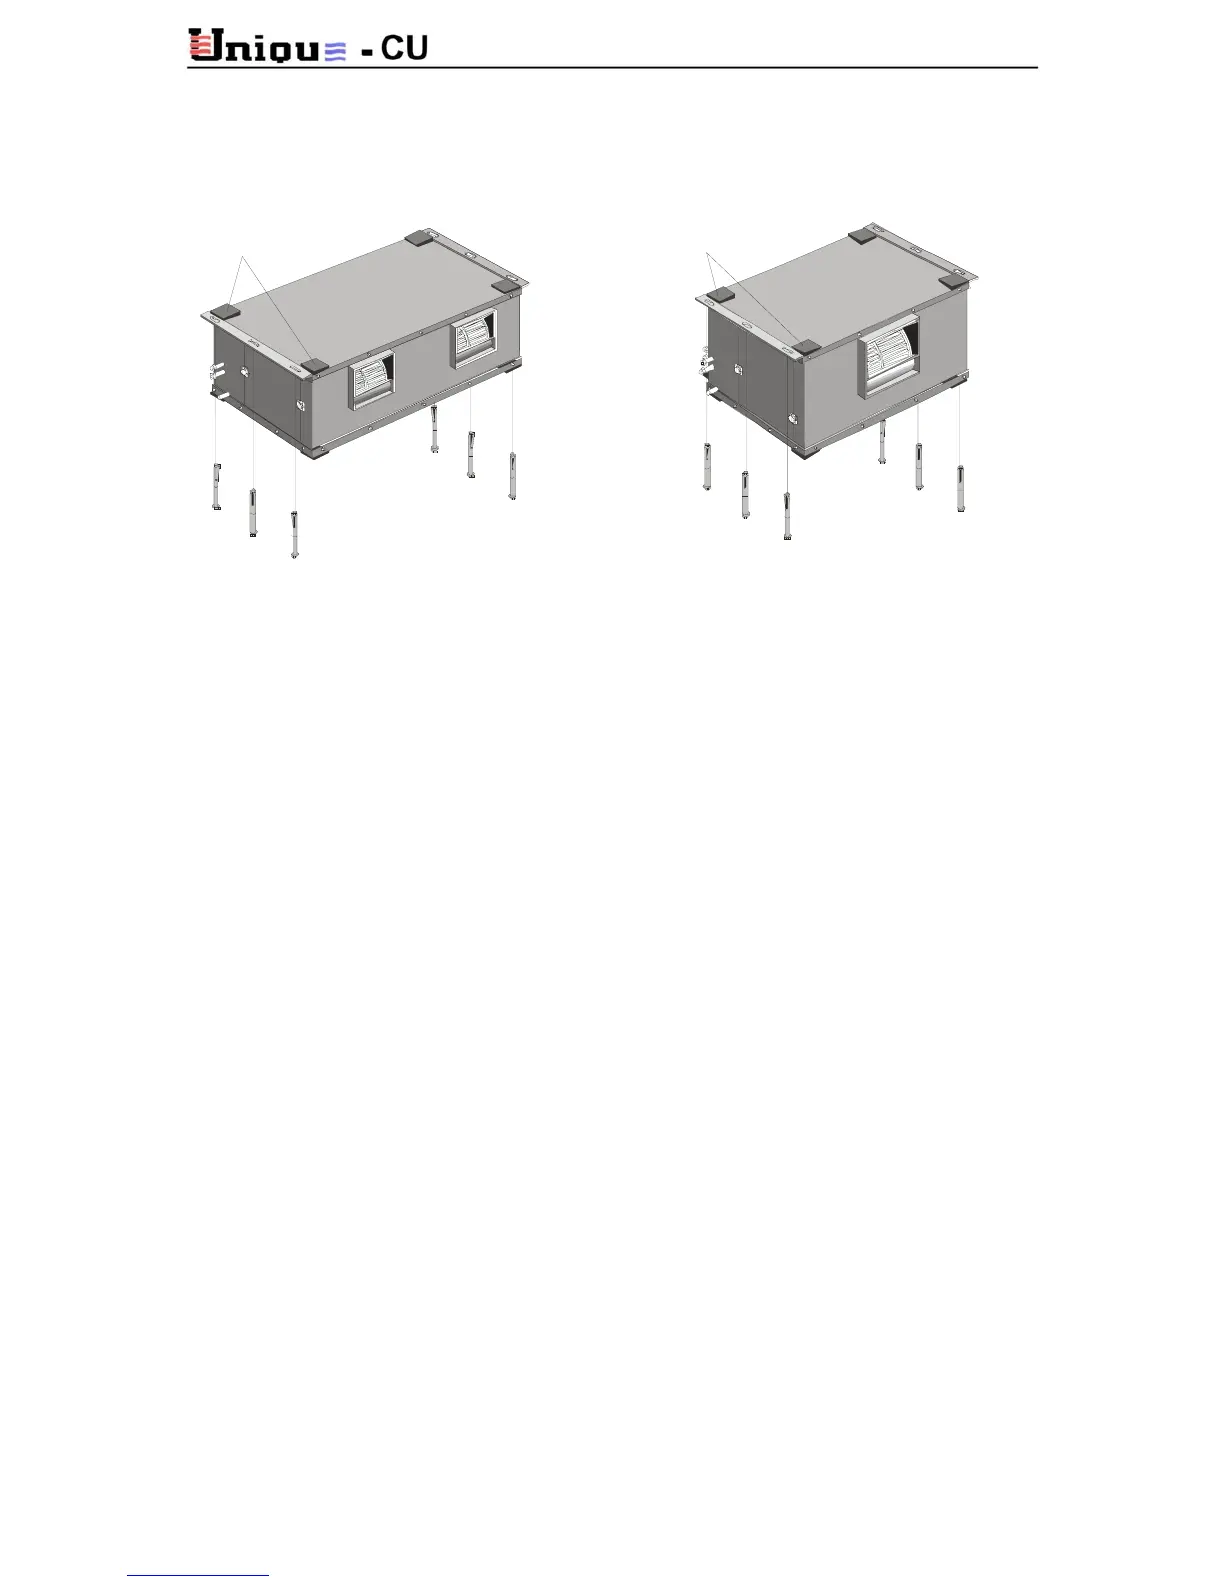
AB SOR BTION
AB SOR BTION
LONG CEILING
LONG C EILING
ANC HOR S
ANC HOR S
CUSHION
CUSHION
7.6 Installing the Indoor Unit
Fig. 7-5
• Overall and duct connecting dimensions are shown in the technical data tables.
• Allow free access to the service door, air filter and control box.
• Carefully plan the drainage tube path at a minimum slope of 2% avoiding sharp bends
or oil traps.
• The indoor unit may be installed either hanging from the ceiling or resting on hard
surface (i.e. concrete).
• Whenever possible, lead the indoor unit drainage tube to the outdoor unit.
7.6.1 Installing the Indoor Unit on Hard Surface
• Stick four rubber absorbtion cushions on the four corners of the base, as shown in
Fig.7-5.
• Select the installation location according to the above mentioned factors and
guidelines.
7.6.2 Installing the Indoor Unit Directly On the Ceiling
• Select the installation location according to the above mentioned factors and
guidelines.
• Mark 4-6 holes on the ceiling, according to the unit's mounting bracket holes.
• If the ceiling is made of concrete, drill holes for the long ceiling anchors.
• Stick four rubber absorbtion cushions on the four corners of the base, as shown in
Fig.7-5.
• Attach the unit to the ceiling using the long anchor screws, as shown in Figure 7-5.