EasyManuals Logo

UNIVERSAL TECH MyXerver MX3600 User Manual

UNIVERSAL TECH MyXerver MX3600
66 pages
To Next Page IconTo Next Page
To Previous Page IconTo Previous Page
Page #12 background imageLoading...
Page #12 background image
12
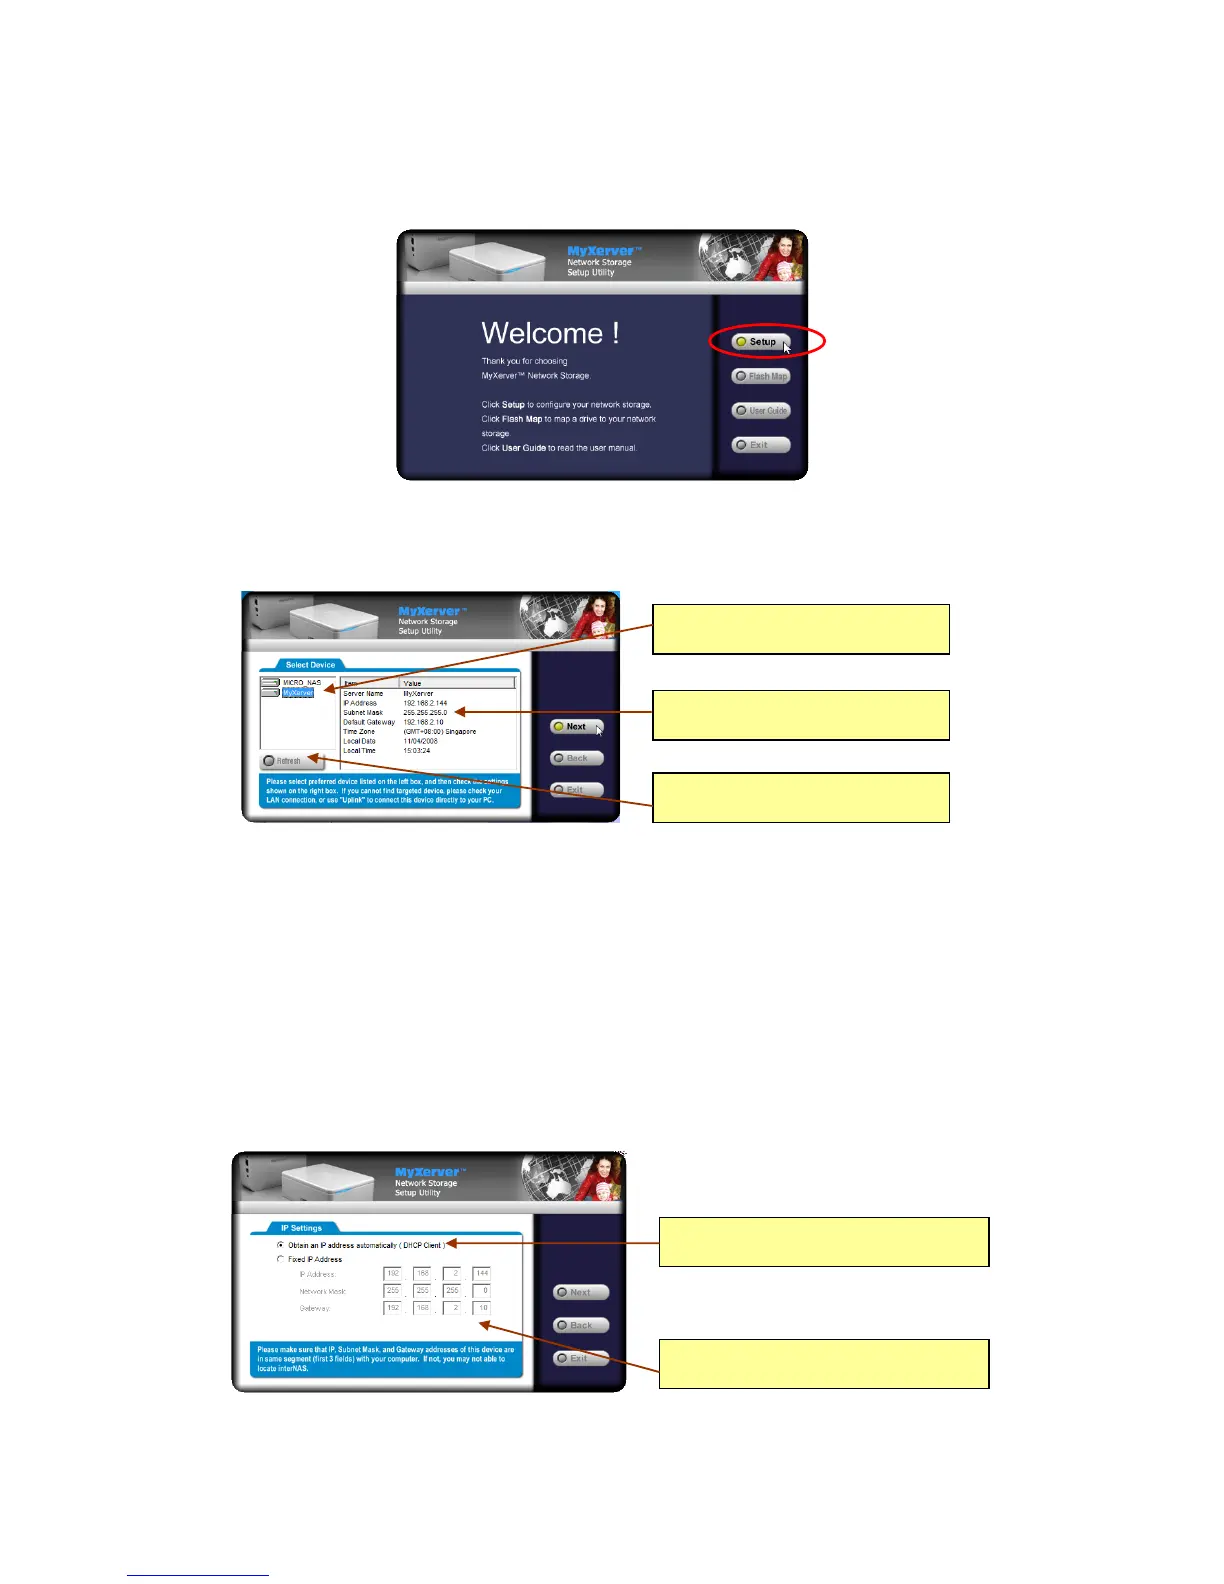
3. Click Setup to start the Setup Utility. The Utility will begin scanning your network for installed NAS drives,
and a screen like the following will be displayed. The default Server Name of MX3600 is “MyXerver”.
A list of MX3600 network storage on your network will show on the left side. The right side displays
details of the currently selected NAS.
If the desired MX3600 network storage is not listed, check the following:
The MX3600 has finished the start up and boot process.
Your PC and the MX3600 are on the same LAN segment (there is no Router
between your PC and the MX3600).
Otherwise, select the desired NAS (default name of MyXerver), and click the "Next" button.
4. The following screen will then be displayed. Select your desired IP configuration.
Detected server list. Select preferred one
to setup.
Current settings of selected server. Please
make a note.
Press “Refresh” to re-scan whole network
for available NAS/USB.
Select this if your LAN has a DHCP Server,
otherwise select “Fixed IP Address
Suggested values are compatible with your LAN.
Suggested IP address is currently used.

Table of Contents

Questions and Answers:

Question and Answer IconNeed help?

Do you have a question about the UNIVERSAL TECH MyXerver MX3600 and is the answer not in the manual?

UNIVERSAL TECH MyXerver MX3600 Specifications

General IconGeneral
BrandUNIVERSAL TECH
ModelMyXerver MX3600
CategoryStorage
LanguageEnglish

Related product manuals