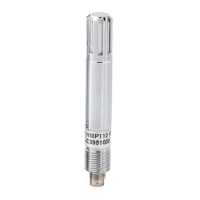
6.4.2 Adjusting measurement with Insight software
• Computer with Windows operating system and Vaisala Insight software
installed
• Vaisala USB cable 242659 for connecting the probe
• Reference environment(s) for producing the desired humidity and/or
temperature
This procedure can be used to adjust the probe's humidity or temperature measurement. If you
want to adjust both, repeat the procedure.
Because stabilization of temperature and humidity takes time, you should expect the
adjustment procedure to take at least 30 minutes for each adjustment point.
1. Connect the probe to Insight. See Connecting to Insight software (page 28).
2. If you intend to adjust humidity measurement, first select > Purge to perform a
chemical purge to condition the sensor. Wait a few minutes for purge to complete.
3. Select > Calibrate > Yes to switch the probe to calibration mode.
In calibration mode, the device will not use functions that may interfere with calibration
and adjustment.
4. Select the type of adjustment to perform: RH adjustment or T adjustment.
5. Define the needed adjustment for the first measurement point:
a. Insert the probe head in the reference environment for the first calibration point.
b. Wait for the measurement to stabilize fully.
c. Click the Reference value, point 1 text box and enter the reference value of the
calibration point. Press ENTER or click outside the text box when done.
d. The probe automatically enters the measured values for the calibration point.
6. If you want to adjust in more than one point, repeat step 5 for all desired calibration
points.
You can adjust humidity measurement in up to five points when Insight is set
to Advanced mode.
7. Select Activate adjustment > Yes to store the adjustment in the probe.
8. Check the message that appears at the top of the screen. If the message indicates that
the adjustment is activated successfully, your adjustment is stored in the probe.
9. Select the Calibration information tab and update the Calibration date and Calibration
text.
10. Select Close > Yes to exit the calibration mode.
Chapter 6 – Maintenance
41
陕西威瑞仪器仪表有限公司 生产代理销售:实验检测设备 气象科学仪器设备
Tel:029-88186182 Web:www.xavery.cn Email:sxvery@163.com