22
Using 1430CIK—Clean Install Kit
Part of the 1430CIK Clean Install Kit installs at the time
of framing the appliance.
The frame fi xing brackets provided loose with the
appliance are not needed with this kit. See next page.
The positioning brackets, convection gap fi ller brackets
and trim support brackets installed on the appliance
are not needed with this kit and must be removed. See
next page.
The 1430CIK Clean Install Kit is not compatible with any
other trim or door kits.
Hearth considerations
You need to know whether there will be a hearth or
not in front of the appliance and some rules must be
considered.
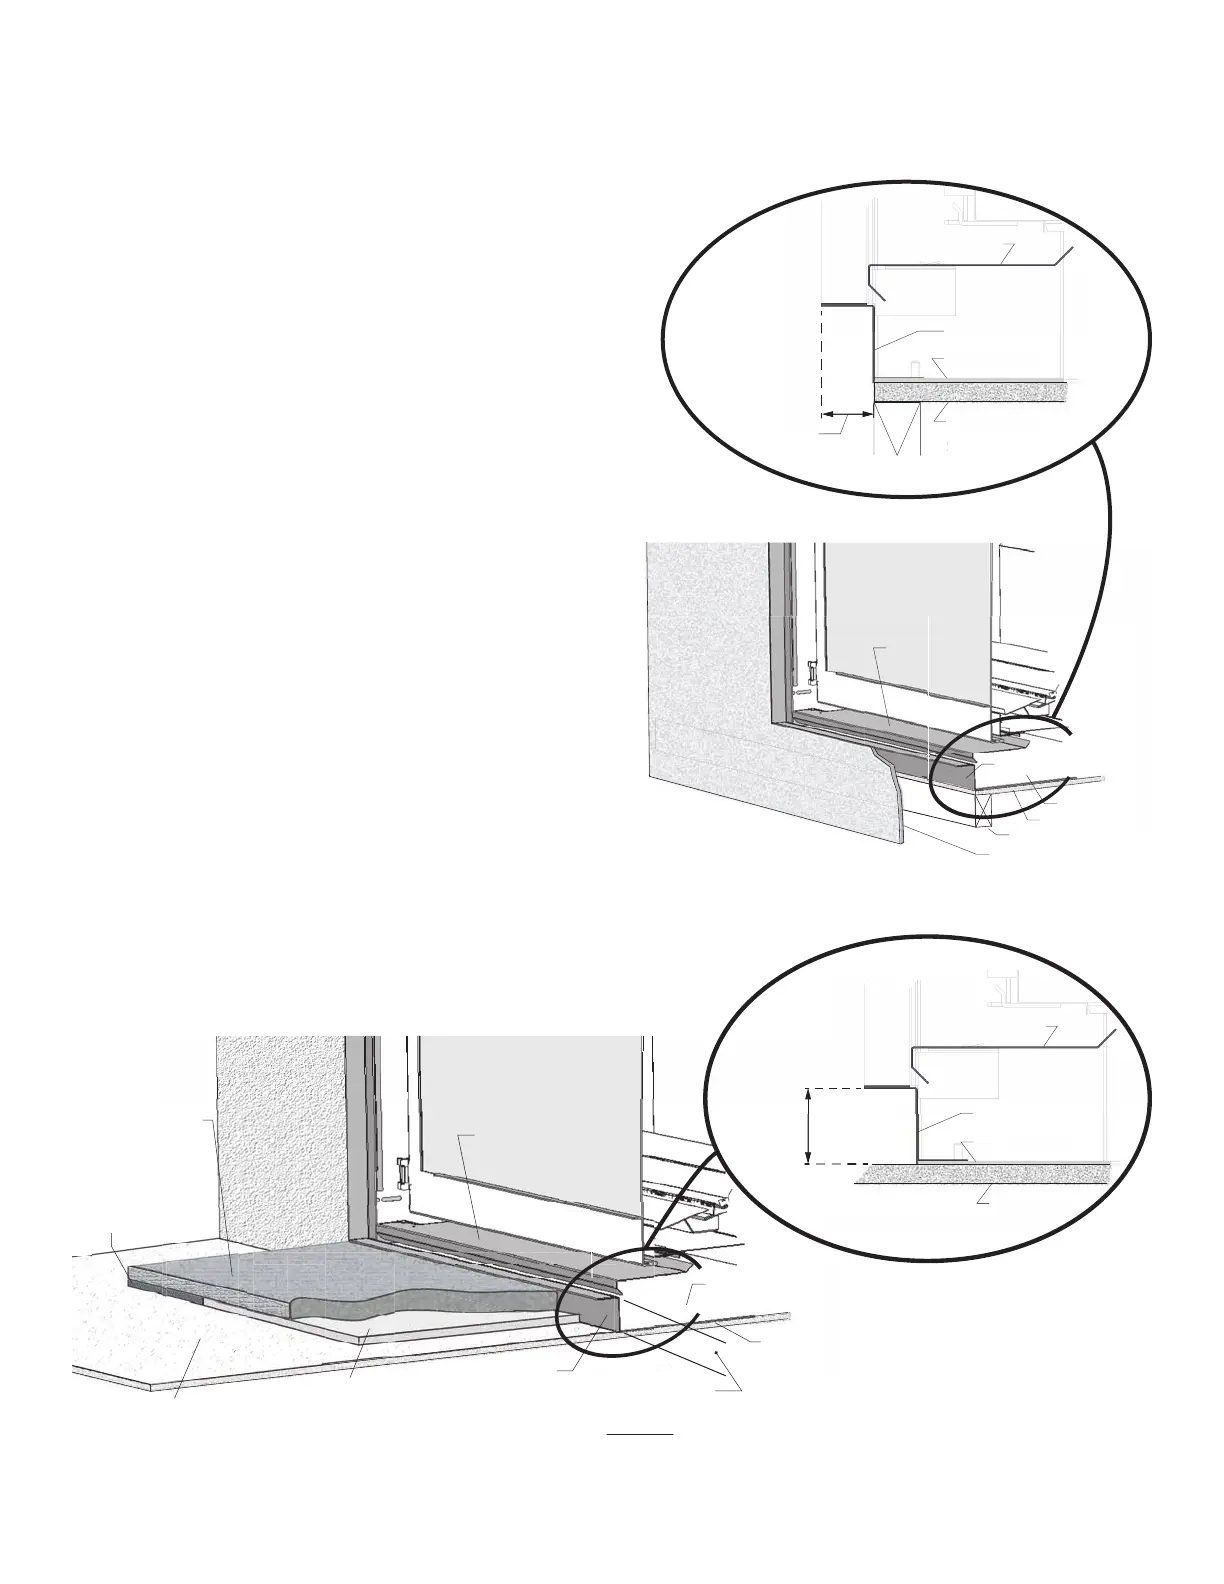
Without hearth (up the wall)
In the case where there is no hearth, the bottom of the
appliance must be raised at least 4 inches above any
exposed combustible fl oor in front.
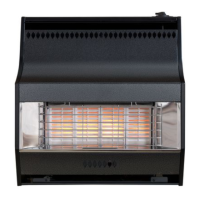
With hearth
Only a non-combustible hearth can be installed in front
of the appliance if within 4” vertically of the bottom of
the appliance. See Framing pages 13–19 of this
manual for hearth requirements details.
The non-combustible hearth in front of the appliance, if
within 4” of the bottom of the appliance, must include
the 1/2” Micore insulation board provided to be used
as thermal break between non-combustible and
combustible material underneath.
Section view, up the wall—detail
Lower panel
Removable panel
1-1/4”
[32 mm]
Front of
appliance
Stud
Plywood base
Appliance base
Lower panel
Removable panel
Finishing up the wall
Stud
Plywood base
Appliance base
:DOOȴQLVK
Removable panel
Appliance base
Combustible
VXEȵRRU
Plywood
VXEȵRRU
Non-combustible
PDWHULDO
1/2” combustible
shims at ends to
match Micore
1/2” insulating Micore panel
- min. 30” wide x 10” deep
(supplied with appliance)
1-5/8” [42 mm]
max. thickness
(including Micore)
/RZHUSDQHO
Section view, hearth—detail
Lower panel
Removable panel
1-5/8”
[42 mm]
Front of
appliance
Plywood base
Appliance base
Non-
combustible
hearth with
Micore
Finishing with hearth
Finishing up the wall
Planning Framing—1430CIK Clean Install Kit