28
10” (254 mm)
10” (254 mm)
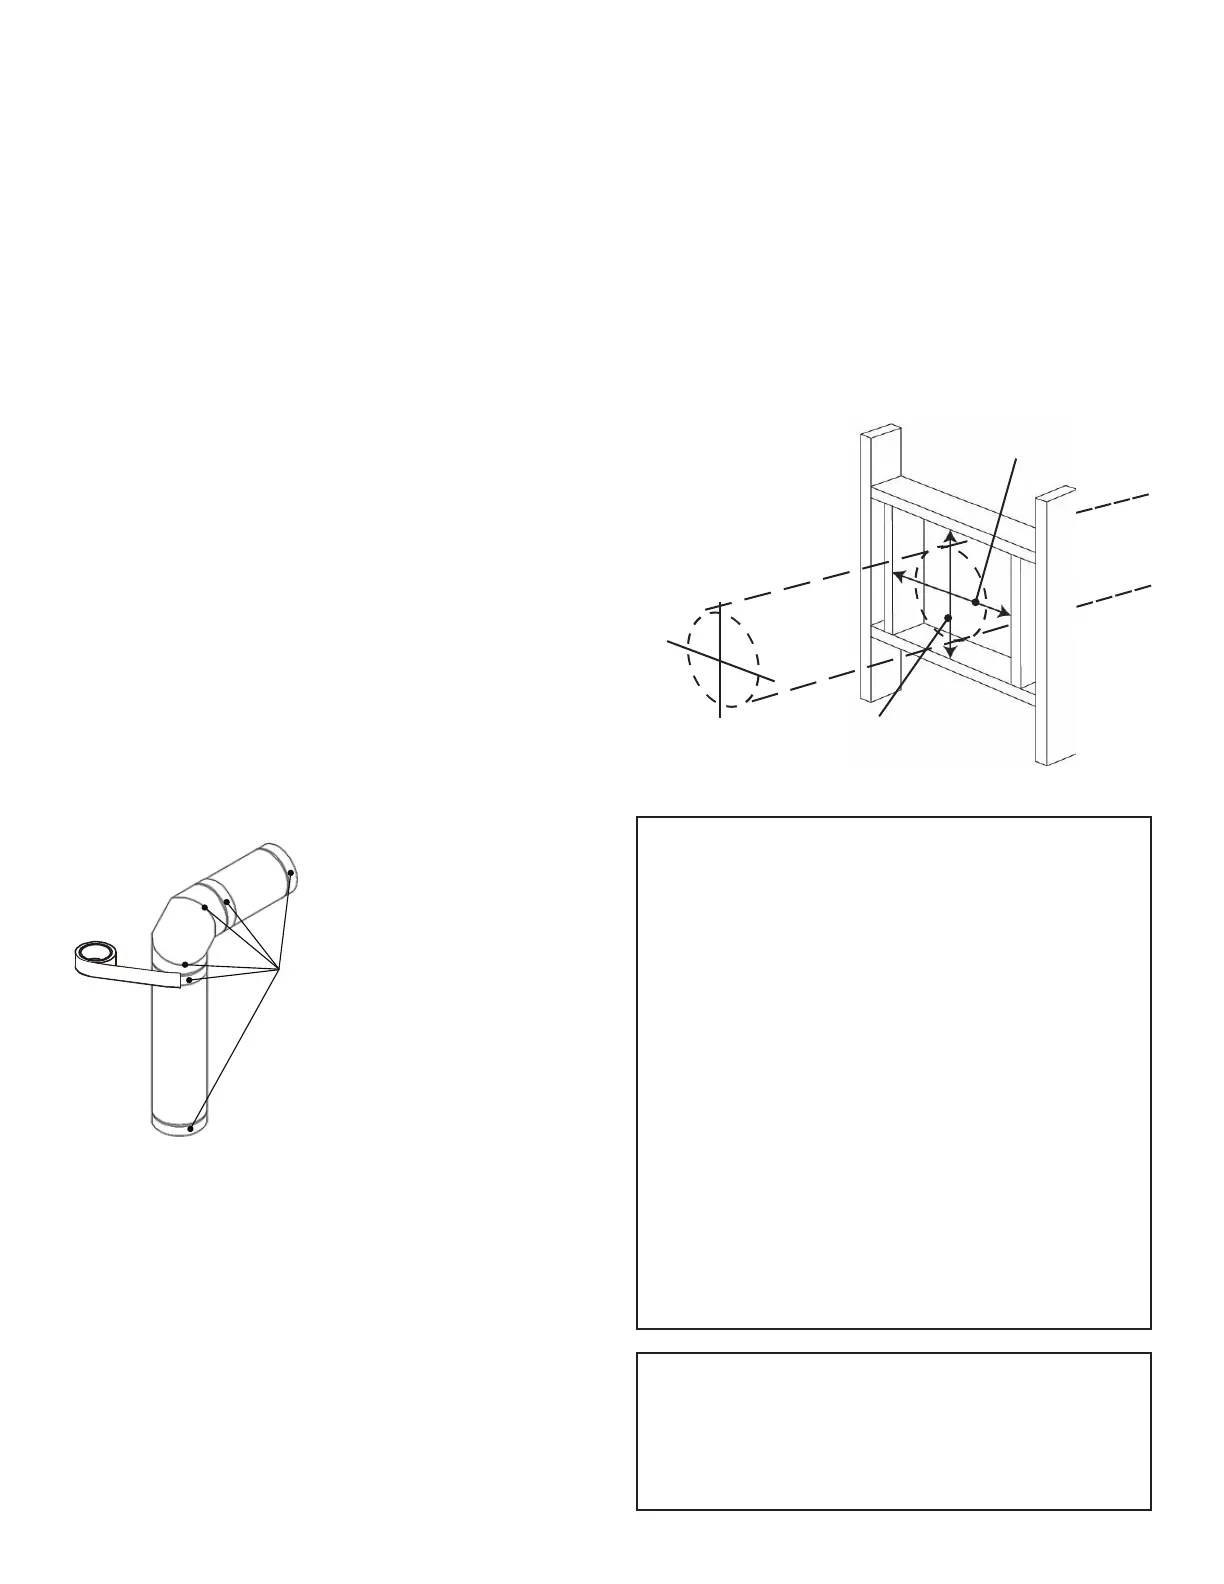
Align the vent
center to the center
of the frame
Venting
Top or Rear Facing Outlet
This unit is supplied with a 45 degrees top facing
vent take-off which can be fi eld-converted to a rear
facing one. See Vent Take-Off on page 36 for more
information.
Vent Material
This unit is approved for installation using 4 x 6-5/8-inch
co-axial direct vent pipe and accessories as listed in
Approved Venting Components pages 66–67 of this
manual. Follow the installation instructions supplied
with the individual venting accessories.
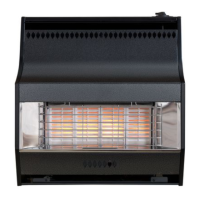
Vent Sealing
Seal all outer coaxial pipe and elbow joints, including
sectioned elbow joints, using high quality, high
temperature 2 inch wide self-adhesive aluminum foil
tape (Nashua-322-2 brand or similar). Wrap the tape
completely around all outer joints and press fi rmly to
seal.
A high temperature black silicone sealant may be used
in the outer joints as a substitute to foil tape.
Ensure all the pipe joints have a minimum of 1¼ inch
overlap.
Wall Thickness
The appliance vent is suitable for penetrating a
combustible wall assembly up to 8 inches in thickness.
A non-combustible wall can be of any thickness up to
the maximum horizontal run of vent pipe allowed for
the particular installation.
Tape all
OUTER joints
(including all
elbow joints)
Framing Vent in Combustible Walls & Ceilings
When penetrating through combustible walls and
ceilings, frame a minimum of 10 in x 10 in opening and
ensure that the insulation is kept clear of the vent pipe
using either a wall thimble or an attic insulation shield.
Follow the installation instructions supplied with the
individual venting components.
Important Installer Notice – Weather
Sealing & Vapor Barriers
It is the installer’s responsibility to ensure that vent
installations through exterior walls are caulked and
weatherproofed in such a manner as to:
• Prevent rain water from entering the wall from
the weather side by adequately caulking the outer
vent plate to the exterior wall surface.
• Prevent moisture inside the home from penetrat-
ing into the wall structure by ensuring the inside
wall plate is adequately sealed to the inside vapor
barrier.
• Prevent rain water and moisture from entering
the walls by sealing the joints between the outer
vent tube and the inner and outer wall plates.
We recommend the use of a high quality
polyurethane sealant.
All horizontal pipe runs must be graded 1/4 inch
per foot upwards in the direction of the exhaust
fl ow. The fi nal pipe length, when terminating
through the wall may be graded downwards
slightly to prevent water migration.
Overview