35
Preparation Stand-offs & Heat Shield
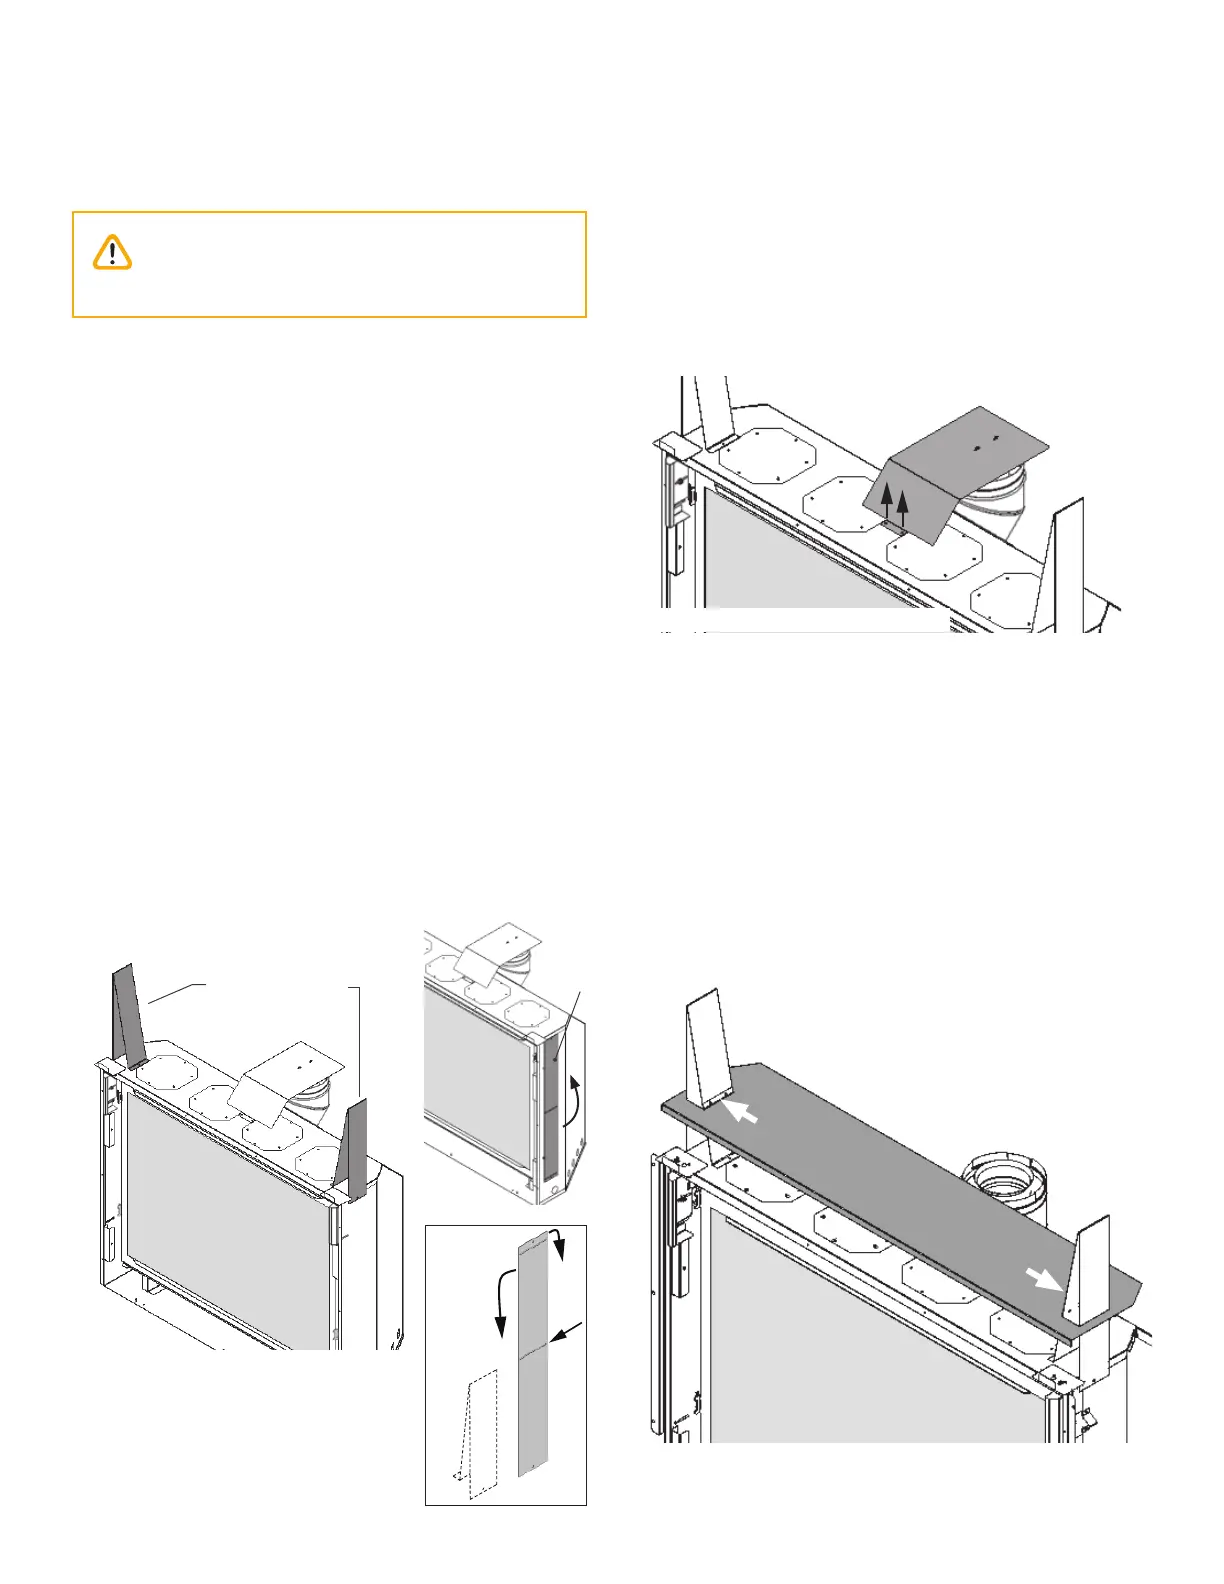
Remove Heat Shield
Remove the heat shield from the top of the appliance
case (2 screws).
If using the top facing take-off or HeatShift, discard the
shield. If using the rear facing take-off , keep the shield
to reinstall after converting from top to rear take-off —
see next subsection.
Unpack Appliance
1. Remove the cardboard top and wood pallet crating
from around the appliance. Discard or recycle.
2. Remove the frame fi xing brackets secured to the
pallet behind the appliance holding the Micore
board. Set aside with the board.
3. Remove the window—see page 37.
4. Remove the items packed inside the appliance.
5. Verify that you have all the components re-
quired for the installation, including:
• approved non-combustible board (not supplied);
• liners and fuel beds (packed separately);
• trim kit with barrier screen;
• venting components and accessories;
• HeatShift System components, if used;
• electrical components.
Install Stand-off s
The stand-off s are supplied fl at on the fi rebox sides and
secured at one end.
Swivel up the fl at stand-off s, bend them as shown and
secure their loose end to the top of the fi rebox.
Caution
Beware of sharp edges! Wear gloves!
Bend stand-
off s
Stand-off s installed
Stand-off
Remove heat shield (2 screws)
Stand-off Heat Shield (if required)
This heat shield is required when a built-in recess
is framed into the wall above zero clearance stand-
off s—see page 17. This shield is provided with the
appliance.
Slide the shield over top of stand-off s, fl ange at the
front, and secure using 2 screws provided for each
stand-off as shown. Note that this shield is not used
with the HeatShift system.