Initial Setup Of The Console Using Workflow Wizard Setup>Tank>General
26
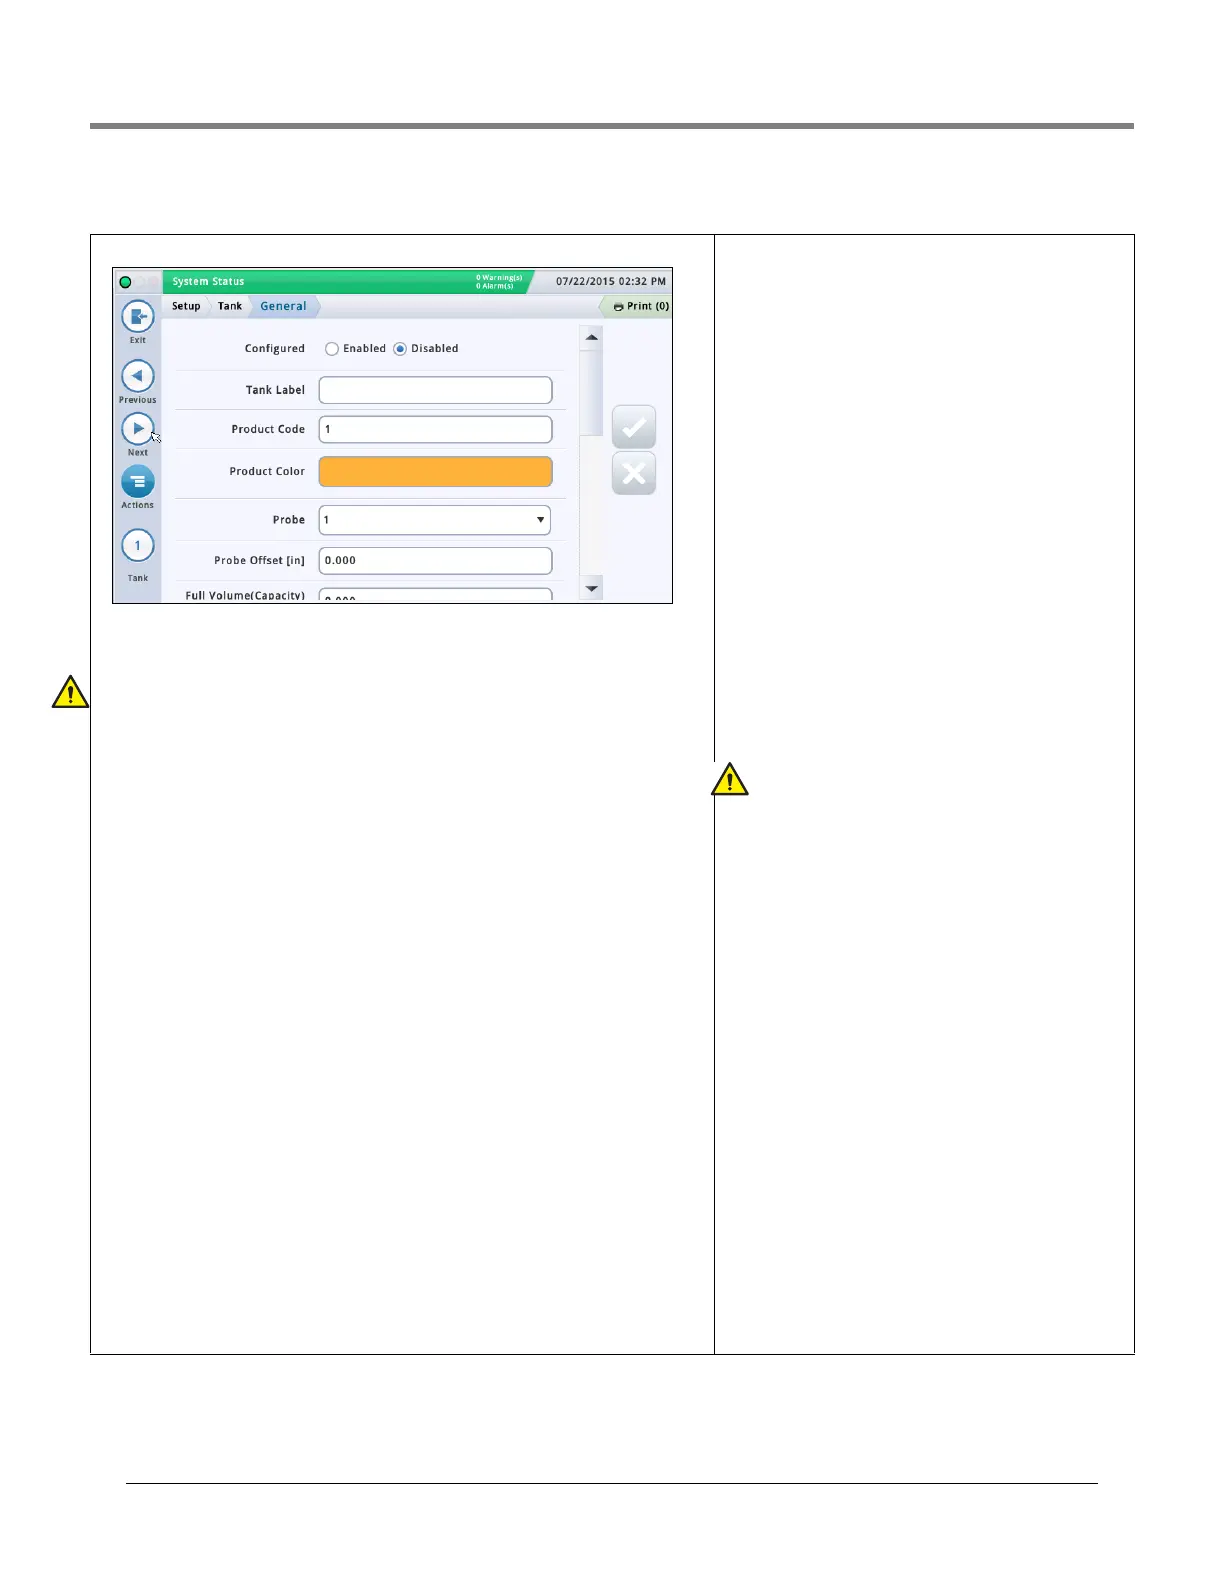
Setup>Tank>General
Configured
Touch the radio button to enable or disable the tank.
NOTE: Set to Enabled only after completing all of the Setup>Tank screens.
Label
Touch to enter a description for the tank (normally based on the name of the product in the
tank and should be unique for each tank).
NOTE: This field is not the same as the label associated with the product, which is assigned
in the
Setup > Product > Labels screen.
Product Code
Touch to enter an alphanumeric code for a POS terminal used to identify the product for
inventory control purposes. This typically defaults to the corresponding tank number, such as
T1 and PC 1.
NOTE: There are instances when you may want to override the default value provided and
enter a different code. For example, in BIR, you may have two tanks that have the same
product type. In this case, you would want to program the same product code the for each
tank. By manually entering in the correct code, you would ensure BIR is presenting the cor-
rect data for the product type..
Product Color
Touch and select a color that represents this product when displayed on screen.
Probe
Touch to enter an Identifier of the installed probe (as set up in “Setup>Devices”). A probe
assignment to a tank is one to one:
• Probe 1 is assigned to tank 1
• Probe 2 is assigned to tank 2
•etc.
Probe Offset
The probe offset value is the distance the probe is off the bottom of the tank and helps to
obtain an accurate measurement of fuel in the tank.
In console calculations, the probe offset value is always added to the product height value
when product height is displayed (for example, in Overview>Tank Detail).
Touch to enter a value compensating for probes that are not resting on the bottom of the
tank.
Full Volume (Capacity)
Touch to enter the full volume of the tank at 100% height
(this volume is provided by the tank manufacturer).
Diameter
Touch to enter the inside diameter of the tank (look for this
dimension on the tank chart provided by the manufacturer).
Tank Tilt
Touch to enter the amount of offset (in inches [mm]) of the
tank from a perfect horizontal. For an explanation of tank tilt
and how to calculate this value, see Actions>Help>Refer-
ence Tables>Tank Tilt Calculation.
NOTES:
• If the probe is installed in the center of the tank, enter a
value of 0.00.
• Tank Tilt may be a positive (+) or negative (-) value. If it is
a negative value, make sure to change the value symbol to
minus (-) when entering a negative tank tilt value.
Thermal Coefficient
Touch to enter a value representing the coefficient of ther-
mal expansion for the fuel in the tank. This value provides
the proper expansion and contraction rate for a particular
product type. If this value is entered incorrectly, it impacts
inventory and tank test results. For a list of thermal coeffi-
cients, see Actions>Help> Reference Tables>Thermal
Coefficients.
NOTE: Make sure you enter the correct value. If you
are off by one decimal point, it can substantially affect
system calculations.
Meter Data Present
For the selected tank, touch the radio button to enable or
disable BIR software* to collect dispenser transaction data
from the meters. (Note: BIR monitors data only from tanks
assigned to Mag probes 1 to 32).
NOTE: Do not enable unless the Veeder-Root electronic Dis-
penser Interface Module (DIM) or current loop Dispenser
Interface Module (DIM) are connected properly to the con-
sole.
*BIR option required
Pump Threshold %
[Field enabled when using line manifolded tanks and the
Dispense Mode field is set to ‘Manifolded:Sequential’ in
“Setup>Pumps and Lines>Line”].
When the tank volume drops below the pump threshold per-
centage entered in this field, pumping will switch over imme-
diately to the next available tank in the line-manifolded line.
Pumping will continue from the current tank for another 10
seconds to avoid a disruption in any dispenser during the
switch-over.