30
PROCEdURE 2. INSERT THE VIdEO BATON INTO THE STAT (SINGLE‑USE ONLY)
1. Open the GVL
®
Stat pouch, but do not remove the Stat from the packaging.
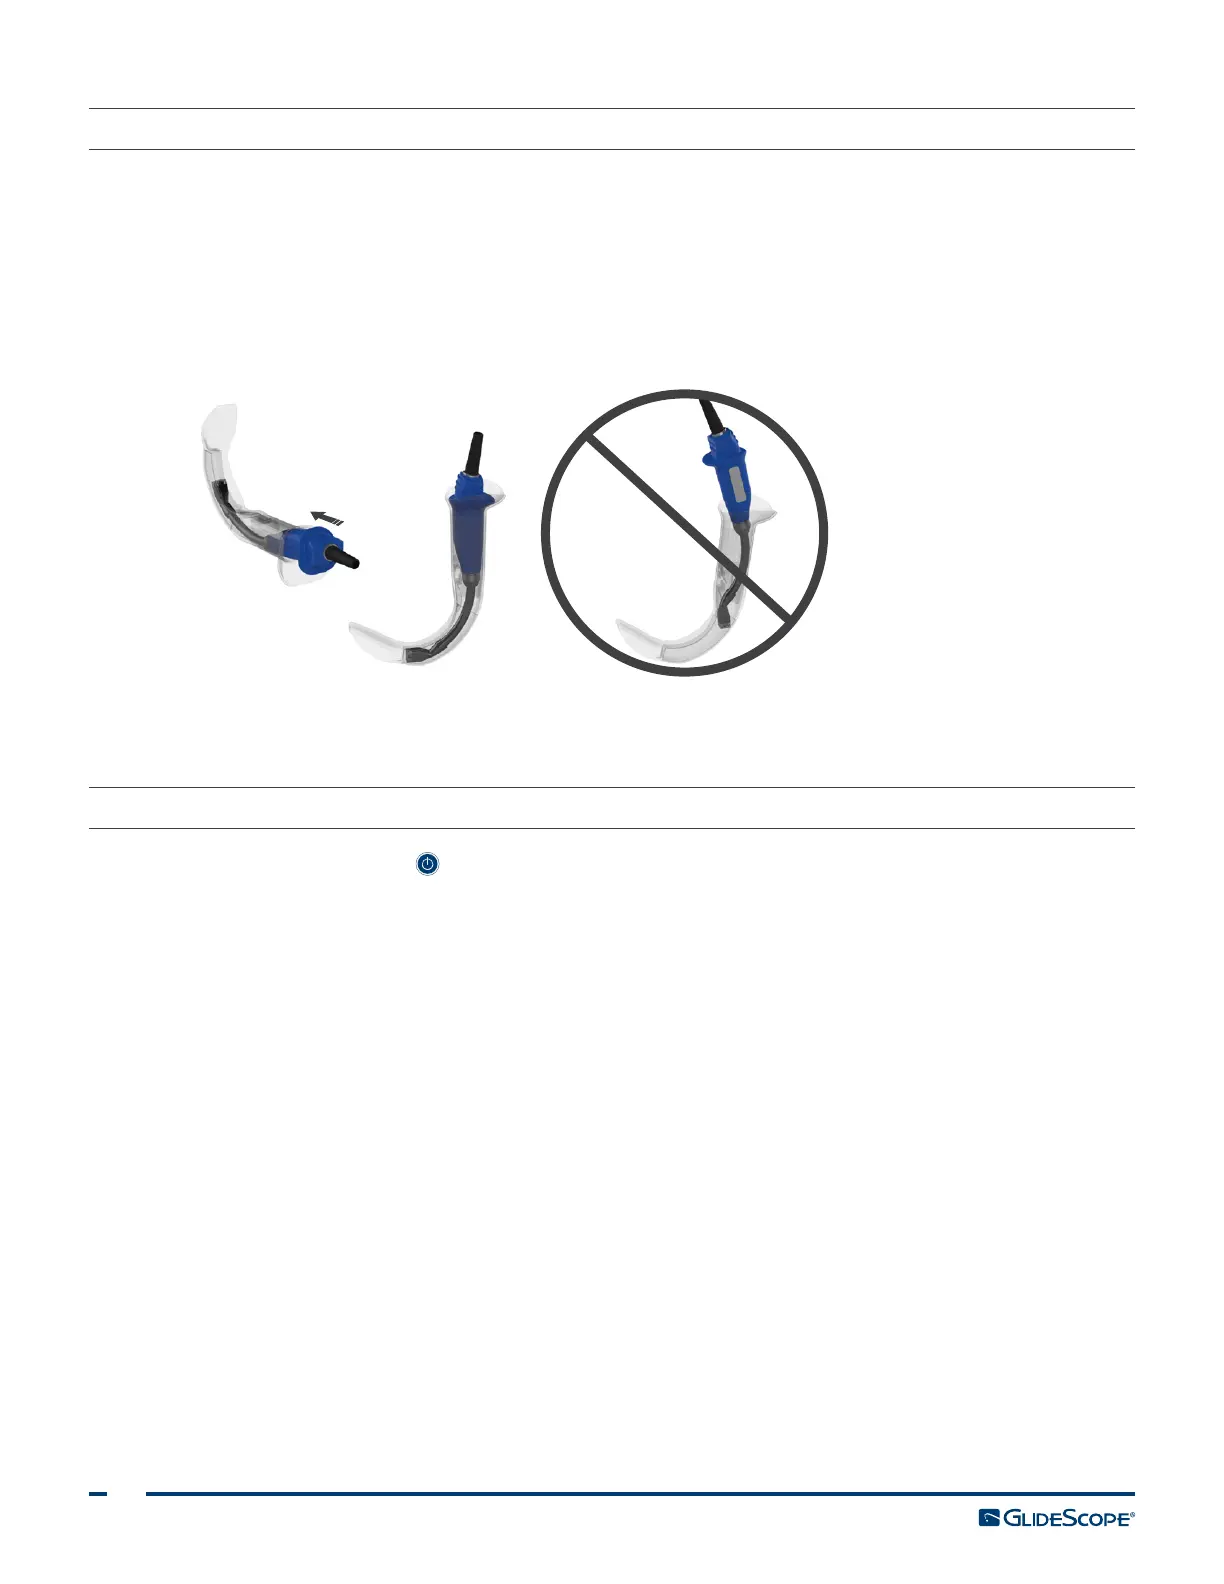
2. Ensure that the logo on the side of the baton and the logo on the side of the Stat are aligned.
3. Slide the video baton into the GVL Stat until it clicks into place. Do not remove the Stat from the pouch
until you are ready to begin the intubation. This ensures that the Stat remains as clean as possible.
Note: Ensure that you do not insert the video baton backwards.
Correct Incorrect
4. When you remove the GVL Stat from the packaging, visually inspect the Stat to ensure that all exterior
surfaces are free of unintended rough areas, sharp edges, protrusions, or cracks.
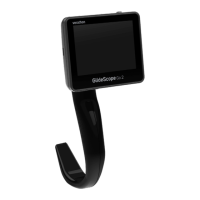
PROCEdURE 3. PREPARE THE GLIdESCOPE SYSTEM
1. Press the Power button . The video monitor turns on.
Note: If the monitor locks up or becomes unresponsive for any reason, press and hold the Power button
for 10seconds to reboot the system.
2. Ensure that the battery is sufficiently charged. If necessary, connect the monitor directly to power.
3. On the monitor screen, verify that the image displayed is from the video laryngoscope camera. On the
monitor, a small portion of the GVL Stat may be visible on the top or upper‑left and right corners.
4. If needed, allow the GlideScope Reveal™ anti‑fog feature to warm up for 30–120seconds.
Note: The time required for the anti‑fog feature to be fully optimized varies according to the ambient
temperature and humidity where the equipment is being stored or used. If the video laryngoscope is
stored in cold conditions, additional warming time may be required for optimal performance of the
anti‑fog feature.
5. If desired to provide additional anti‑fog benefits, you may apply Dexide™ Fred™ Lite to the camera
window on the Stat.
*
Use the solution according to the manufacturer’s instructions.
* Compatibility has been demonstrated for up to one hour of continuous exposure on video batons and Stats.