34
5. If at any point you would like to save a photo of the live display to the USB flash drive, press the
Snapshot button , and then wait for the Saving Snapshot icon to disappear.
Note: If you remove the USB flash drive before the Saving Snapshot icon disappears, the photo will be lost.
6. If you would like to review the recorded files on the video monitor, complete the following procedure,
Use the Playback Feature (Optional).
If you would like to review the recorded files on a computer, insert the USB flash drive into the PC, and
then view the .avi or .jpg files.
Note:
If you are viewing the recorded file on a Windows
®
operating system (OS), use an application such as
Windows Media Player
®
.
If you are viewing the recorded video file on Mac OS
®
, use an application such as one of the following:
• MPlayerX (free in the App Store
SM
)
• VLC
®
(free at http://www.videolan.org/vlc/index.html)
If you are viewing the recorded video file on iOS
®
, use an application such as one of the following:
• VLC for iOS (free in the App Store)
• 8player lite (free in the App Store)
• Media Player—PlayerXtreme™ HD (free in the App Store)
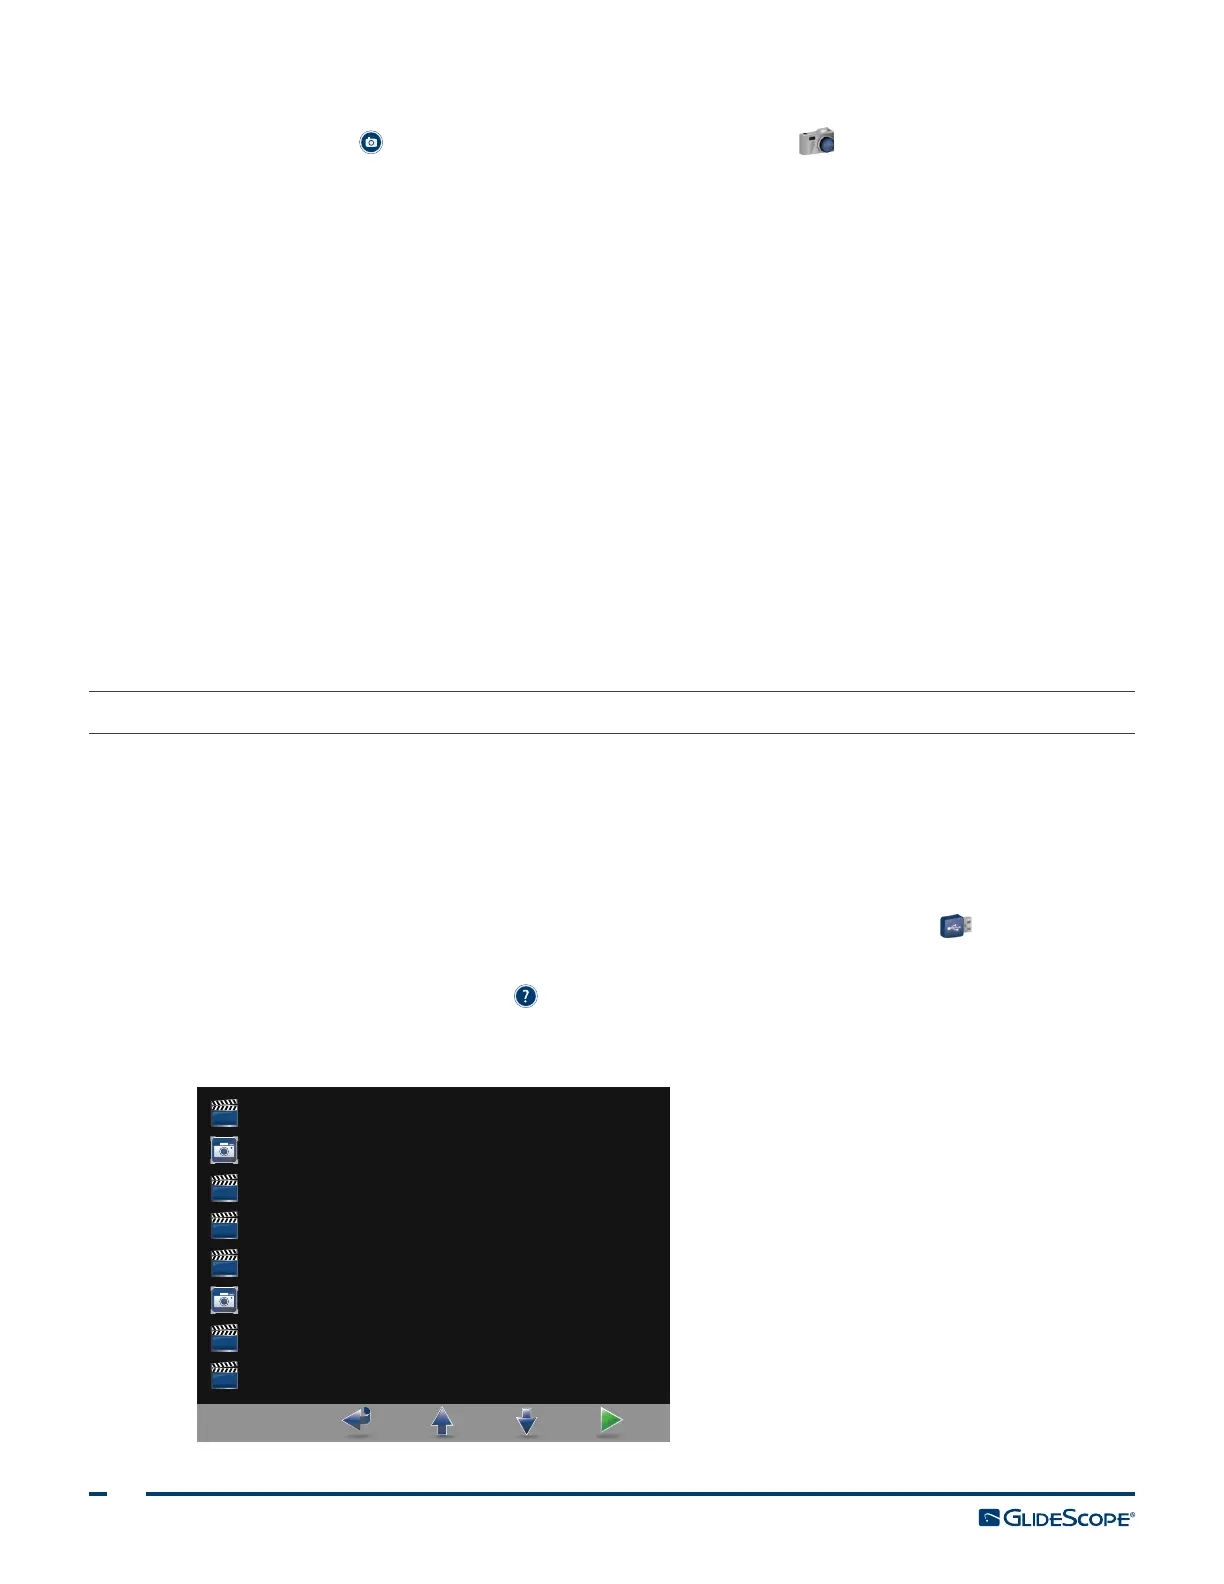
PROCEdURE 7. USE THE PLAYBACK FEATURE (OPTIONAL)
Recorded videos and snapshots on a USB flash drive can be viewed on the GlideScope Video Monitor.
This feature is only available if your GlideScope Video Monitor is running software version 3.4 or higher. For
more information about upgrading the software, see System Software on page56.
1. On the back of the monitor, remove the USB port cap, and then insert a USB flash drive into the port.
2. Ensure that the USB flash drive is detected by checking if the USB Flash Drive icon on the bottom of
the screen is displayed.
3. Press and hold the Tutorial button 3 seconds or longer. The playback menu is displayed.
Figure 14. Playback Menu
20130411_213043.avi
20131101_132115.avi
20131101_132217.jpg
20130411_143605.avi
20140110_203355.avi
20140114_203419.avi
20140114_205213.jpg
Tutorial