33
Operations & Maintenance Manual: Using the Device
PROCEdURE 6. USE THE RECORd & SNAPSHOT FEATURES (OPTIONAL)
Use only a passive‑type USB flash drive. Do not use USB drives powered by another
externalsource.
WARNING
The system is equipped with video and audio recording features and the ability to save a snapshot of the
live display on the monitor. The video monitor saves this data to a USB flash drive, and you can view the
recordings or snapshots on a computer or on the video monitor. For more information about viewing these
files on a monitor, see Use the Playback Feature (Optional) on page34.
By default, audio recording is disabled on the system. If you would like the system to record audio in addition
to video, complete the procedure Configure User Settings in order to enter the User Setting display, and then
change the Audio Recording setting to On.
While recording, a number next to the icon indicates approximately what percentage of the USB flash drive
has been used. When the USB flash drive is full, recording stops.
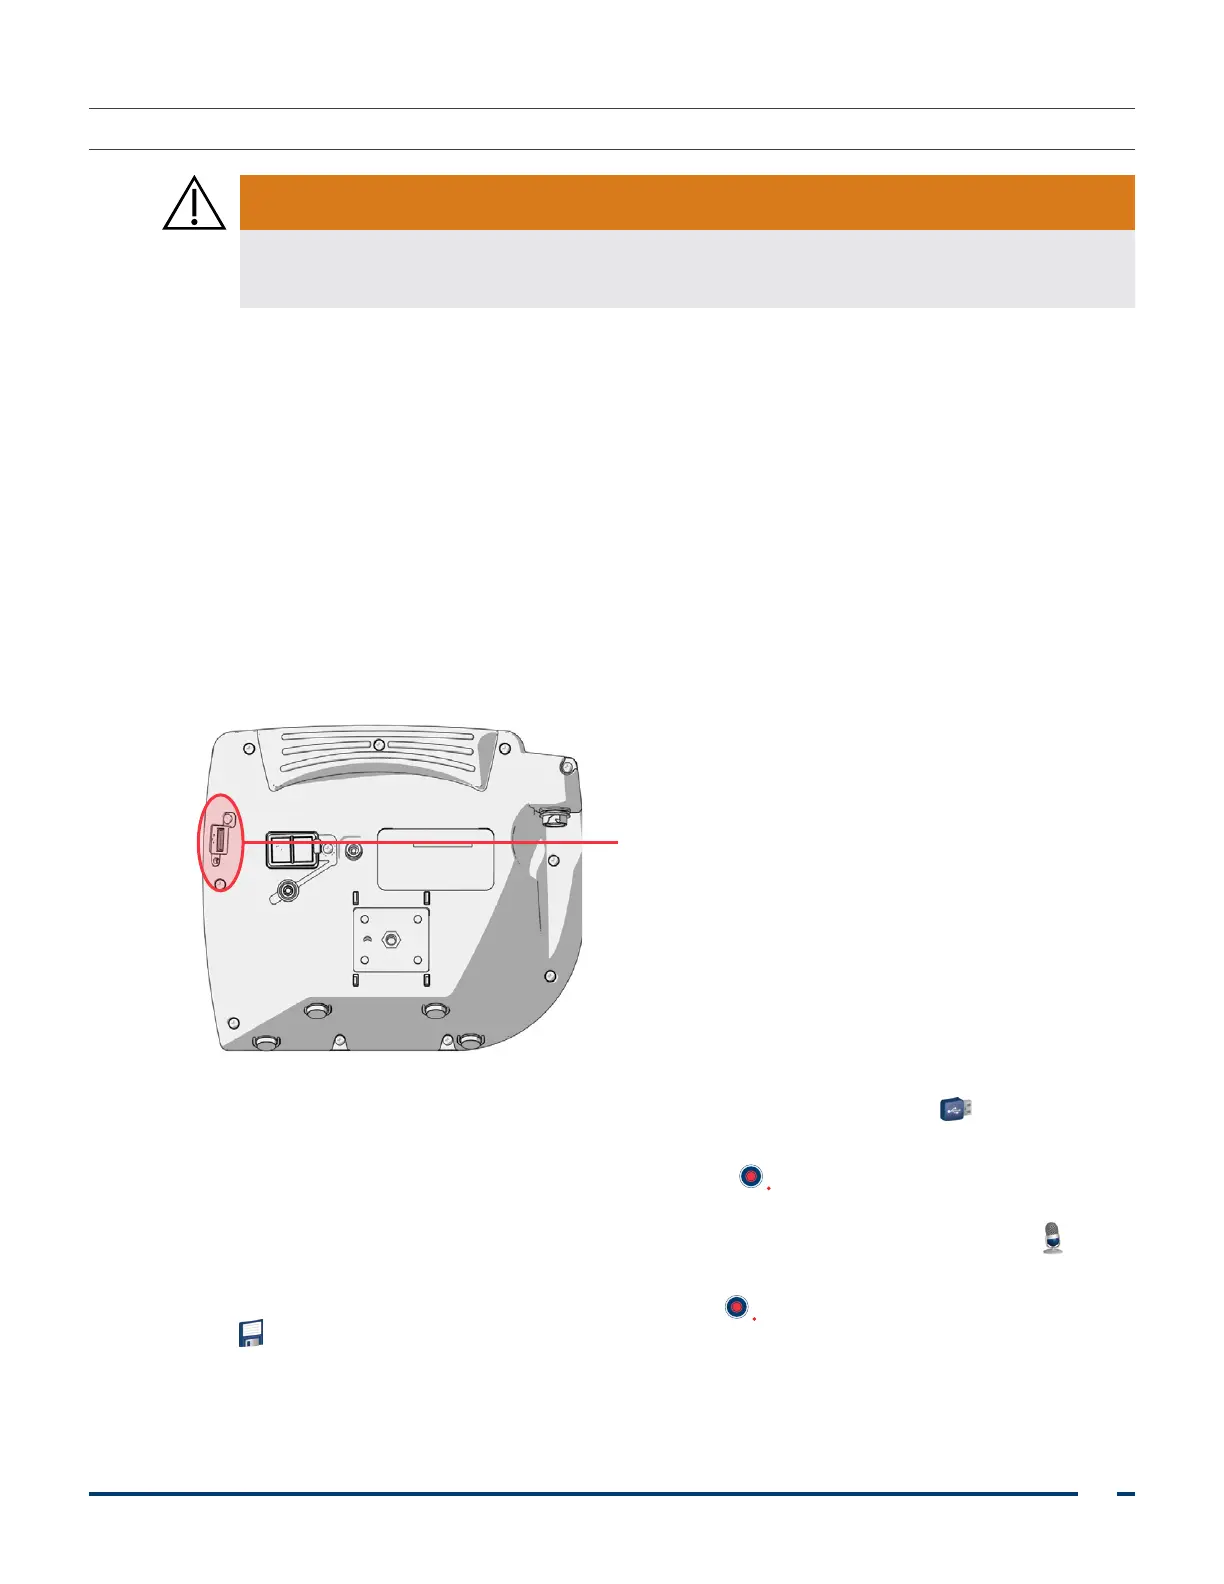
1. On the back of the monitor, remove the USB port cap, and then insert a USB flash drive into the port.
Note: If you do not insert a USB flash drive, the video recording, audio recording, and snapshot features
will not be available.
USB port
2. Ensure that the USB flash drive is detected by checking if the USB Flash Drive icon on the bottom of
the screen is displayed.
3. If you are recording the intubation, press the Record button . Video recording starts and is saved to
the USB flash drive.
If audio recording is enabled in the User Settings display, the Audio Recording is Active icon will
appear on the screen, and audio will be recorded with the video.
4. When you are finished recording, press the Record button again, and then wait for the Saving File
icon to disappear.
Note: If you remove the USB flash drive before the Saving File icon disappears, the recording will be lost.