3
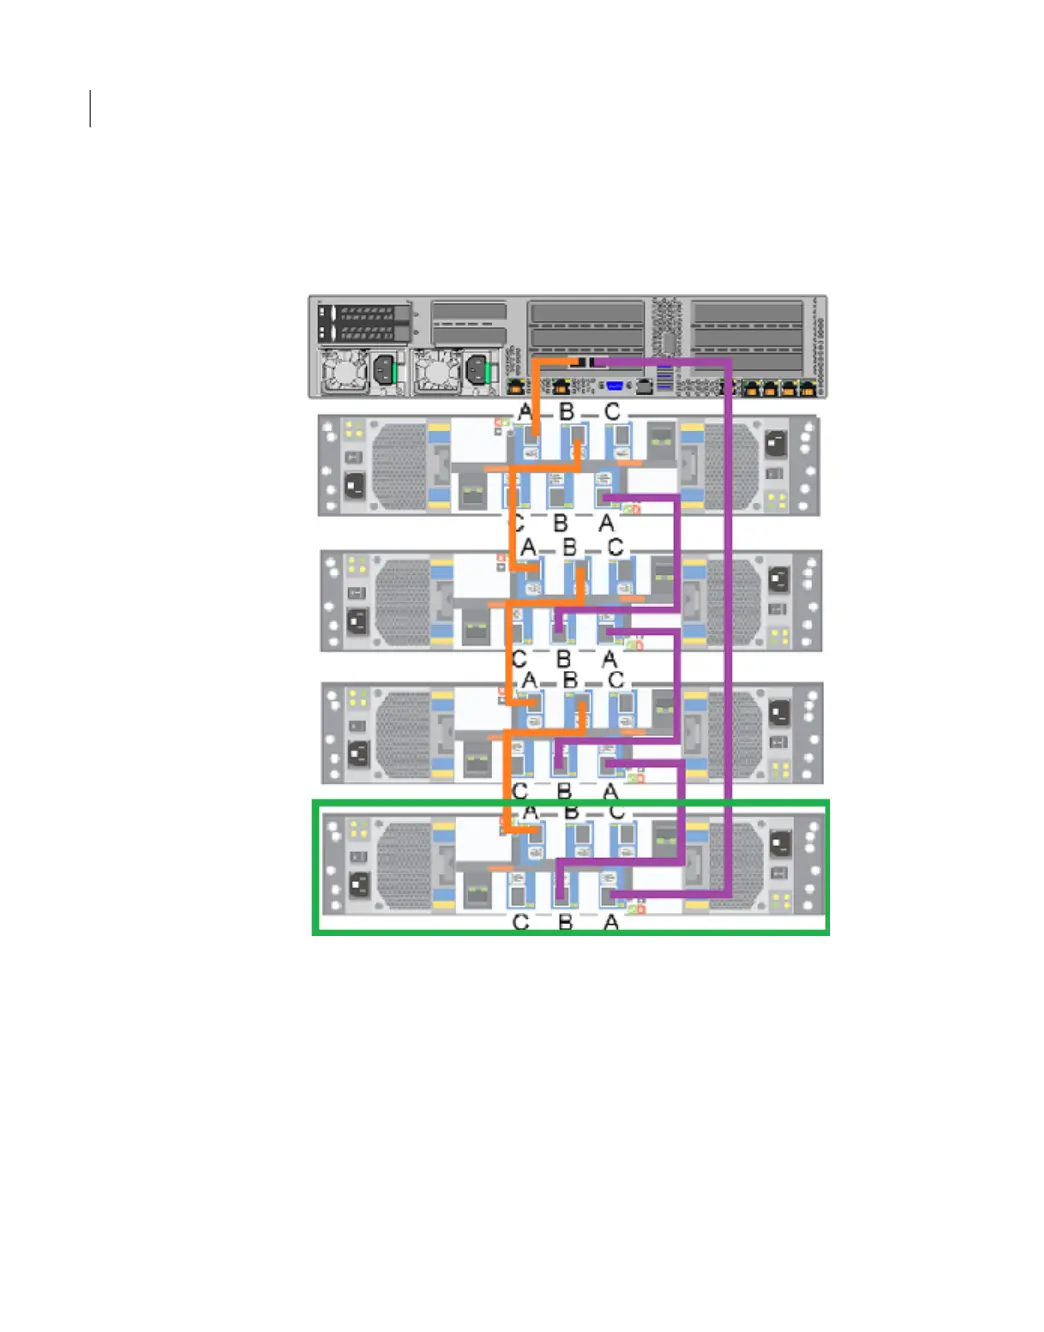
Connect the two new SAS-3 cables that ship with each storage shelf, as shown.
If you want to see more cabling details refer to the following section.
Connecting a 4TB appliance to more than one storage shelf
4
Connect power cords between the new storage shelf and separate Power
Distribution Units (PCUs) in the rack.
5
Turn on the new storage shelf. Let the shelf initialize for a few minutes.
6
Verify that the new shelf functions correctly.
Refer to the following section for details.
Turning on the hardware and verifying operation
Refer to one of the following sections to add the additional disk space.
Adding storage shelves to an operating 4TB appliance that has at least one storage shelf attached
Recabling
138

 Loading...


