■ Open Me First box, containing:
■ Installation flip cards
■ Deployment plan that provides basic information, and links to detailed
information
■ Rack mounting templates
■ Screwdriver and cable straps
■ Installation poster
■ Cabling poster
■ Envelope containing the following:
■ USB drive(s) with factory reset files
■ Warranty and license information
■ Accessory box containing rack rails
■ Two power cables
■ Bezel
Determining rack locations
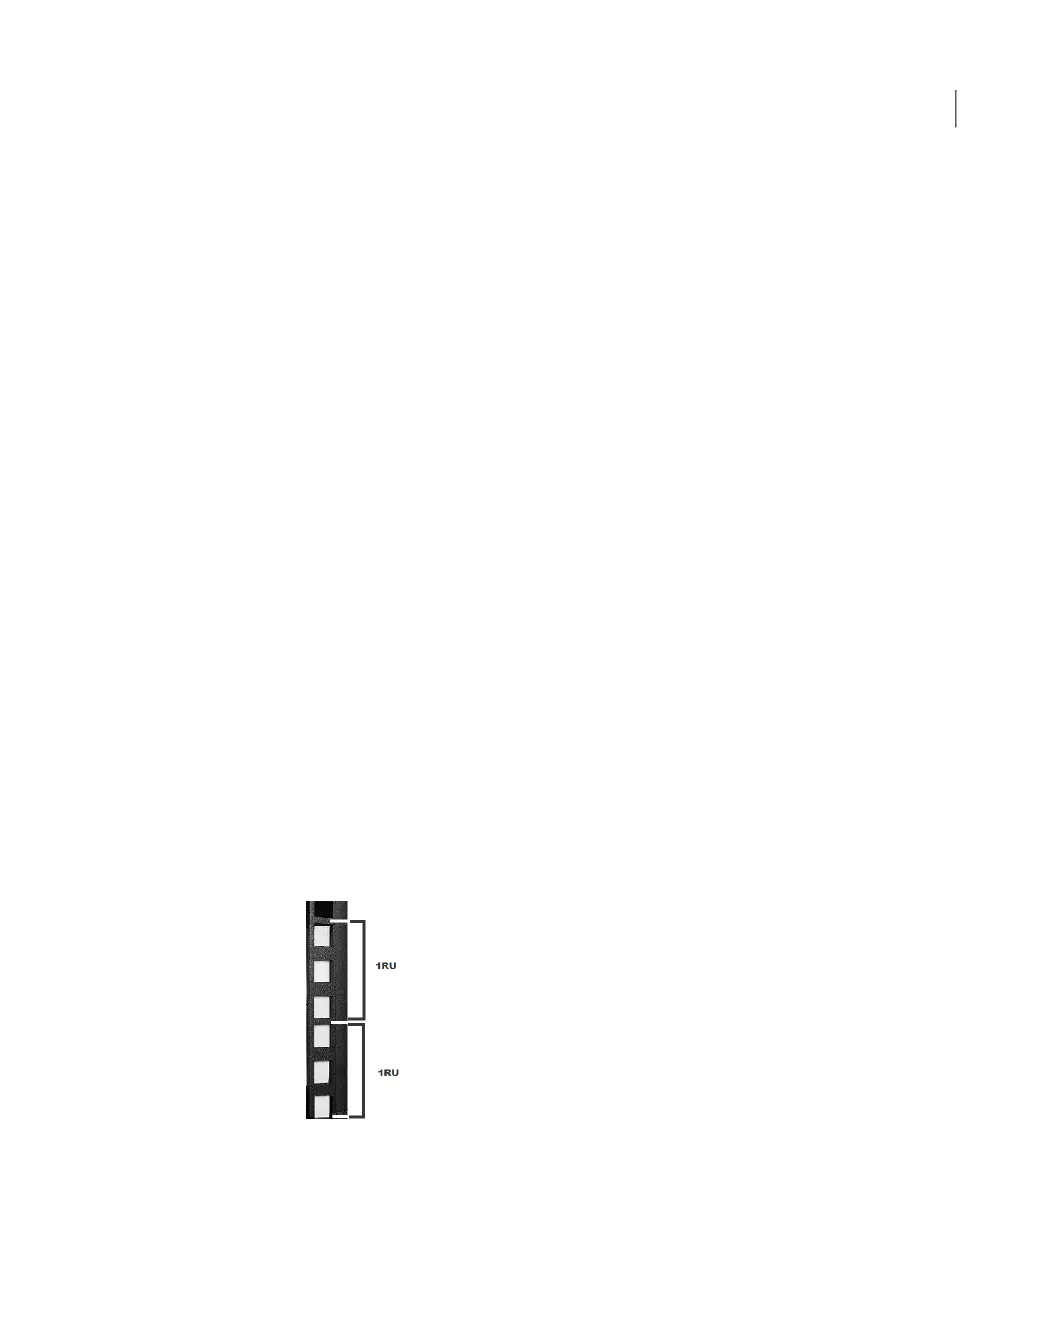
The appliance and the storage shelves are both two rack units (2RU) high. To help
you identify RU spacing, many rack manufacturers typically use a system of lines
and sequential numbers starting at the bottom of the rack. The front and the rear
of the rack are marked the same to ensure that the rails are installed straight and
level. One RU has three holes. The holes for one RU are typically marked with a
line below the bottom hole and another line above the top hole.
Use the rack templates to determine the mounting locations for all devices.
17Preinstallation requirements
Determining rack locations

 Loading...


