2
Select one of the following sections that describe the complete connection of
one, two, three, and four shelves.
See “Connecting one storage shelf to an appliance” on page 95.
See “Connecting two storage shelves to an appliance” on page 98.
See “Connecting three storage shelves to an appliance” on page 101.
See “Connecting four storage shelves to an appliance” on page 107.
Connecting one storage shelf to an appliance
Note: The cables in the following diagrams are shown in different colors for
demonstration purposes only. The actual cables are black.
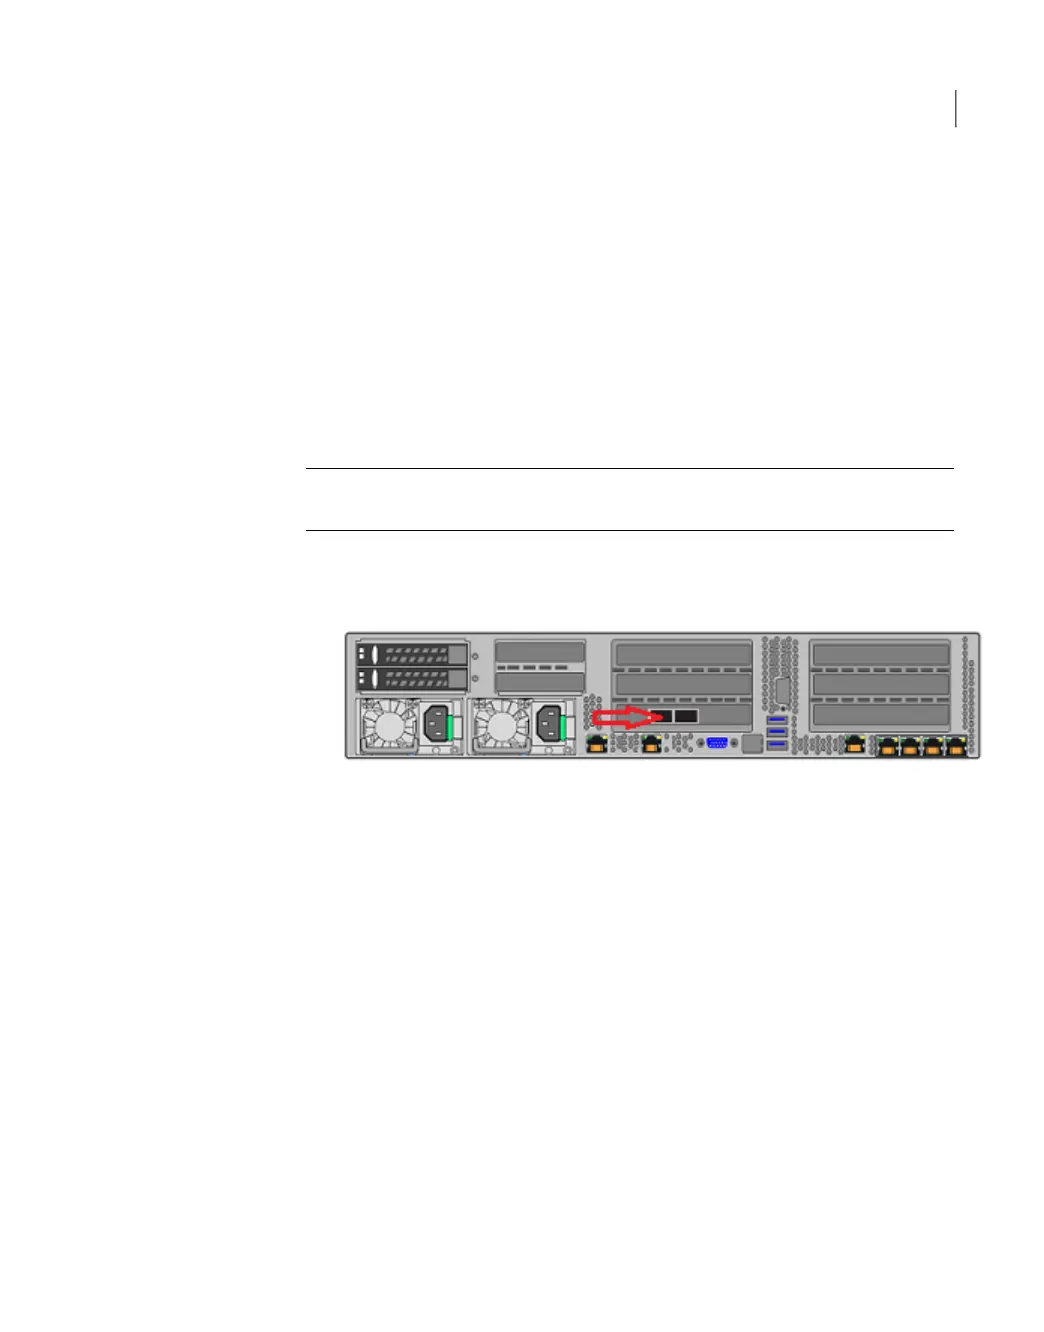
To connect one storage shelf to the appliance
1
Connect a SAS-3 cable to the left RAID port in the appliance.
2
Be sure that the blue clip on the cable connector in the appliance port points
down.
95Adding one or more storage shelves to an operating 4TB appliance that does not have any storage shelves
Connecting one storage shelf to an appliance

 Loading...


