7
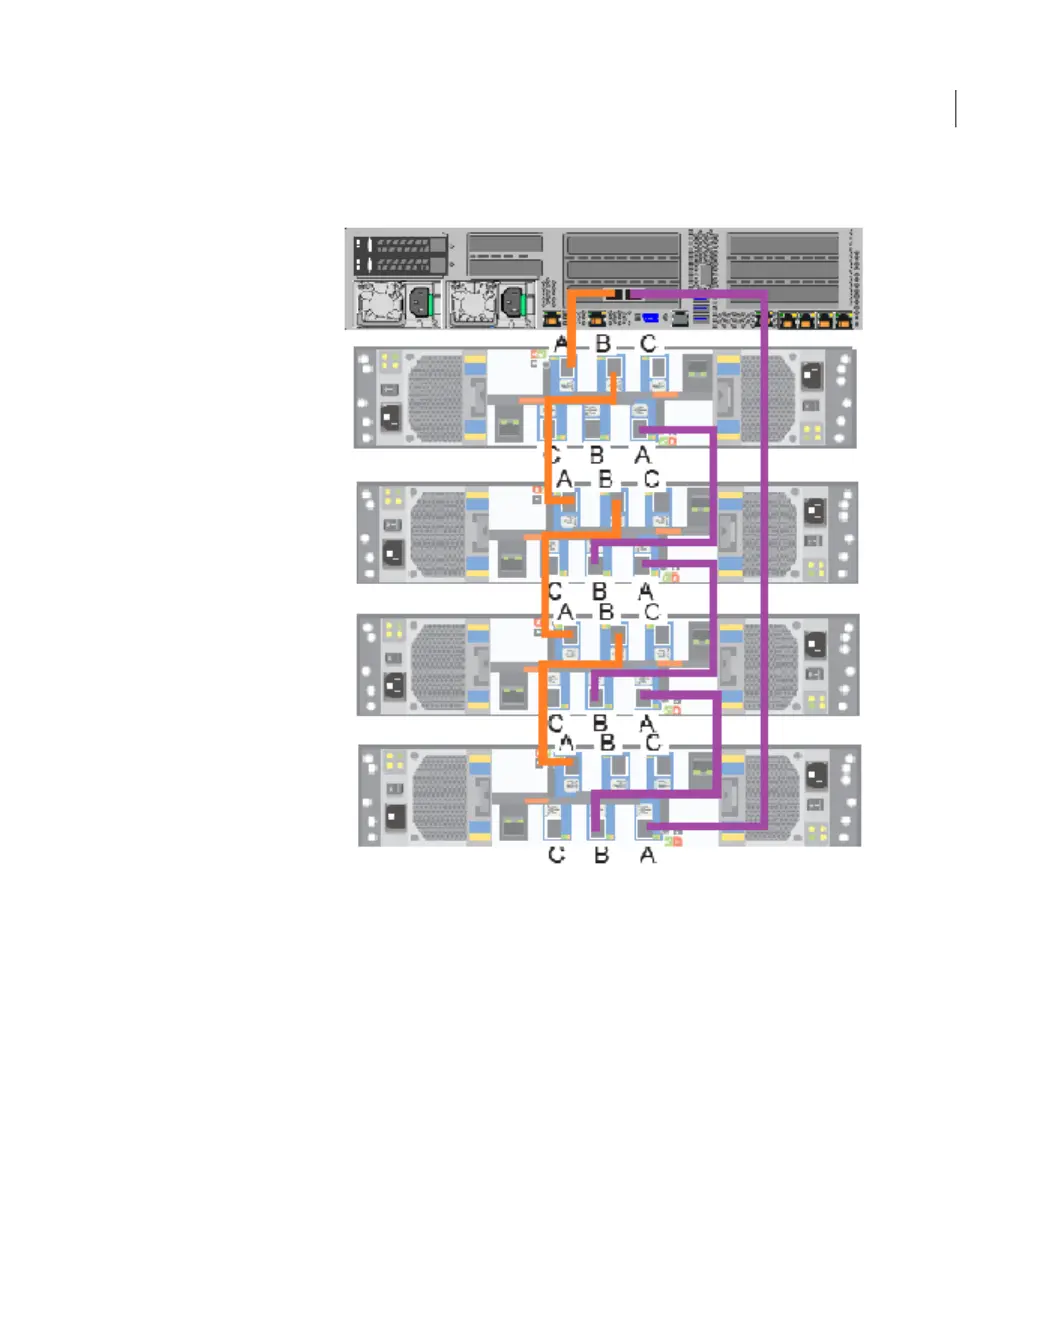
Continue until the all storage shelf bottom canisters are connected.
See “Connecting the network cables” on page 47.
See “Connecting the power cords” on page 48.
Connecting the network cables
The networking ports are accessed on the rear panel of the device. The remote
management port is for use by Veritas Technical Support staff or by approved field
service technicians. The following picture shows the layout of the network ports. It
includes the four 1 Gb Ethernet ports on the right and the two 10 Gb Ethernet ports
on the left. The remote management (IPMI) port is located to the left of the 1 Gb
Ethernet ports.
47Installation procedures
Connecting the network cables

 Loading...


