VIDEONICS DIGITAL VIDEO MIXER PAGE 17
preceding diagram (G, H). But many other arrangements are possible. The
diagram gives some examples:
• VCR 1’s audio output is not used (I). Only its video is connected, to IN 2.
• A tape player is connected to IN 2’s audio inputs (J).
• VCR 2 has mono sound, connected to IN 3’s left input (M). VCR 3’s stereo
audio is converted to mono using a Y-cable (N) and is connected to IN 3’s
right channel.
IN 3’s audio can be “split” — sent to two different sources, so that the left
input would appear as source C, for instance, and the right input would
appear as source D. See Chapter 5, “Setup Screen,” for details on splitting
IN 3’s audio.
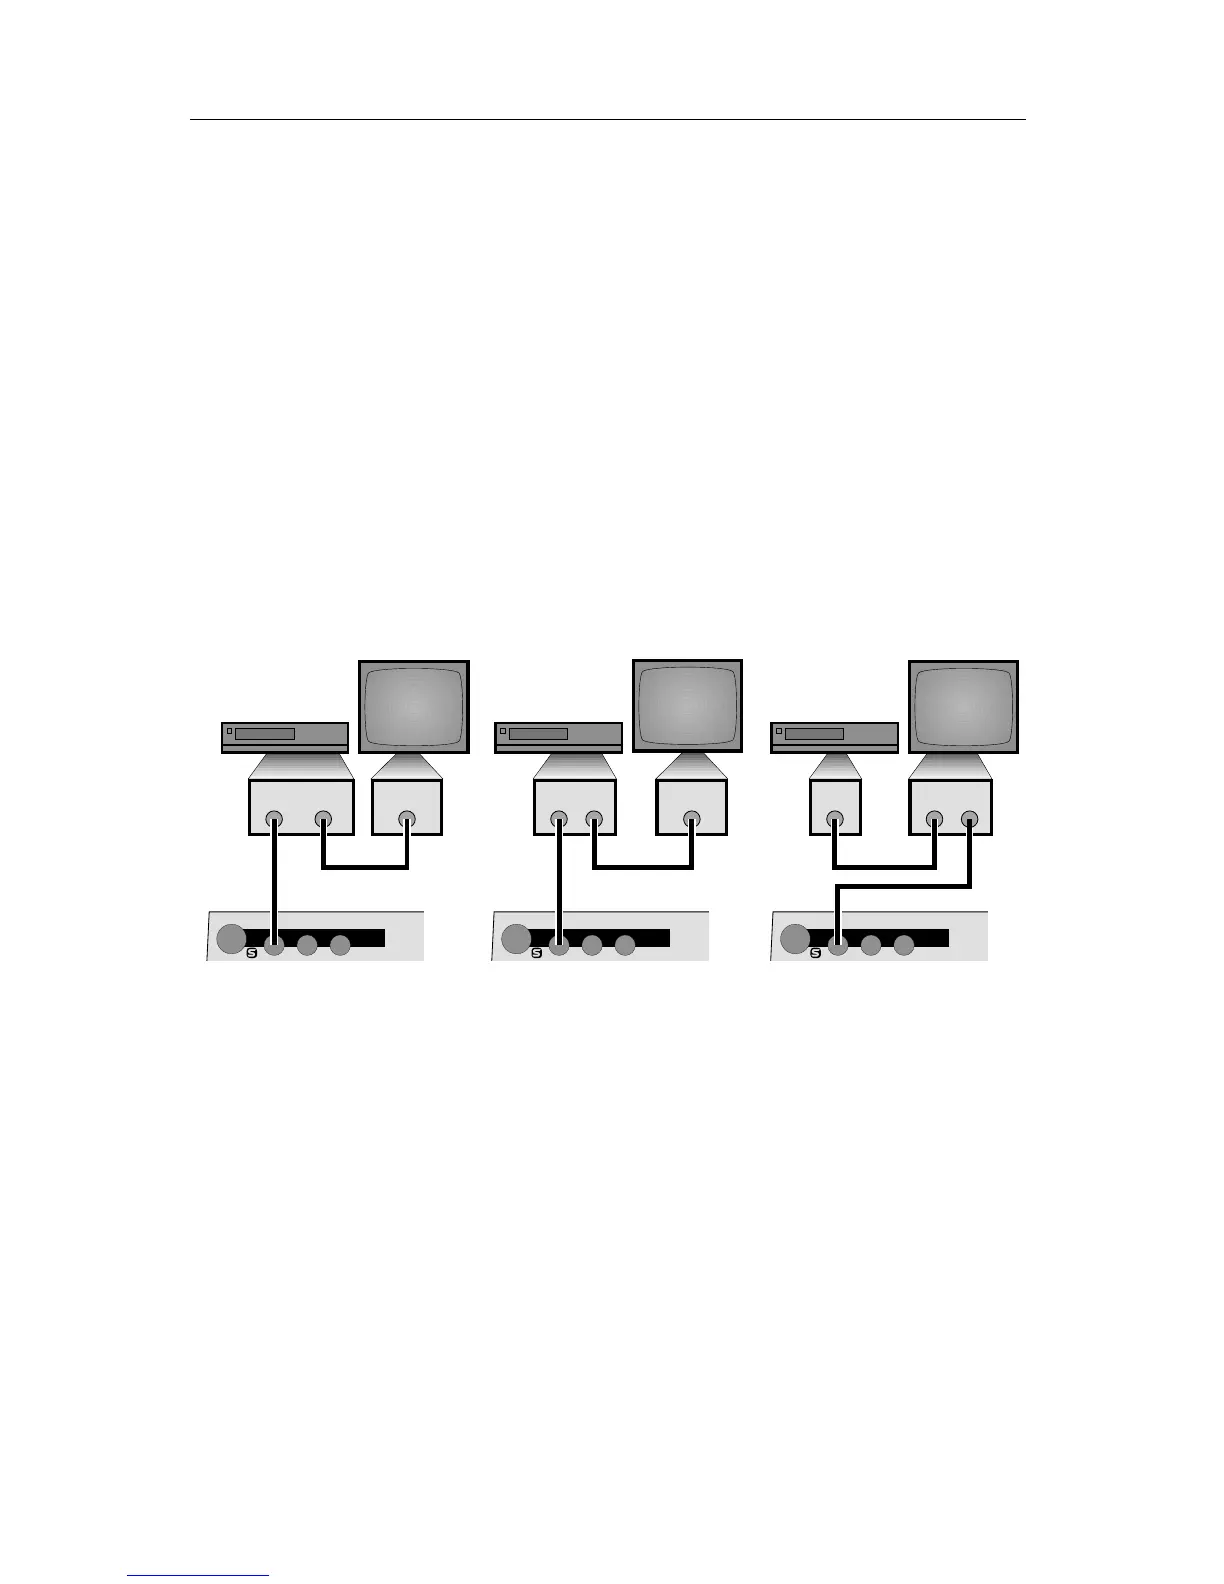
■ Input monitors (optional).
You can add a monitor to each input if you would like a full screen view of
each source. There are three ways to connect an input monitor, depending
on what type of jacks are on your VCRs and monitors:
IN 1IN 1 IN 1
LRVLRV LRV
❸❷❶
VIDEO
OUT
VIDEO
IN
VIDEO
OUT
VIDEO
OUT
VIDEO
OUT
ANTENNA
IN
ANTENNA
OUT
VIDEO
IN
VIDEO
OUT
Three Ways to Add a Monitor to an Input
∂ Most VCRs are equipped with an ANTENNA or RF or VHF or CABLE TV
output, in addition to the VIDEO OUT. You can use that output to connect
to a television’s ANTENNA/CABLE TV input.
∑ Some VCRs have two VIDEO OUT jacks. One can be connected to the
Mixer and the second can be wired to the monitor.
∏ Some monitors have an output as well as an input, allowing the signal to
pass through the monitor to the Mixer.
■ Test the input connections.
When the MX-1 is turned on, it automatically sets up IN 1 to be source A,
IN 2 to be source B, etc. If the Setup screen has not been used to change
these, you should be able to press the CUT buttons and see the sources you
have connected. Press CUT→A and the OUTPUT monitor should show
whatever is plugged into IN 1. Press the rest of the CUT buttons and you
should see the other inputs on the OUTPUT monitor.