© 2010 Viking Preferred Service
20
Diagnostics
Diagnostics and Testing
To enter Built-in Test mode, first enter the Settings mode.
Press and hold the “BUTTON 4” key. You will hear 3 beeps. Continue holding for five seconds, until the
control board signals one confirmation beep.
Then press within five seconds “BUTTON 3”, then “BUTTON 4”, then “BUTTON 3”.
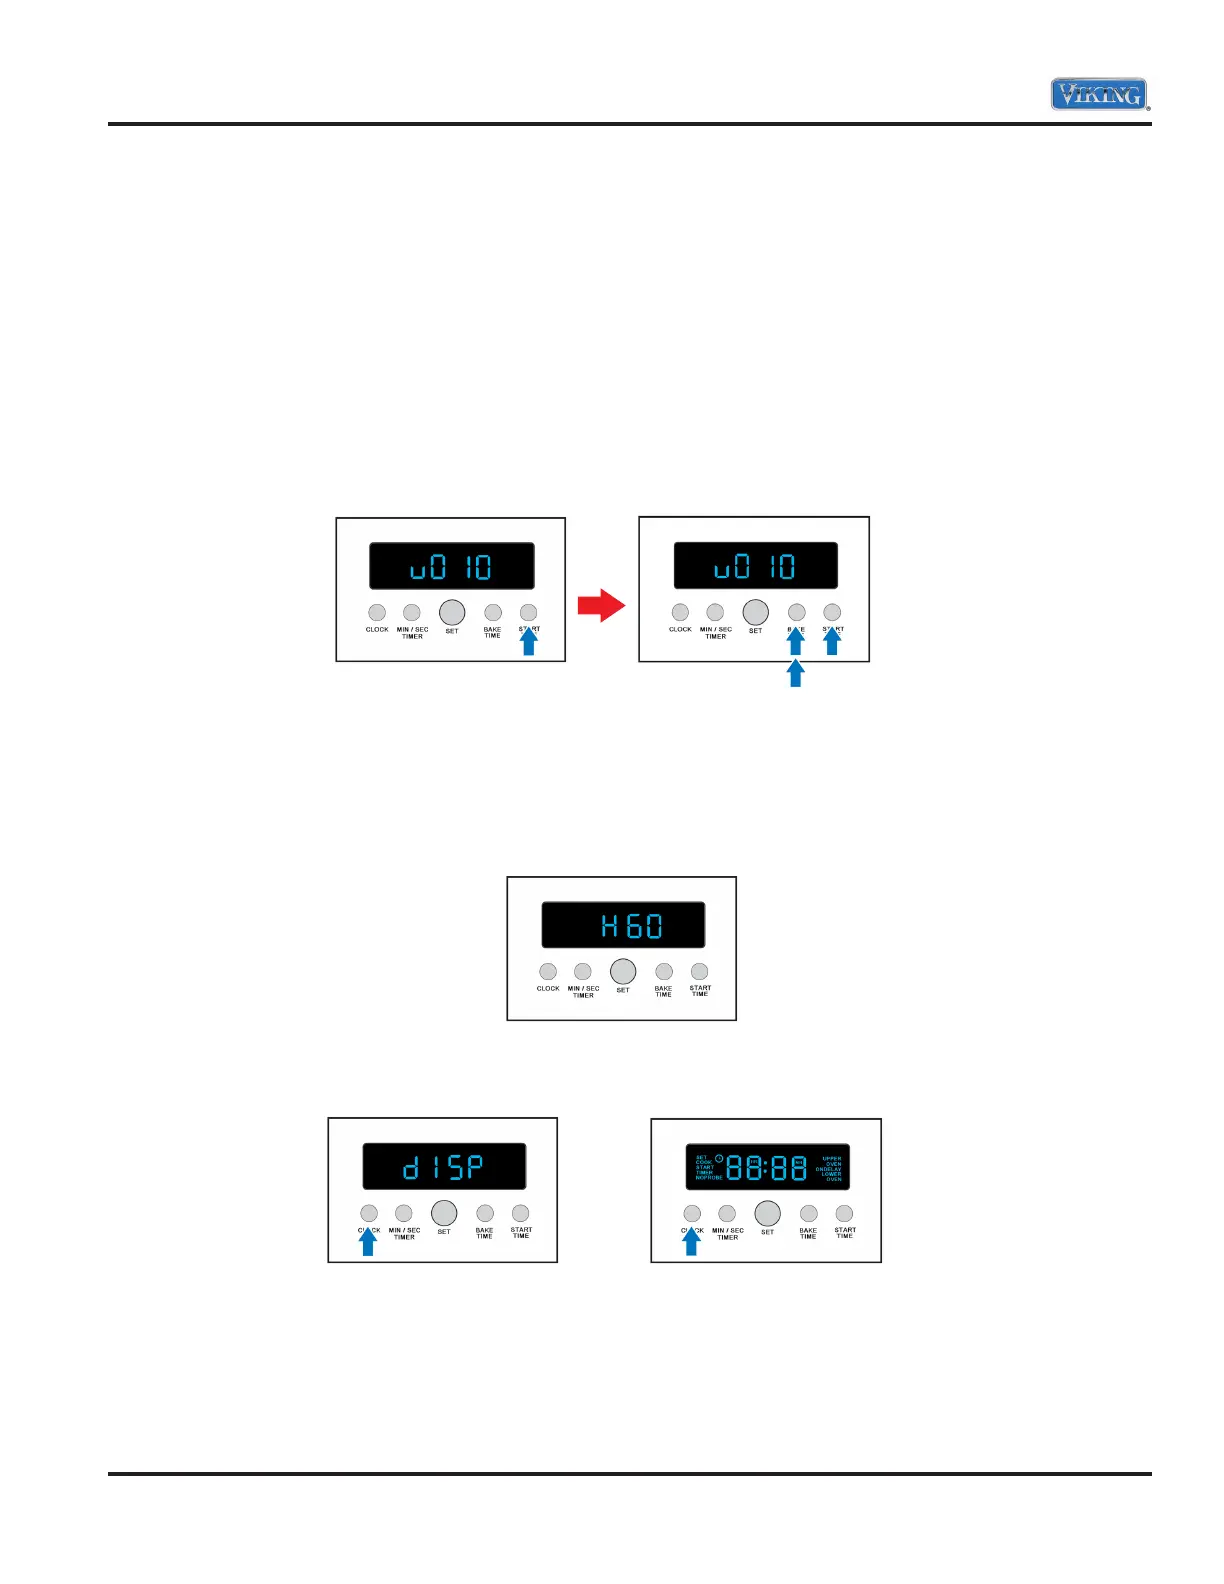
When you have successfully entered the Diagnostic mode, the display will show the TOD2 software version
number (currently Version 10, shown below on left).
Note: Version numbers 4, 5 and 6 will not work with EOC4 versions 19 or higher. Version 9 or higher will
work with EOC4 versions 19 or Higher.
Note: While in the Diagnostic parameter, rotating the “SET KNOB” clockwise or counterclockwise will scroll
through all the testing parameters. When in a particular test, depress “BUTTON 1” to get back to Parameter
Selection to access other test. Depressing “BUTTON 4” at this point will exit the test mode.
When you have successfully entered the Diagnostic mode, rotate the “SET KNOB” clockwise. The display will
show the supplied frequency to the oven (60 Hz is shown below).
Rotate the “SET KNOB” clockwise to the DISPLAY parameter (below left). Depress “BUTTON 1” to activate
all elements within the clock (below right). Depress “BUTTON 1” to exit.
Note: Display test implemented in version 11.