~ 21 ~3. Machine Functions
Stitch Length and Width/Needle Position Controls
Auto/Default settings
Your sewing machine will produce most of your stitching
requirements at an Auto/Default Stitch Length and Width. When
a pattern is selected, it will automatically sew at default settings of
stitch length, width and needle position for straight stitch.
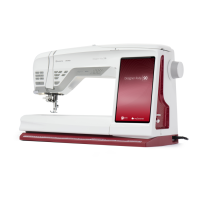
Auto (preprogrammed) default settings are easily determined
by moving the Stitch Length and Width / Needle Position
Control Knob. The LED Indicator next to the Control
will light in orange without blinking and a beep will sound
indicating you are at the Auto / Default Position.
Manual settings
Once you have determined the Auto / Default position you
can manually change the length, width or straight stitch needle
postition according to your preference. Starting at the Auto
position, slide the control knob left or right to locate each of
the potential adjustments. At each manual adjustment point,
the LED will blink 3 times in green and a beep will sound.
The LED will light in red beyond the potential adjustment range
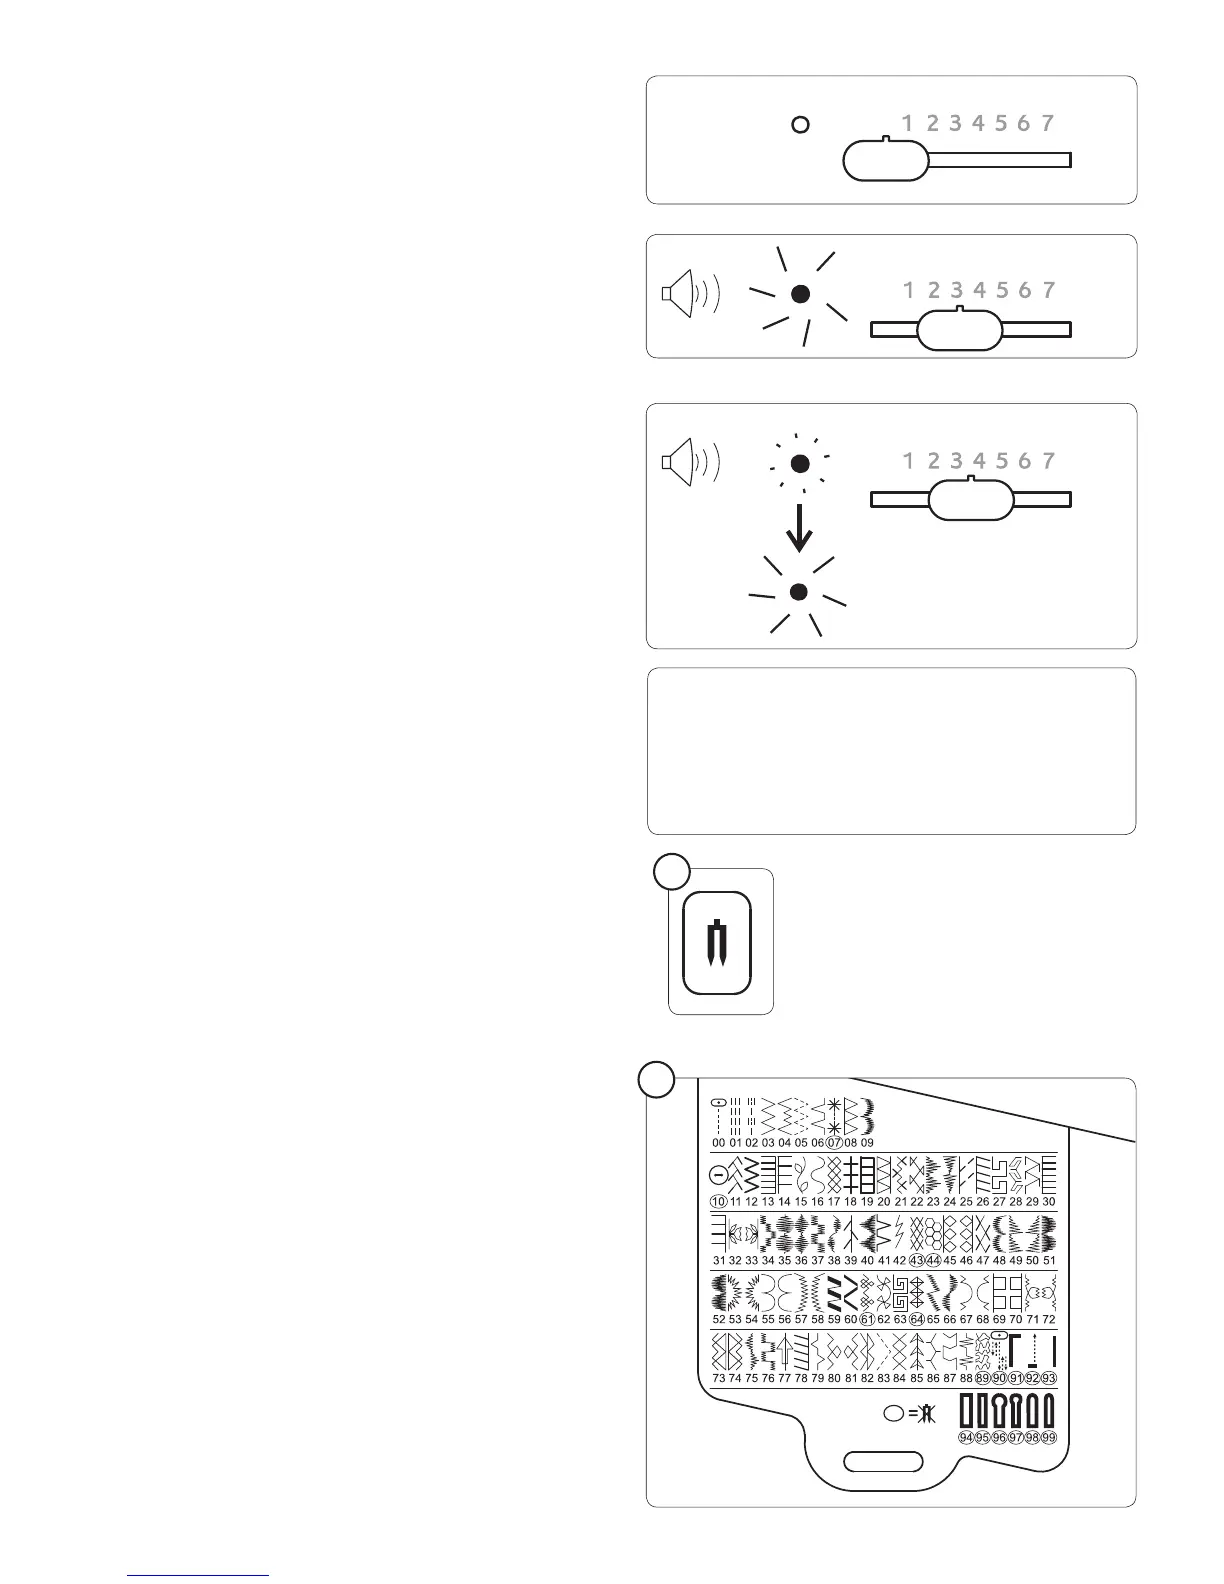
Twin Needle Safety (1)
When using twin needles, push the twin needle mode switch
regardless of the stitch you selected. Doing so will reduce the
stitch width automatically and save broken needles and possible
damage to your machine.
While the switch is pushed and lit red, patterns with circled
numbers in the pattern reference guide are skipped and cannot
be selected with the numerical selection buttons, and a beep
will sound when selecting buttonhole pattern with the direct
selection button.
Note:
1. Always select the Twin Needle Mode prior to selecting a pattern. This
will preclude any possibility of the twin needle breaking.
2. Turning off the machine returns the machine to normal sewing mode.
Twin Needle is only active when the Twin Needle Switch is lit red.
Stitch Reference Guide (2)
Stitches in dark blue – stitch length and width can be changed.
Stitches in pink – stitch length and width are À xed.
Stitches in black – buttonholes
Stitches with circled numbers cannot be sewn with a twin
needle (optional).
Note:
1. Some stitches offer more opportunities for manual adjustments
than others.
2. An alternate method of determining available adjustments is
to move the control knobs while sewing slowly.
2
1