~ 45 ~5. Embroidery
START EMBROIDERING
When embroidering, you need to have your machine connected to a PC (See below for system requirements). The
embroidery designs are selected and transmitted to the machine using a special embroidery software and a USB-cable. See
below for instructions on how to connect the machine and start up the embroidery software. These instructions must be
followed precisely to start-up correctly, otherwise you will get a ”Transmission Pending” error message.
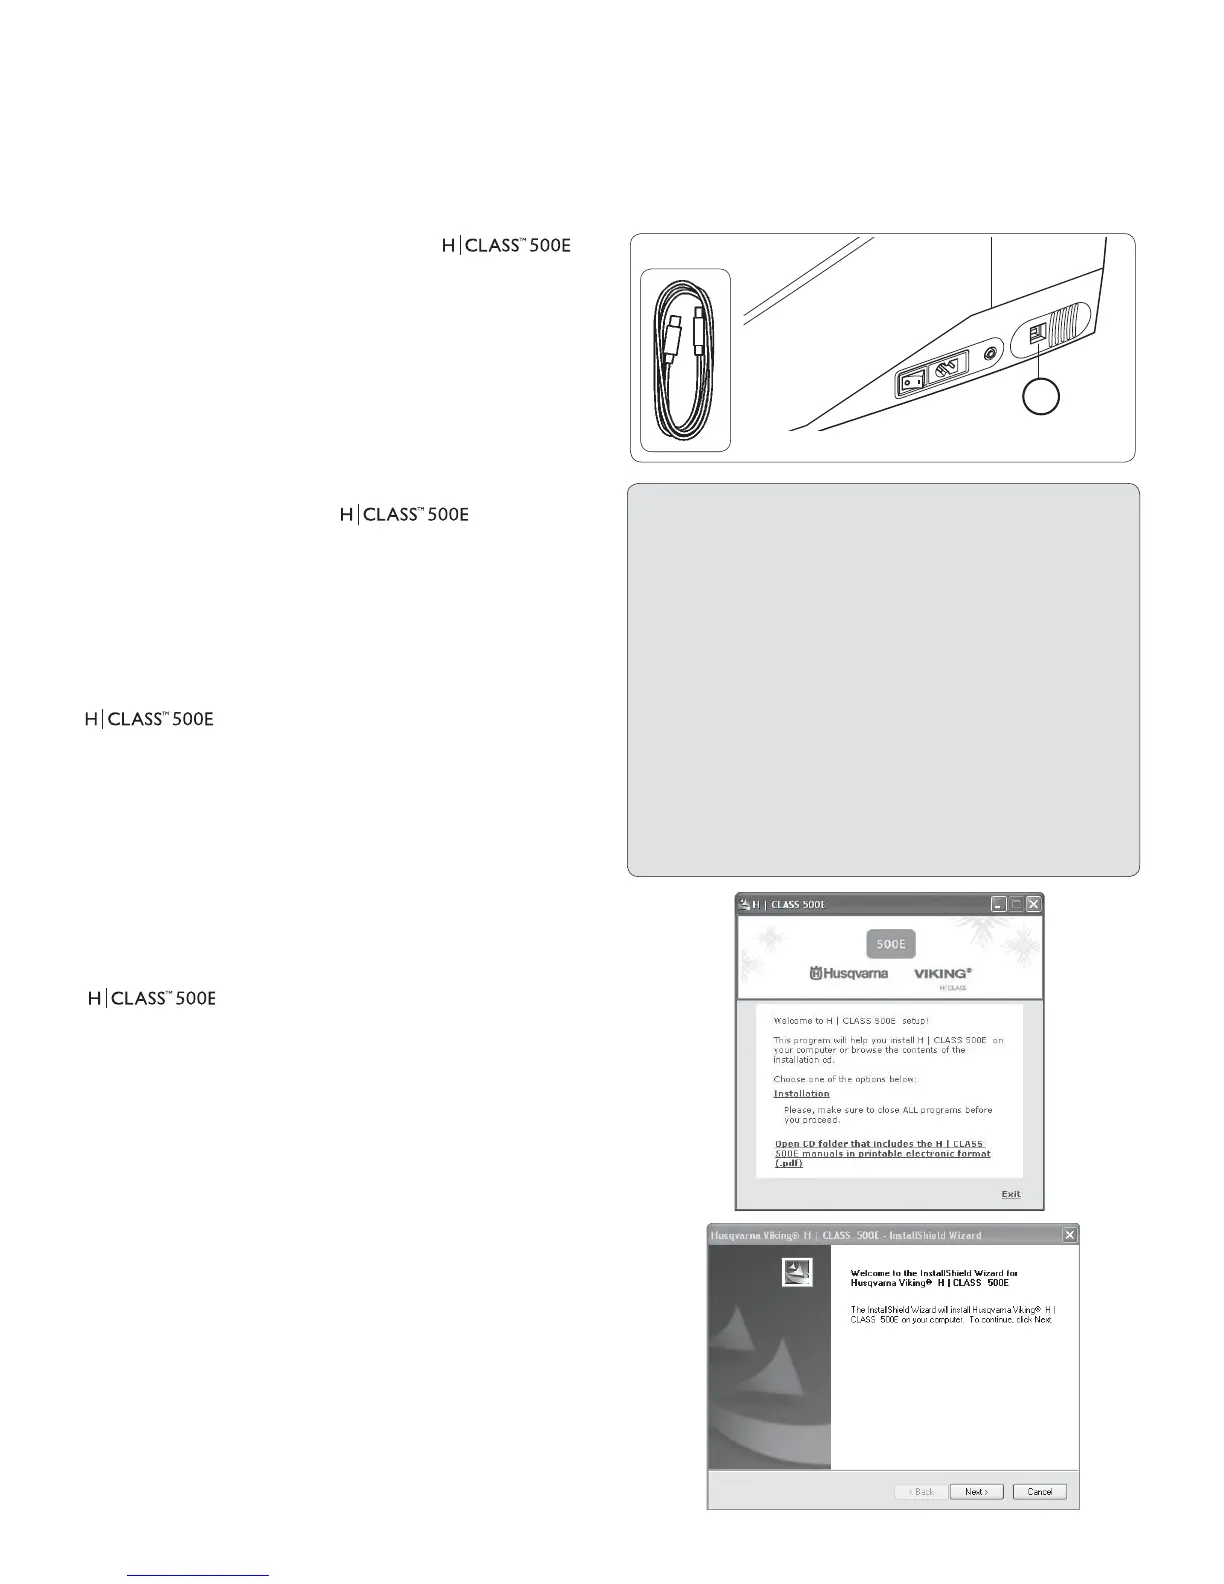
Start your computer, but do not open the
software. Next attach the embroidery unit to your sewing
machine and connect the USB cable between your
computer and sewing machine (1).
1. Turn on your machine. Make sure the needle is in its
highest position by turning the hand wheel towards you.
2. Attach the hoop that you plan to work with to your
embroidery unit.
3. Double click on the embroidery software icon on your
PC desktop to open up the
embroidery
software (see below for installation guide of the
embroidery software).
4. You are now ready to select and transmit a design to
your machine.
Important: If you have embroidered using the small hoop, and you are
now ready to use your large hoop. Turn off your machine, close the
software and then turn OFF your computer. Wait
for a moment, turn on your computer and then follow steps 1 through
4 above.
USB-cable
1
INSTALLATION OF
EMBROIDERY SOFTWARE
In order to start using the software on your PC you need to
install the contents of the CD to your PC. This procedure
is refered to as “installation procedure”. Please follow the
below listed instructions in order to successfully install the
embroidery software to your PC.
The software comes on a CD-ROM disc. Insert the disc
into the CD-ROM receiver in your PC (In most personal
computers the default drive setting for a CD-ROM drive is
“D:”).
A welcome screen appears giving you two choices, either
installation of the the embroidery software or opening of
the software User's Guide. Click on "Installation" to start
the installation process.
After some seconds, the Installation procedure of the
software will start automatically. (In case this will not occur after
a short while, you can run the installation procedure manually by
going to the “Start” option of Windows, select “Run”, type “D:\
HCLASS_Start.exe”and click on OK.)
The step by step installation of the software begins with
the Welcome window. You can always stop the installation
procedure by clicking on the “Cancel” button.
Click on “Next” to move on the next screen.
System Requirements
You can install and use the software on a PC which fulÀ lls at
least the speciÀ cations listed below:
• PC with 1 GHz Intel or AMD processor
• Windows OS: Windows 7 /XP / Vista
• 1 GB of RAM (or more recommended)
• CD-ROM drive
• 500 MB (or more recommended) of available
hard-disk space for installation
• Color standard (1024x768 pixel; 65,000 colors
recommended) VGA adapter connected with a
color VGA monitor
• Microsoft compatible mouse
• USB 1.1 / 2.0