~ 43 ~5. Embroidery
Connector lid
Handle
tab
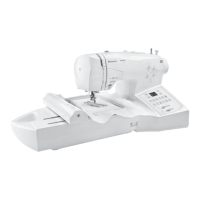
REMOVE THE EMBROIDERY UNIT
• Turn off the power to the machine.
• Remove embroidery hoop from machine
(see page 44).
1. When holding the handle of the embroidery unit,
carefully slide it towards the left while pressing release
lever.
Note: Do not pull the embroidery arm when removing the embroidery
unit.
2. First insert the tab at the bottom of the connector lid,
then push in the top of the connector lid with your
À nger as illustrated.
Release lever
Release lever
2
1
Hoop adjusting screw
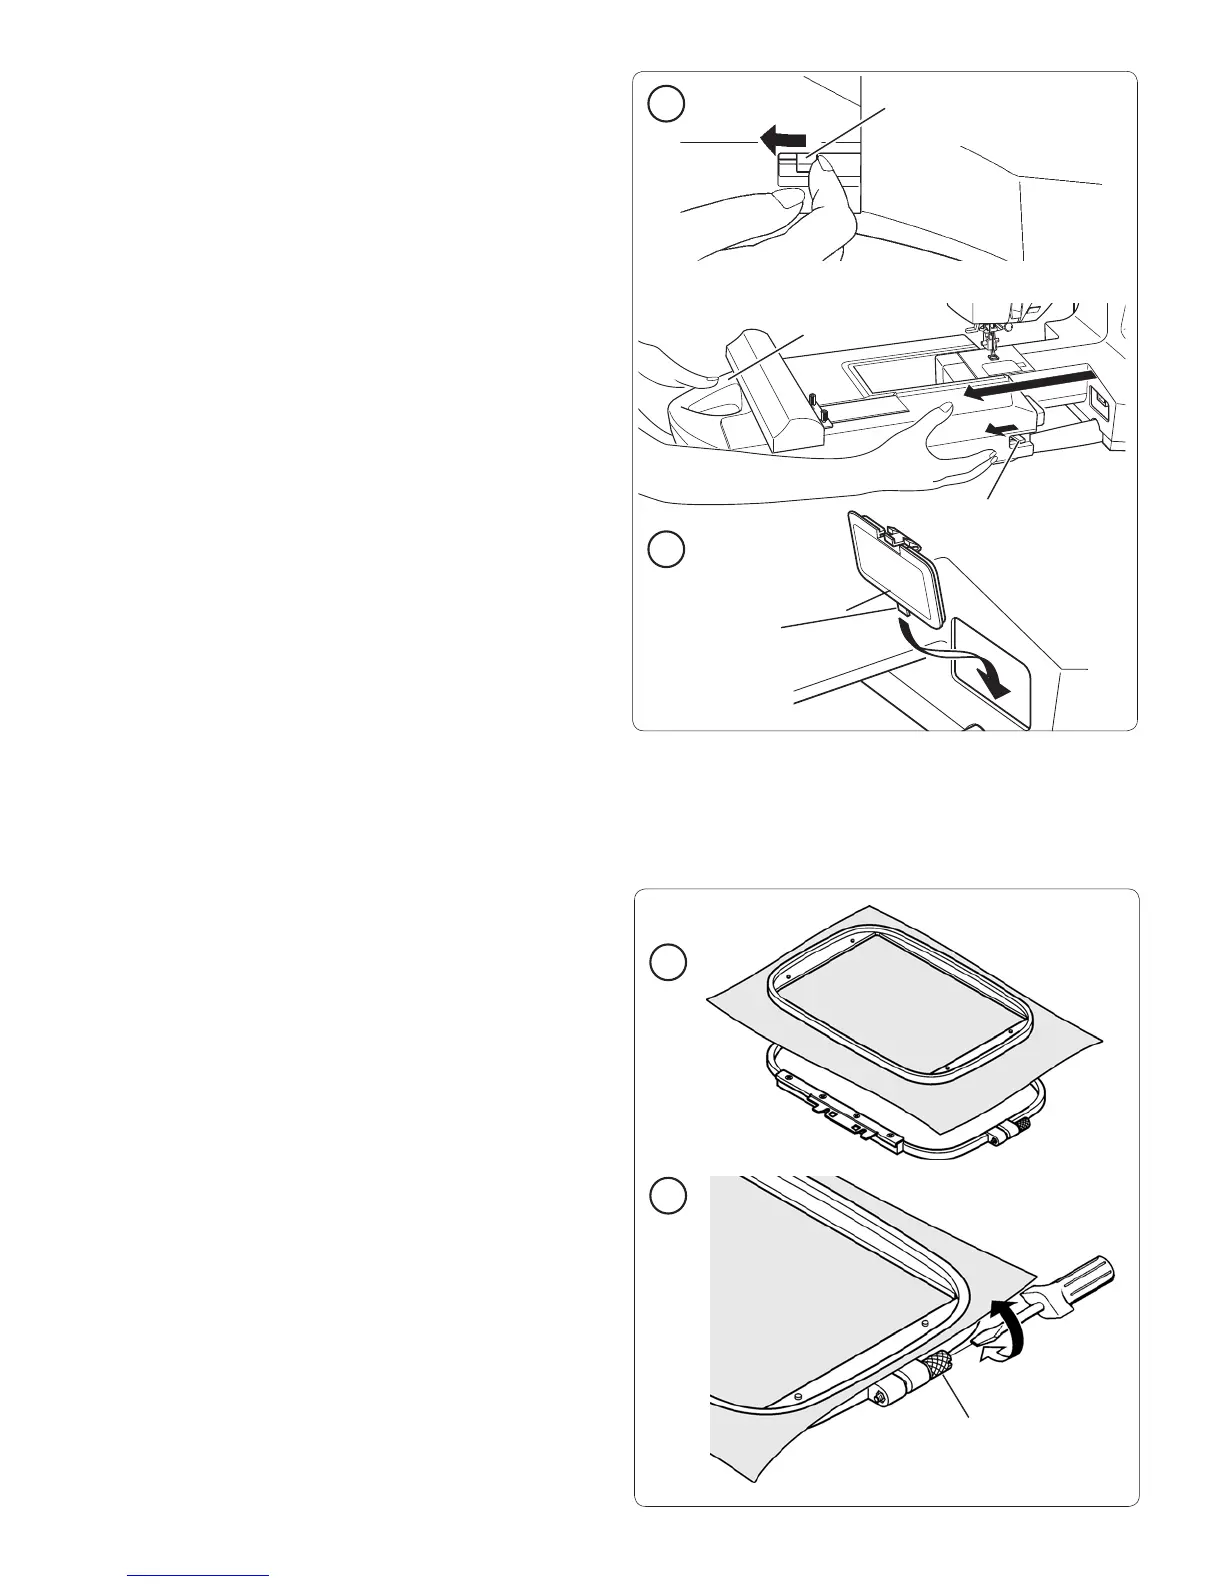
HOOP THE FABRIC
Two hoops are supplied with the machine offering an
embroidery surface up to 5"x7" (§ 13x18 cm).
For the best embroidery results, place a layer of stabilizer
beneath the fabric. When hooping stabilizer and fabric
make sure that they are smooth and securely hooped.
1. Loosen the hoop adjusting screw on the outer hoop and
remove the inner hoop. Place the outer hoop on a À rm
Á at surface.
Place the stabilizer and fabric, with the right sides facing
up, on top of the outer hoop. Place the inner hoop on
top of the fabric. Push the inner hoop À rmly into the
outer hoop.
2. Adjust the pressure of the outer hoop by turning the
hoop adjusting screw.
Tighten the hoop adjusting screw, but do not over
tighten it.
The fabric should be taut in the hoop for the best results.
Do not stretch the fabric in the hoop, it can cause
distortion to the embroidery.
2
1