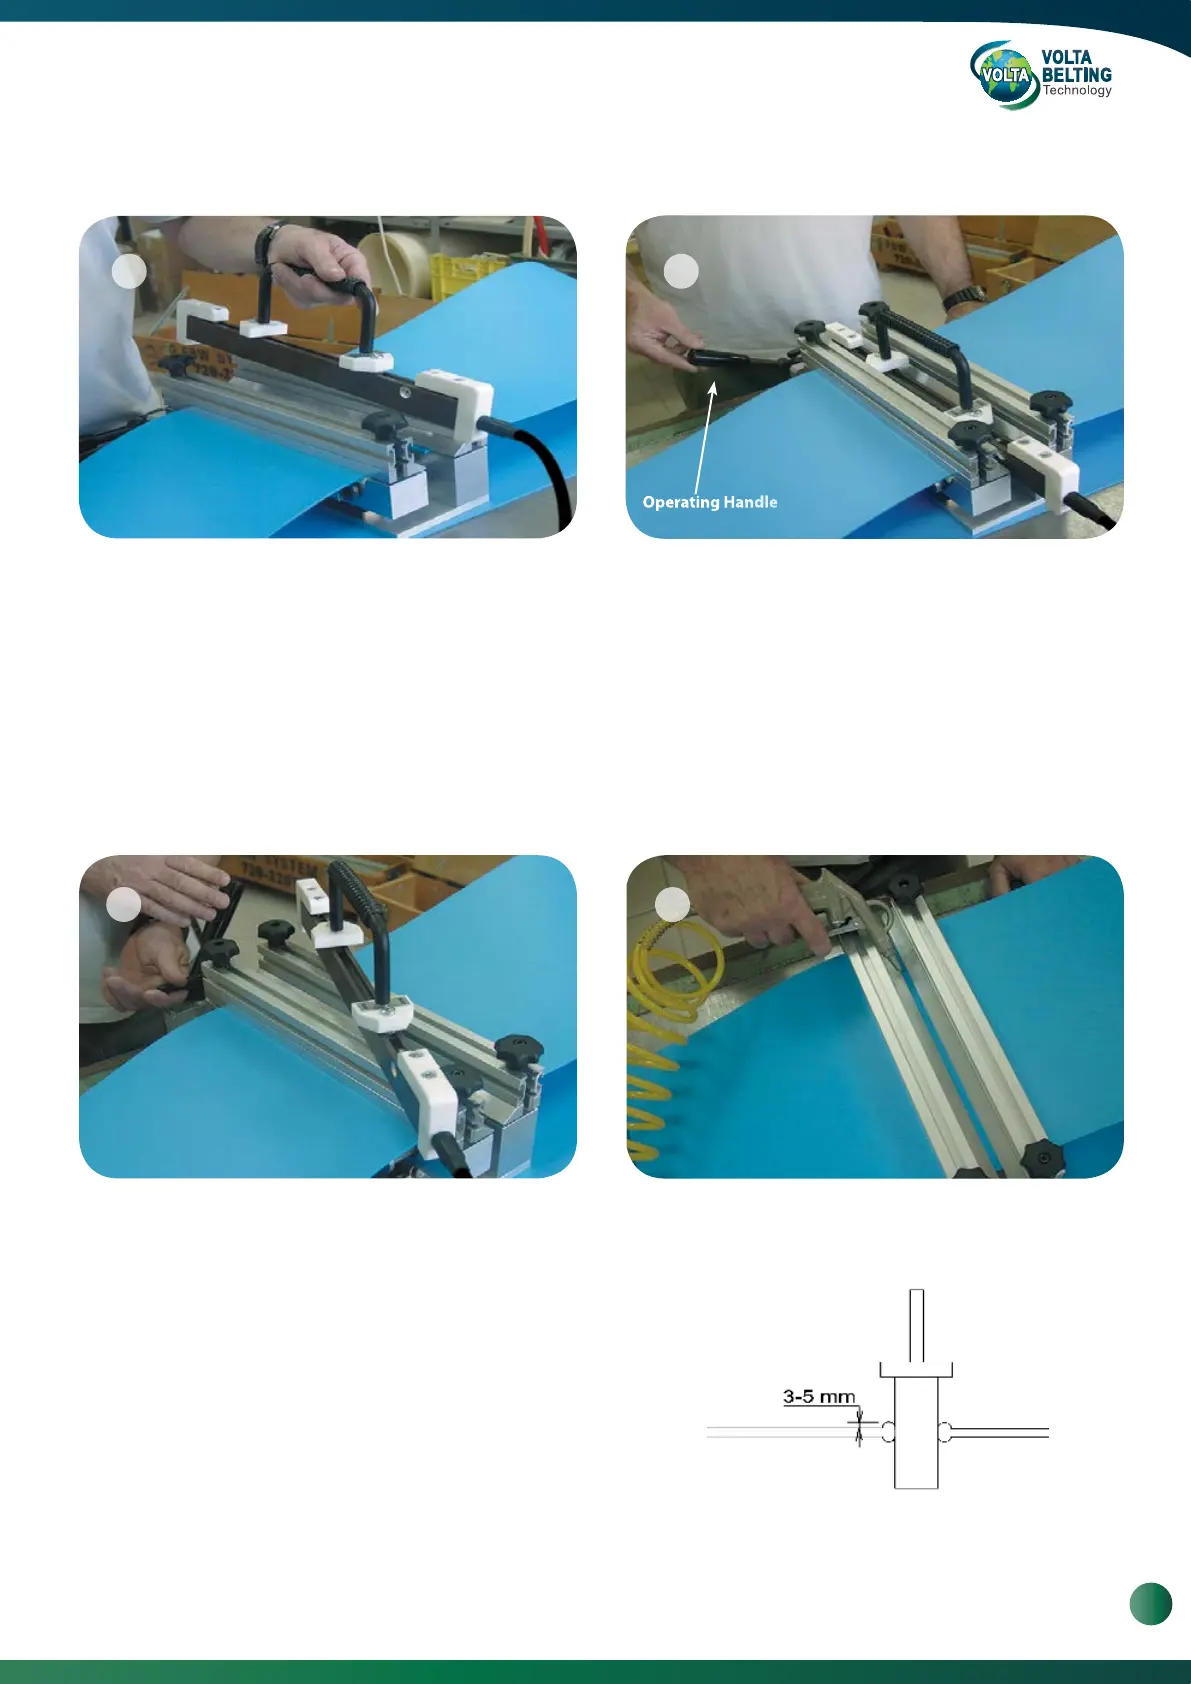
Clean the belt and Welder. With the Welder cable
away from the operator, place the pre-heated Welder
between the two edges of the belt. Position the
Welder over the Pliers guide bars.
Using the Operating Handle bring the two belt ends into
contact with the Welder. Apply very gentle pressure
and observe the melting of the material along both
sides of the Welder. Do not hold the Welder during the
welding process. The Welder should be free to move
with the belt. When the material is evenly melted along
the length of both sides of the Welder, move the
Operating Handle to open the Pliers. Quickly remove
the Welder and close the Pliers. This operation should
be performed quickly but without too much force.
With the belt ends pressed together, lock the Adjusting
Lever. The weld requires approximately 5 minutes to
cool. The time required for cooling depends on the
thickness of the belt and the ambient temperature.
When removing the Welder, pull it straight up in a quick
movement. This will prevent the welder from pulling
melted material off of the belt ends.
The cooling process can be sped up by directing
compressed air along the weld.
a. b.
c.
d.
3.4. Welding the Belt
Amount of excess when belt ends
are properly melted.
1211
13
14
11
www.voltabelting.com
 Loading...