4.4. Welding Cresent top (CT)
Required Tools:
You must be familiar with the instructions for welding with FBW before continuing
with this procedure.
FBW Welding Kit
CT Cutting Bar for all FBW welding tool sizes Cat. # 81626365
Wood Chisel 6 mm (¼”)
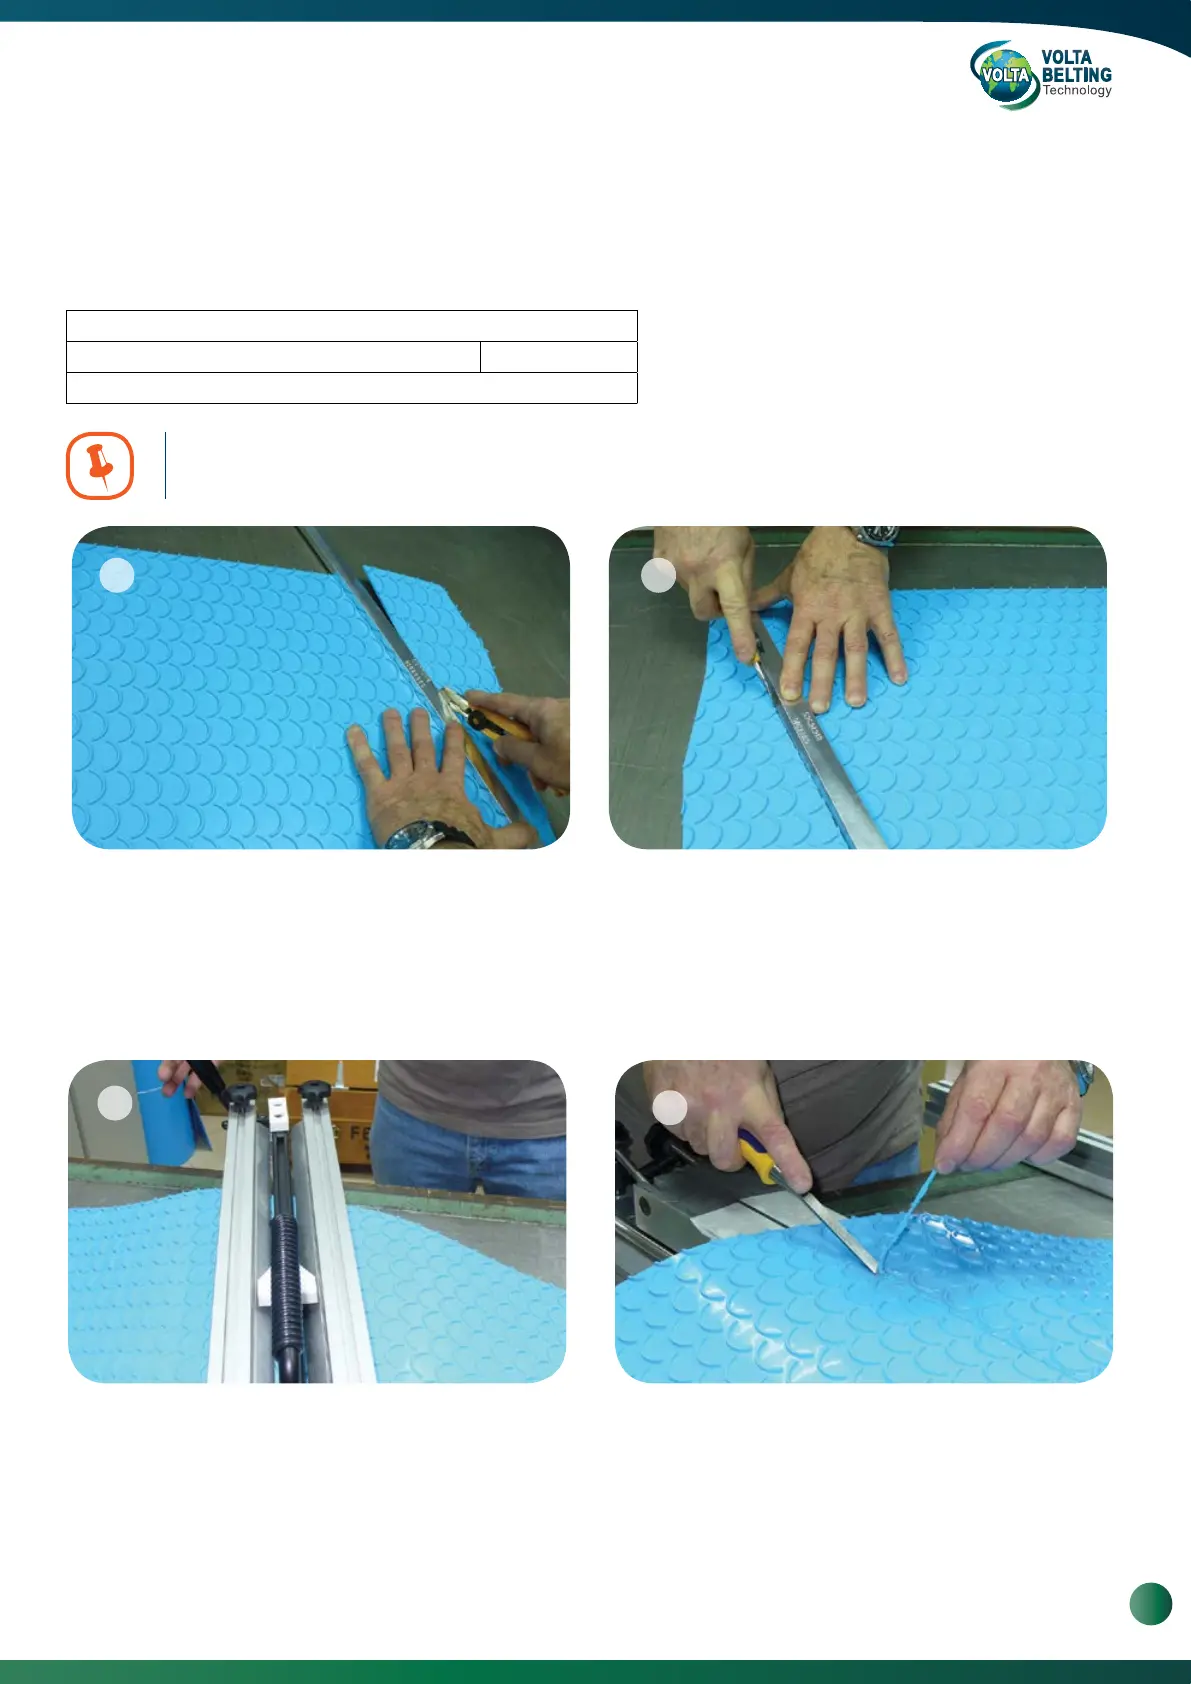
Go to the other side of the belt and insert the Cutting Bar
as close to the required size. Make sure that the scrap and
the “Cutting” engraving (on the bar) are on your right-hand
side. To carry out this step, please stand on the opposite
side of the belt. Add or deduct from the length of the belt
according to the position of the pattern.
Place the belt with the pattern facing to the left as shown
in the picture. Insert the Cutting Bar at an angle between
the patterns when the “Cutting” engraving (on the bar) and
the belt scrap is on the right-hand side. Cut the belt with a
sharp knife. If the belt is wider than the adapter, cut the
belt in two steps.
The weld is performed at an angle alongside the crescent pattern. There will be a 20 mm difference on the final length of
the belt according to the cutting line between the patterns.
1 2
21
22
Weld the belt according to the instructions as described
in the FBW Intruction Manual (Page 13). When welding
belts made of L material, be careful and use less
pressure during the melting process and tightening after
melting.
After cooling the belt, trim the weld with a wood chisel
when the flat side is facing the belt. Use liquid soap to
improve the cut if required. Turn the belt and trim the
bottom weld as usual. Check the weld and perform
“cosmetic” finish if necessary. A good weld will be free of
cracks and defects.
4
3
17
www.voltabelting.com
 Loading...