Power Switch
Operating Handle
Cross Bar
Knobs (4 each)
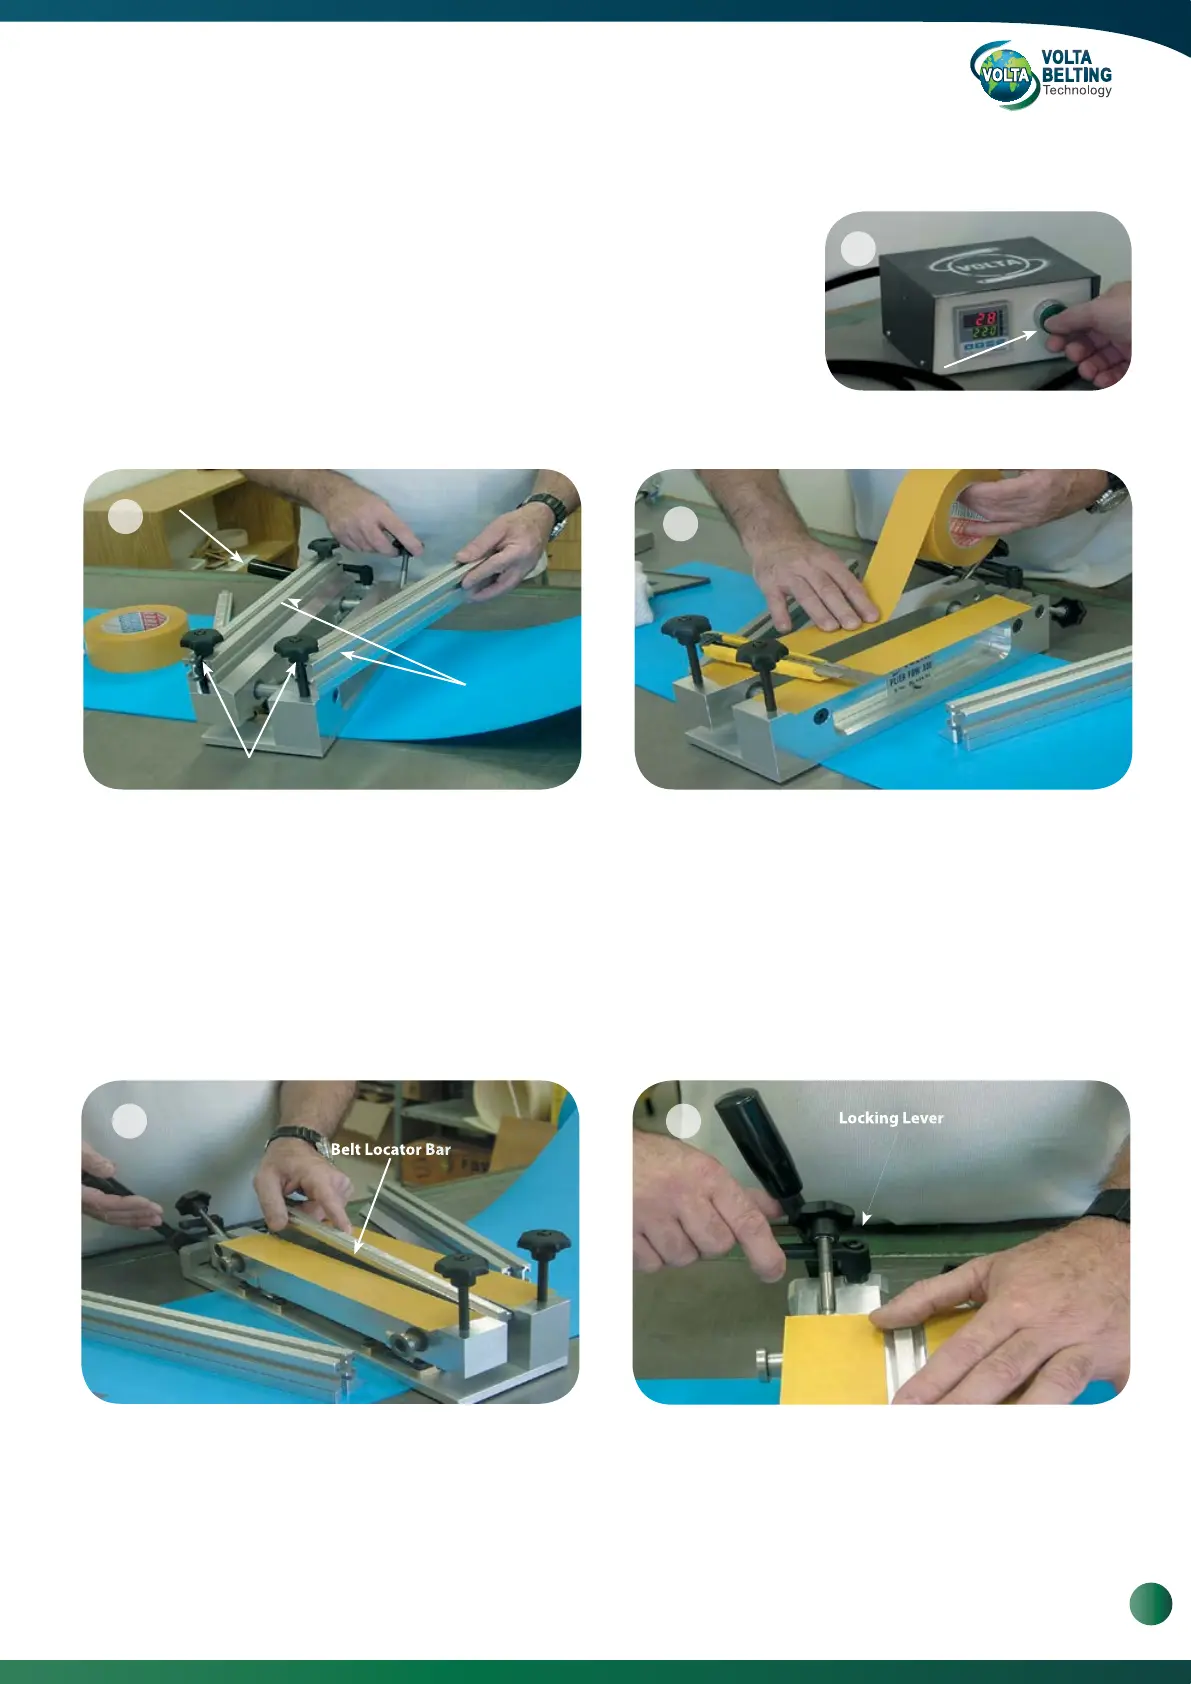
3.1. Preparing the Temperature Controller
a.
3. Welding Instructions
a. Position the Pliers with the Operating Handle closest to
you.
b.
c.
d.
Apply strips of good quality double-sided tape on the
upper surfaces of the Pliers’ jaws.
e.
f.
3.2. Preparing the Pliers
Connect the Welder to the Controller, and then connect the main power to the
power supply. Turn the Power Switch to “ON” and allow 15 minutes for the
Welder to warm up and the temperature to stabilize. The Welder is supplied
after factory adjustment and should not be altered unless there is a problem.
The Temperature Controller should be adjusted to 220°C (428°F) for all belt
types. If you need to readjust the temperature, please refer to Page 32.
Position the Locator Bar between the jaws of the
Pliers. Place the Locator Bar in the center of the
Pliers and over the Pliers Shafts. The belt locator has
reference marks for belt alignment, Each side of the
Belt Locator Bar has notes for different belt
thicknesses. One side is marked for 1.5 to 2.5 mm
belts and the opposite side for 3 to 5 mm belts.
Ensure that you have the correct side facing up.
Move the Operating Handle to close the Pliers jaws
and lock in place using the Locking Lever. (By pulling
the lever up you can adjust the handle position).
Loosen the 4 knobs securing the Crossbars. The two
knobs closest to the Operating Handle are hinged
and can be swung out and down to remove the
Crossbars.
Remove the Crossbars and set them aside. FBW
models 1301, 1701 & 2101 are equipped with magnetic
crossbars. To remove these crossbars, slide or roll
them off the Pliers.
2
1
3
54
9
www.voltabelting.com
 Loading...