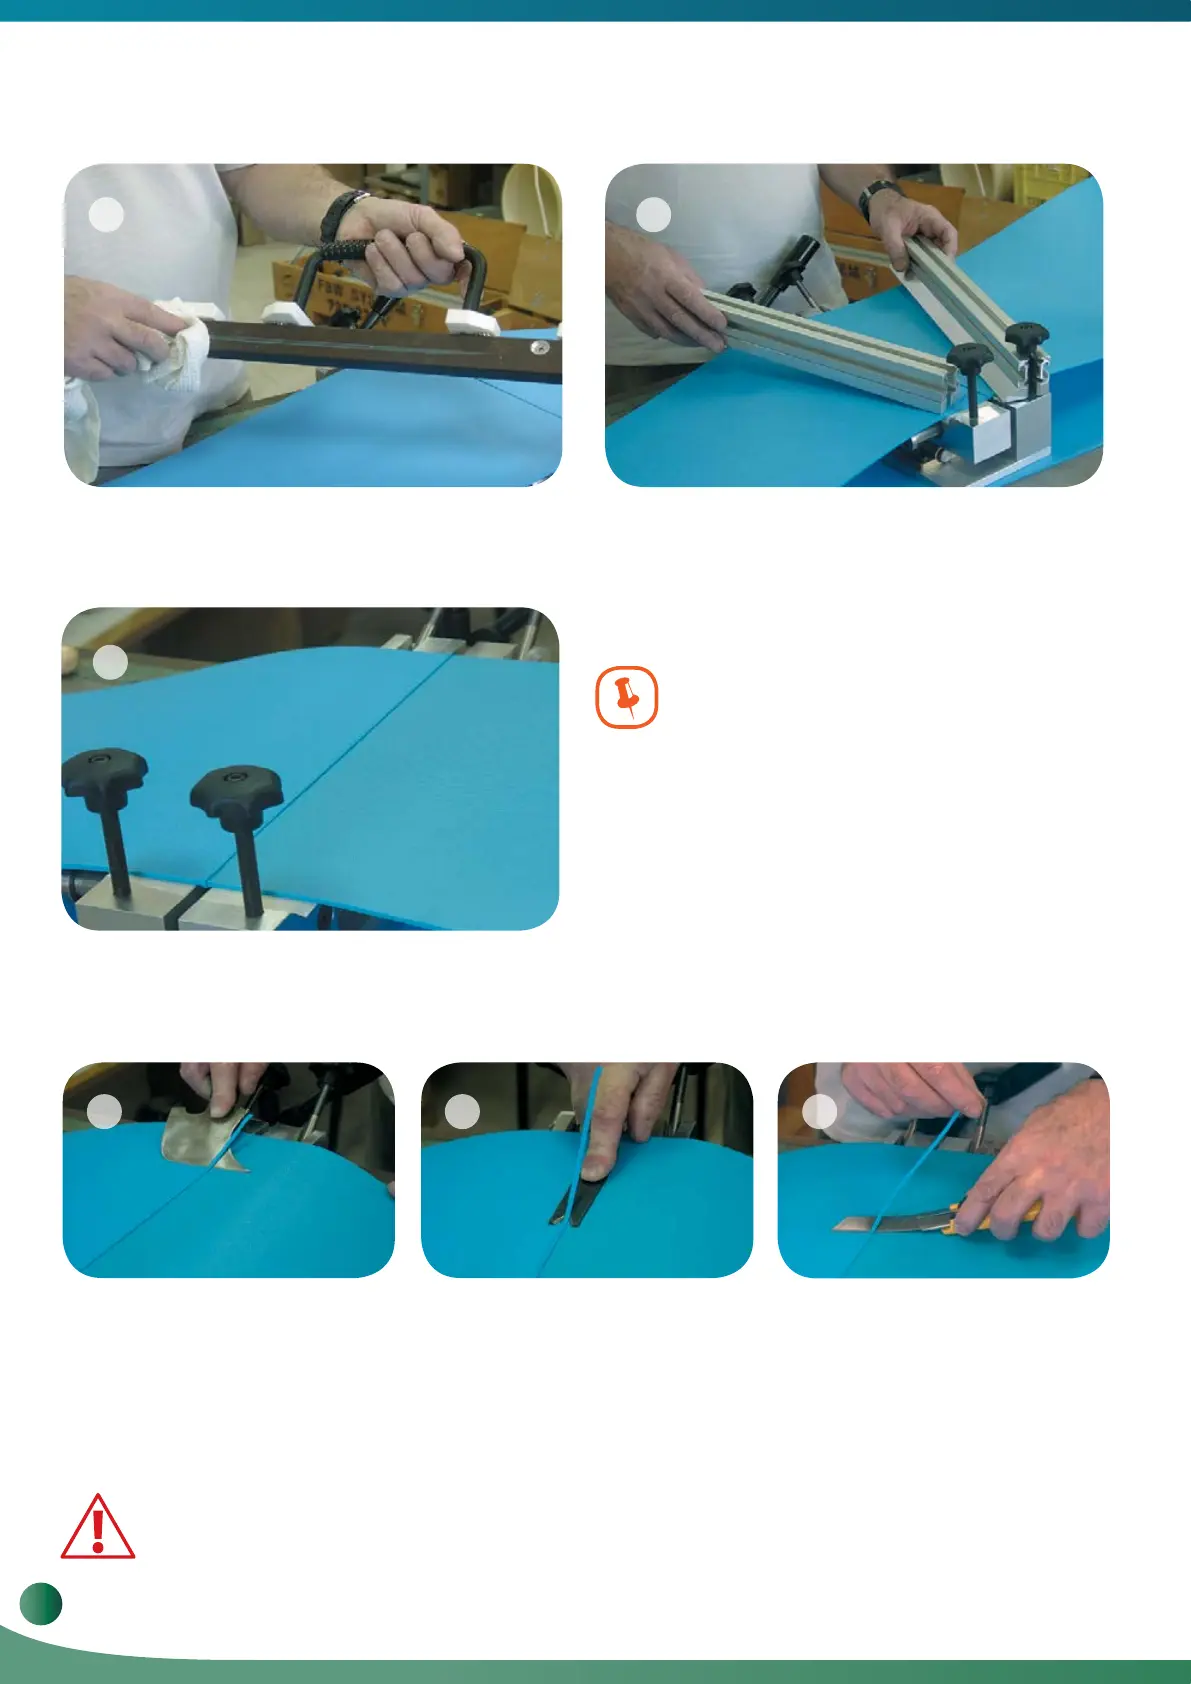
Clean the Welder using a clean, dry, lint-free soft Cotton
cloth while the Welder is hot. Leaving material on the
Welder will damage the Welders surface and reduce the
efficiency of the Welder and the quality of the welds.
Separate the belt from the Pliers and turn it over placing
the trimmed surface on the Pliers. Trim the excess from
the bottom of the belt.
Check the splice quality by bending the belt in both
directions. Check the quality of the splice across the
width of the belt and on both sides. A good weld will be
free of cracks and defects. In case of a bad splice repeat
the above steps (this will cause the loss of about 5 mm
of the belt’s length).
The amount of pressure required to secure the ends of the
belt depends on the thickness and type of material being
welded.
During welding, air bubbles are formed in the melted ends.
The bubbles should be pressed out during the operation.
If too much pressure is applied during welding, the heat will
penetrate only a very narrow section along the edge of the
belt. When the Pliers are closed this small amount of melted
material will be pushed out. To ensure a quality weld, the
heat must penetrate a wide section of the belt.
Using Leister Knife to trim
excess from weld
Using V-trimmer to trim
excess from weld
Using Utility knife to trim
excess from weld
e.
f. When the belt is cooled, leave the Pliers closed and
remove the two Crossbars.
g. Welded belt with excess.
3.5. Trimming and Checking the Weld
a.
Using a Leister Knife or other appropriate tool, trim the excess from the top of the belt.
c.
b.
The following factors must be kept in mind
when welding:
•
•
•
15 16
17
18 19 20
Use a finger guard when engaging in various activities that involve the use
of sharp objects. Handle the knife with care. Cut away from your body, not toward it.
12
Volta Belting Technology Ltd.
Welding & Fabrication Tools FBW-Flat Butt Welding System Model II
 Loading...