40
Piston and connecting rod
Piston and connecting rod,
assembly / dismantling
(13A-05)
1
Remove the piston rings, operation 13A-04.
2
Remove the snap rings holding the piston pins in
position.
3
Make a temporary marking on the piston to display
the cylinder number as given on the connecting rod.
Make the marking on the piston on the same side
as the marking on the connecting rod big end to en-
sure that they are correctly installed together.
4
Press out the piston bolt by hand. If the piston bolt
is fixed, heat the piston to 40-50°C to allow the pis-
ton bolt to be removed.
5
Clean the hole in the piston pin bushing and lubri-
cate with fresh engine oil.
6
Install a new snap ring in one of the piston bolt posi-
tions on the piston.
7
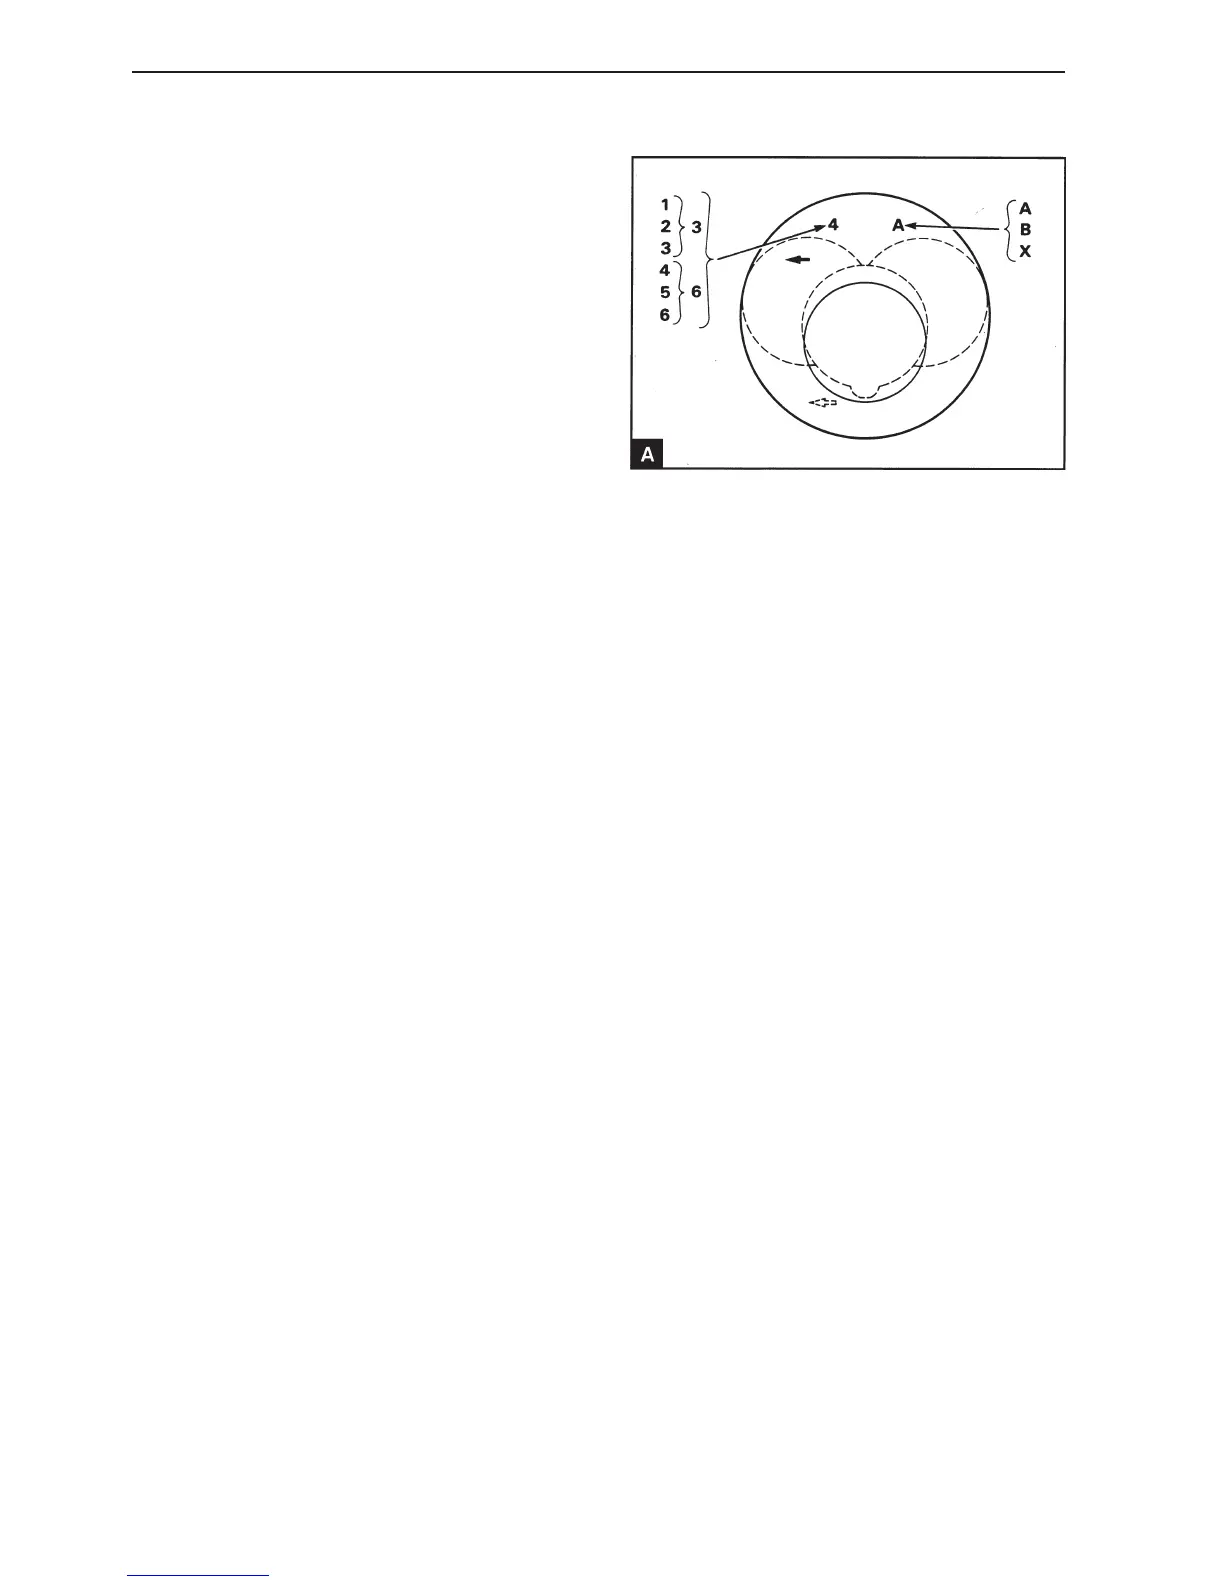
If the original piston is used, ensure that it is in-
stalled on the correct connecting rod and the origi-
nal cylinder. If a new piston is installed, ensure that
it is the correct height class. There are six different
height classes in production. The classes are desig-
nated with numbers which are stamped on the top of
piston (A). Number 1 is the highest piston and
number 6 the lowest. Only classes 3 and 6 are
available for service purposes. Class 3 must be
used if the original piston has the markings 1, 2 or
3. Class 6 must be used if the original piston has
the markings 4, 5 or 6. Two different diameter
classes ”A” and ”B” are also in production. Only pis-
ton A with the smaller diameter is available for the
standard cylinder diameter for service purposes. A
class (X) piston is accessible for cylinders which
have been bored out by 0.50 mm oversize in con-
nection with service repairs. The diameter classes
are stamped on a machined plate in the right upper
rear edge of the cylinder block (16A-04/C). If a cyl-
inder bore has been bored out to oversize in a serv-
ice repair, the letter for the original class should be
stamped with an (X).