47
Crankshaft assembly
Rear sealing ring, replacement
(14A-03)
Special tools: 885030, 885034, 885035
1
Disconnect the battery
2
Remove the drive components from the rear end of
the engine.
3
Remove the flywheel, operation 21A-01.
4
Check the sealing ring position in the flywheel hous-
ing, in the separate sealing ring housing or in the
back plate. If the sealing ring rear surface is edge
to edge with the rear housing surface, the new seal-
ing ring can be pressed further into the housing,
thus displacing the sealing rings sealing position on
the crankshaft flange. This is not possible if a 10
mm thick back plate is installed. If the crankshaft
flange is worn and a new sealing position is not pos-
sible, remove the crankshaft and machine the
flange, see Workshop Manual “Technical Data”.
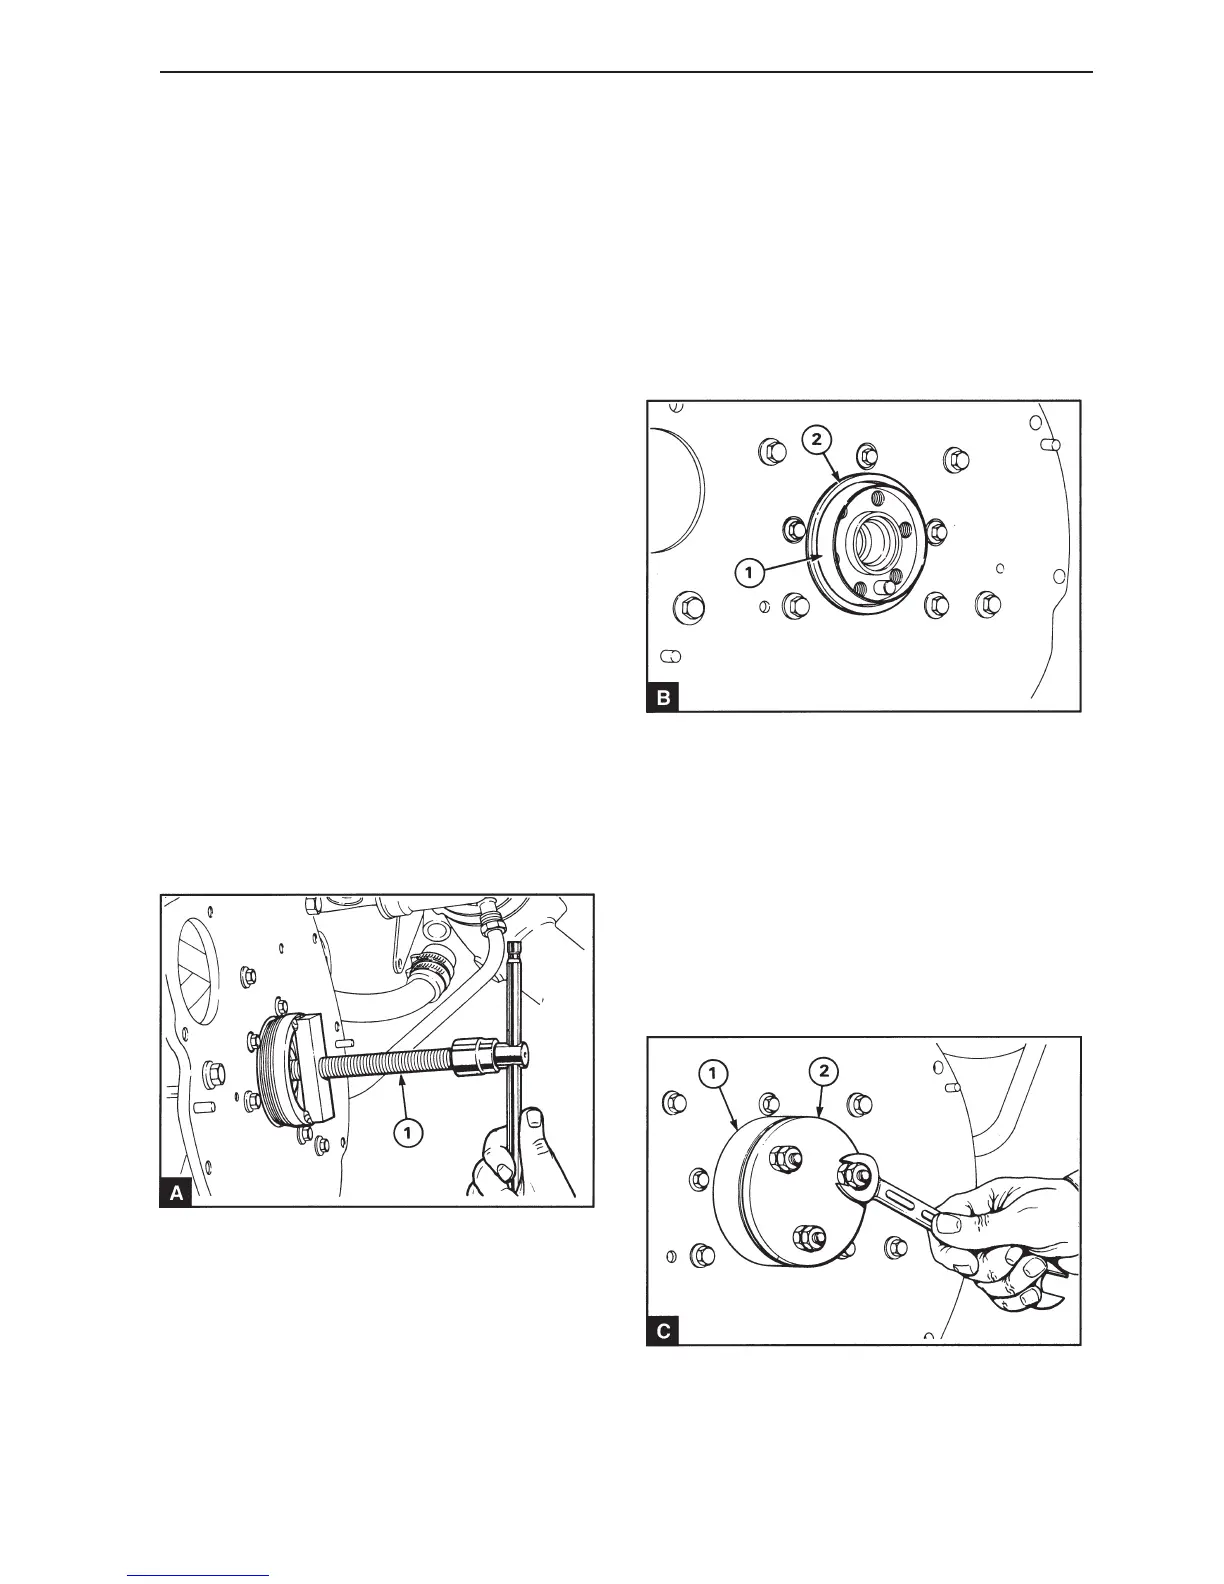
5
Slacken off the screw (A1) in the puller tool so that
it does not reach the crankshaft. Insert the tool in
the sealing ring and turn it clockwise so that it fas-
tens in the sealing ring. Use an adjustable spanner
to turn the tool body so that it fastens securely in
the sealing ring. Tighten the screw against the rear
end of the crankshaft in order to remove the sealing
ring.
6
Clean the sealing ring housing and the flange on the
crankshaft.
7
Lightly the sealing ring housing, the flange on the
crankshaft and the sealing ring seal lip with fresh
engine oil.
8
Clean and lubricate the protective socket 885030
(B1) and install it on the end of the crankshaft
flange.
9
Insert the sealing ring (B2) over the socket with the
seal lip turned towards the engine and slide it up the
flange until it enters the sealing ring housing. Re-
move the protective sleeve.
10