29
Cylinder head
13
Use the valve spring tensioner to compress the
valve spring and the install the valve cotter (B1).
Ensure that the valve spring is pressed straight
down so that the valve stem is not damaged.
14
Lubricate the shims and valve lifters. Install each
shim above the valve spring washer for each valve
and install the valve lifter above each shim.
15
Install the camshaft in position and check valve
clearance according to operation 12A-02. Adjust
valve clearance as necessary.
16
Install the camshaft and the camshaft cover, opera-
tion 12A-02.
17
Install the seawater pump, operation 20A-06.
18
Install the cylinder head, operation 12A-07.
Valves and valve springs,
inspection (12A-09)
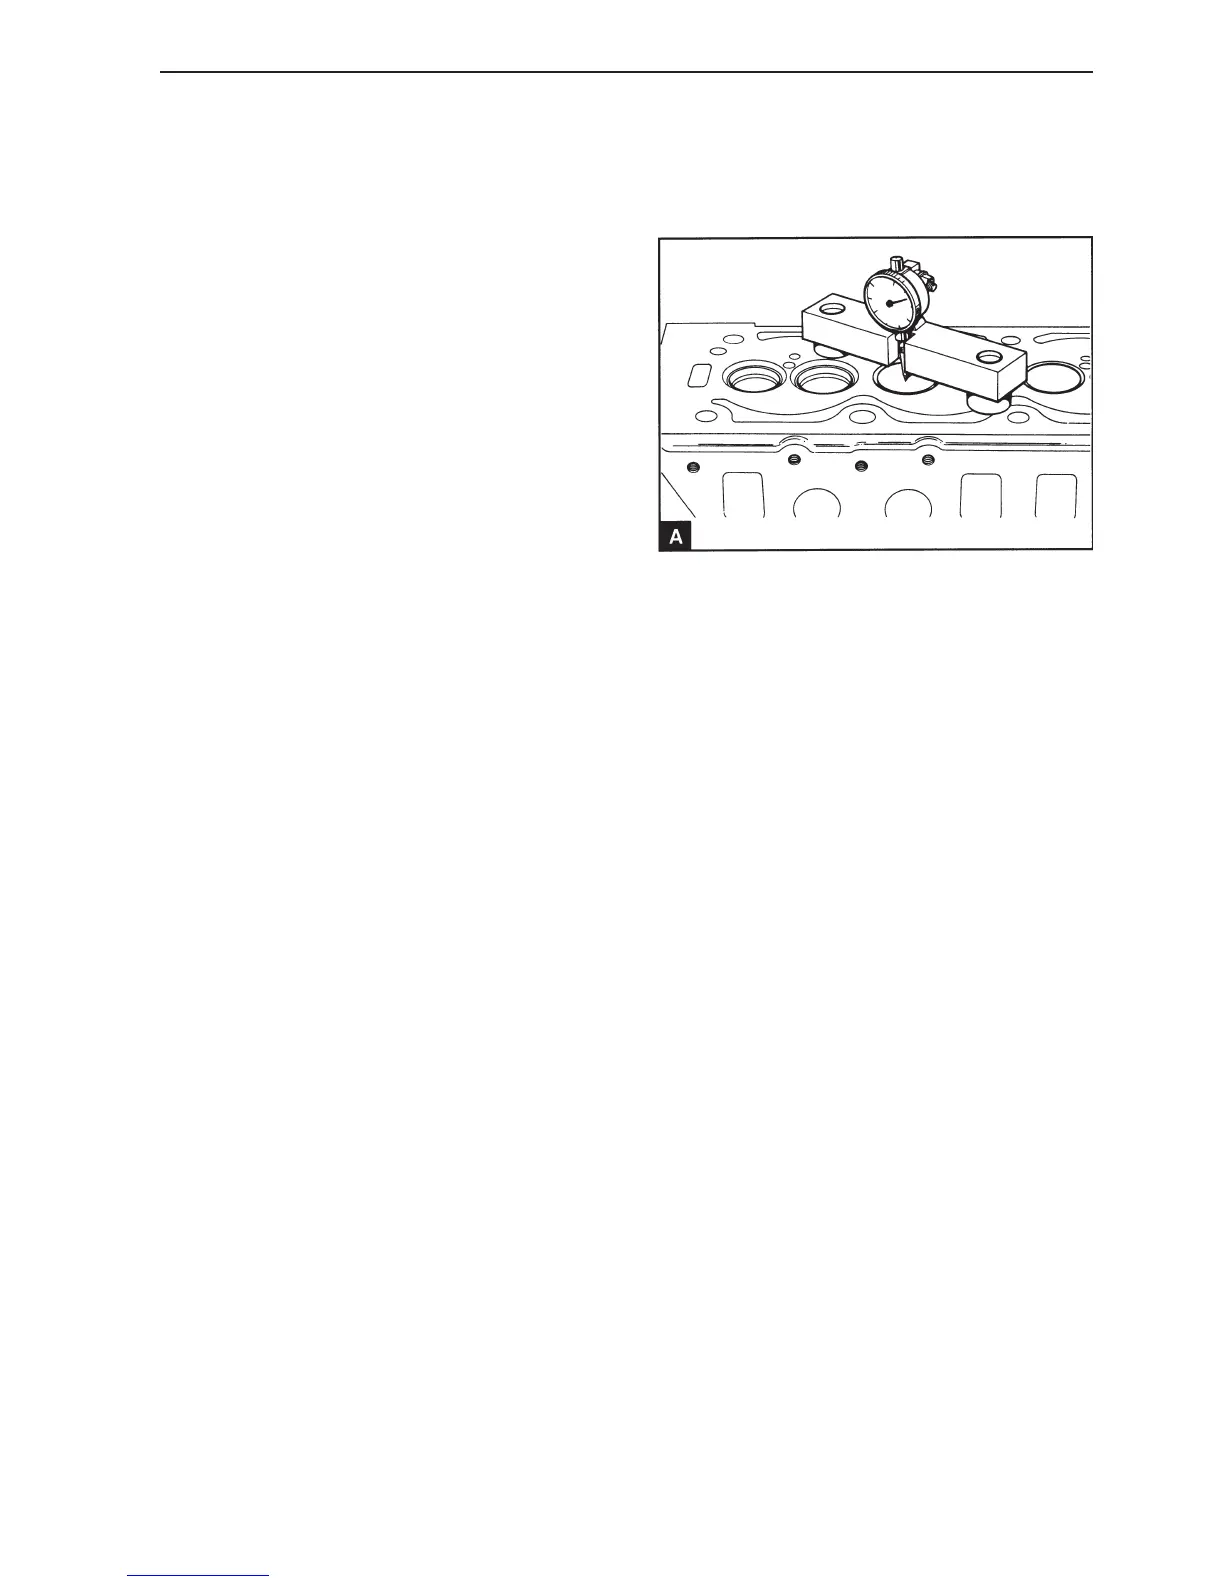
1
Check the depth of the valve crowns under the cyl-
inder head surface, before removing the valve
springs. Ensure that the valve crowns and the cylin-
der head underside are clean. Install the valve
depth gauge on the cylinder head surface and zero
the gauge. Install the valve depth gauge carefully in
position above each valve crown (A) and note the
value. The parameter values for valve crown depth
are given in the Workshop Manual “Technical Data”.
If a valve is deeper than the maximum value, check
the valve depth using a new valve. If the valve
depth is still outside the permitted value, a new
valve seat can be installed, operation 12A-14.
2
Check for the valves for cracks. Check the valve
stems for wear and correct alignment in the valve
guides.
3
Check that the valves mating surfaces to the seats
are not badly burnt or damaged. Valves with dam-
aged sealing surfaces can be reground in a special
machine. Lightly damaged valves can be lapped in
to the valve seats. When new valves are installed
the valve depth must be checked.
4
Check that the spring loading is the correct at the
installed length, see Workshop Manual “Technical
data”.
Install the new valve springs at every complete en-
gine reconditioning.