31
Cylinder head
Cylinder head, inspection
(12A-12)
1
Remove the cylinder head assembly, operations
12A-07.
2
Remove the thermostat housing.
3
Remove the seawater pump, operation 20A-06.
4
Remove the camshaft cover, operation 12A-01 and
the camshaft.
Remove the valve lifters and shims and place each
valve lifter and shim together in a numbered place,
so that they can be returned to their original posi-
tions.
5
Check the cylinder head for signs of gas or coolant
leakage.
6
Remove the valve springs and valves, operation
12A-08.
7
Clean the cylinder head surface. Clean the coolant
and lubrication channels. The water mantle can be
cleaned with a special solvent which must be used
according to the manufacturers instructions.
8
Check the cylinder head for leakage at the pressure
specified in the Workshop Manual “Technical Data”.
9
When the cylinder head is completely clean, it
should be checked for cracks. Carefully check the
areas around the valve seats and the holes for in-
jector nozzles.
10
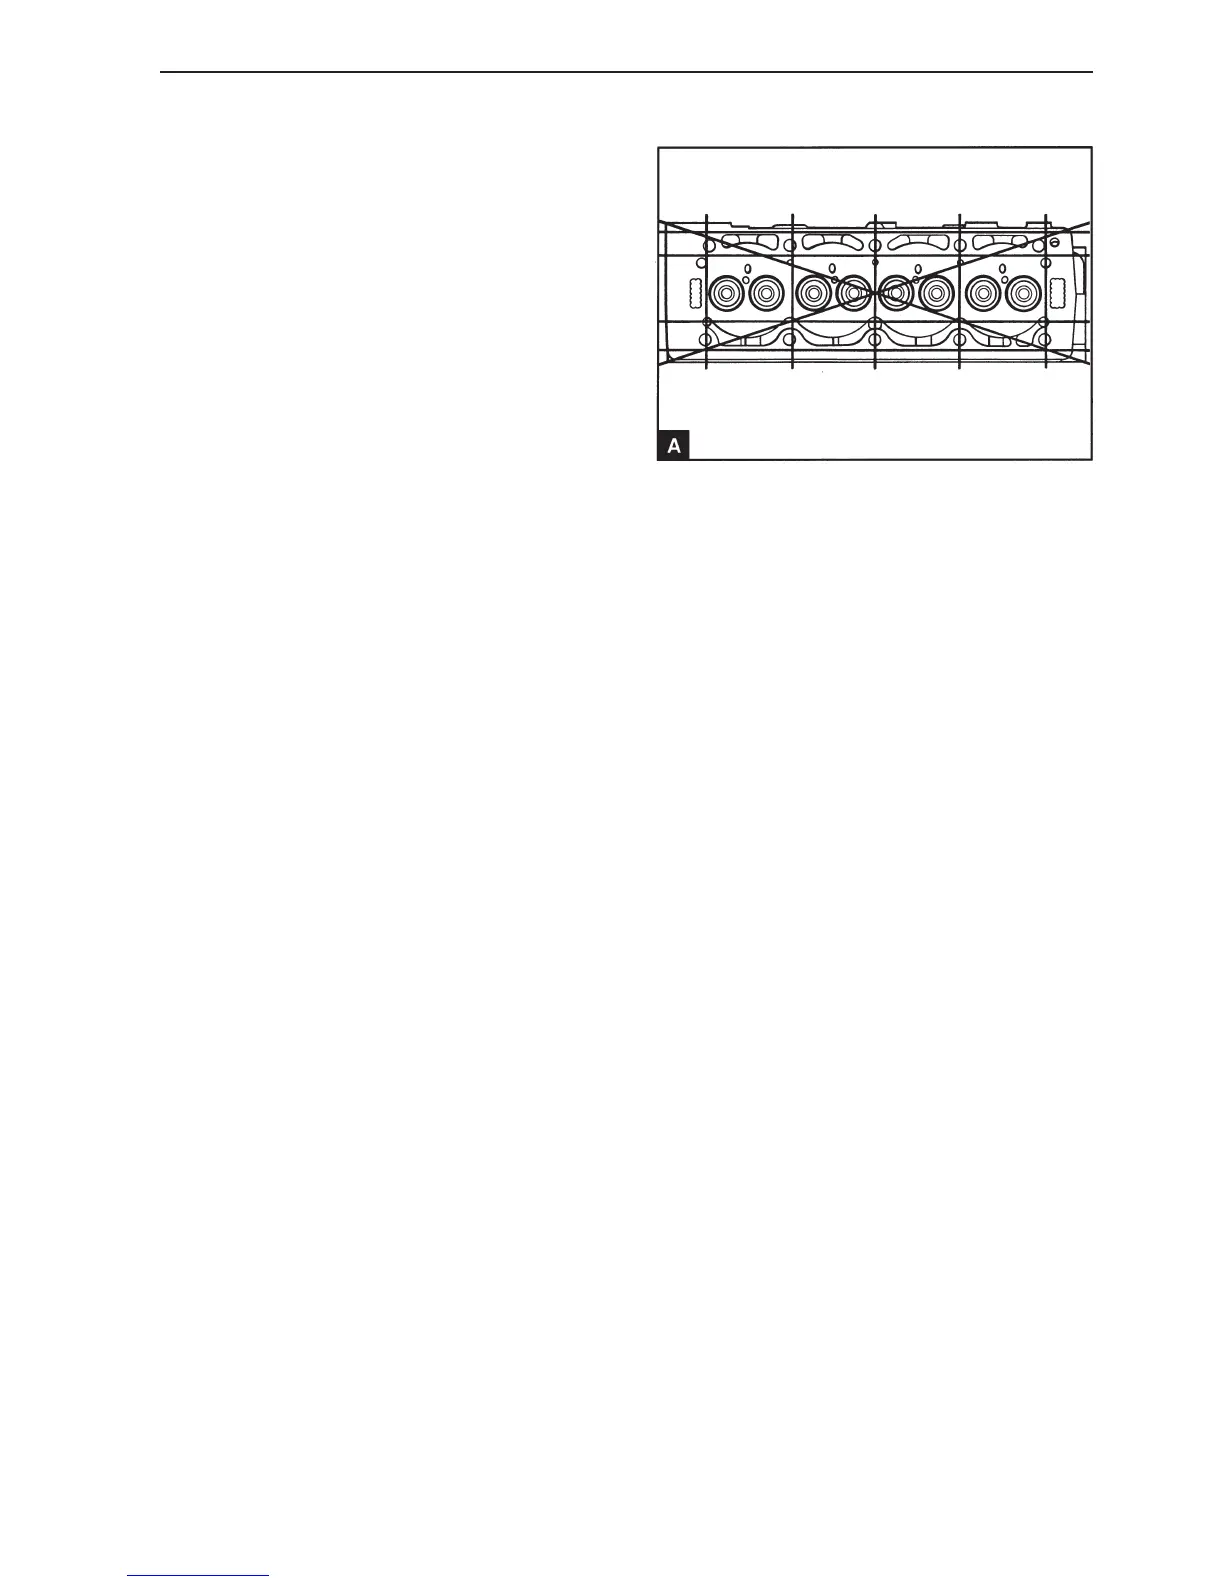
Use a straight edged ruler and a feeler gauge to
check the latitudinal, longitudinal and diagonal flat-
ness of the bottom surface of the cylinder head (A).
If deformation is greater than 0.10 mm the bottom
surface can be machined. Remove the minimum
amount of material and check that the cylinder head
height will not be less than 119.85 mm after the cyl-
inder head has been treated.
NOTE! After the cylinder head has been machined
the valve seats must be corrected to give the cor-
rect valve depth. It is recommended to use the mini-
mum value to allow for wear later.
11
Check the valve seats for damage and wear.
12
Before carrying out any work on the valve seats,
check that the valve guides are not worn, see
Workshop Manual “Technical Data”. If valve guide
wear is above the parameter values the valve
guides must be replaced, operation 12A-11.
13
If the damage is mild the valve and valve seat can
be lapped in. When the valve seats are lapped keep
the sealing area as thin as possible and ensure that
all lapping paste used on the valve and seat is re-
moved.