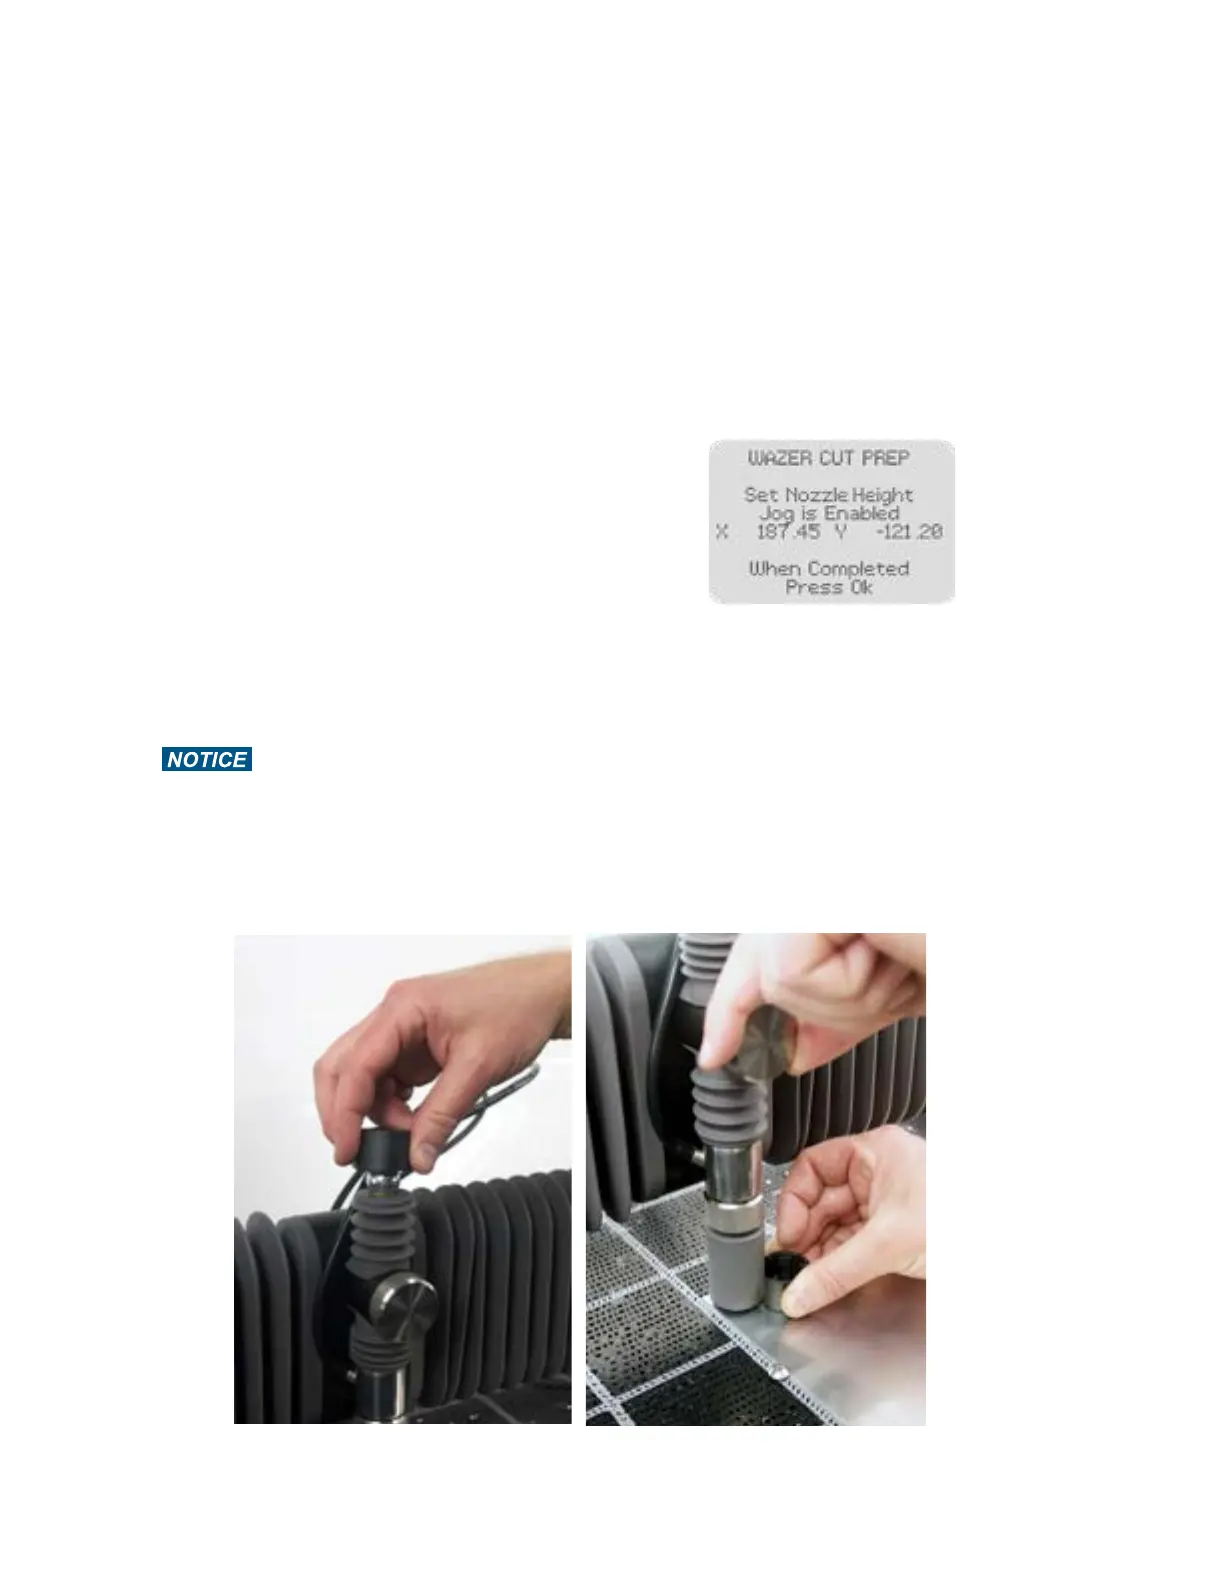
• First, the Control Panel will prompt you to set the Nozzle Height.
• Grab the Nozzle Height Tool, which is the black cap on top of the Nozzle.
• Place the Nozzle Height Tool on top of your Material and loosen the Nozzle Lock Knob on the Nozzle.
• You may Jog the Nozzle over the Material to other points using the keypad. This will not affect the starting
position for the Cut. We highly recommend you check the levelness across the cut piece at this point.
• Slide the Nozzle Height Tool up against the Nozzle Cover, and gently lower the Nozzle onto it. The flange of
the Nozzle Height Tool should now be caught between the Material and the Nozzle, which is hidden under
the gray Nozzle Cover. As long as the Nozzle Height Tool is between the Nozzle and the Material to be cut,
you can trust that it is set properly.
• Tighten the Nozzle Lock Knob after the height is set
properly. This should be tightly snug by hand to ensure
that it doesn’t vibrate loose while cutting. If it comes
lose it will result in a jam, clog, and a failed cut.
• Pull the Nozzle Height Tool out and replace it on top of
the Nozzle.
• Confirm task completion by pressing OK on the Control
Panel.
The Nozzle should not be so tight against the Nozzle
Height Tool that you find it hard slide it out. Additionally,
when you pull the nozzle tool out, be sure that the material hasn’t flexed away from the Cut Bed. If the Nozzle
Height is set too low, it might crash and ruin your Cut and require significant maintenance. If the Nozzle
height is set too high, you may notice a decrease on your Cut Quality.
Setting the height of the Nozzle relative to the Material is critical. If the Nozzle Height is set
improperly, WAZER Pro may not cut through the Material or the WAZER cutting head will come in contact with
the material resulting in a jam, clog, and lost cut.
Set Nozzle Height
52