REFITTING COMPONENTS
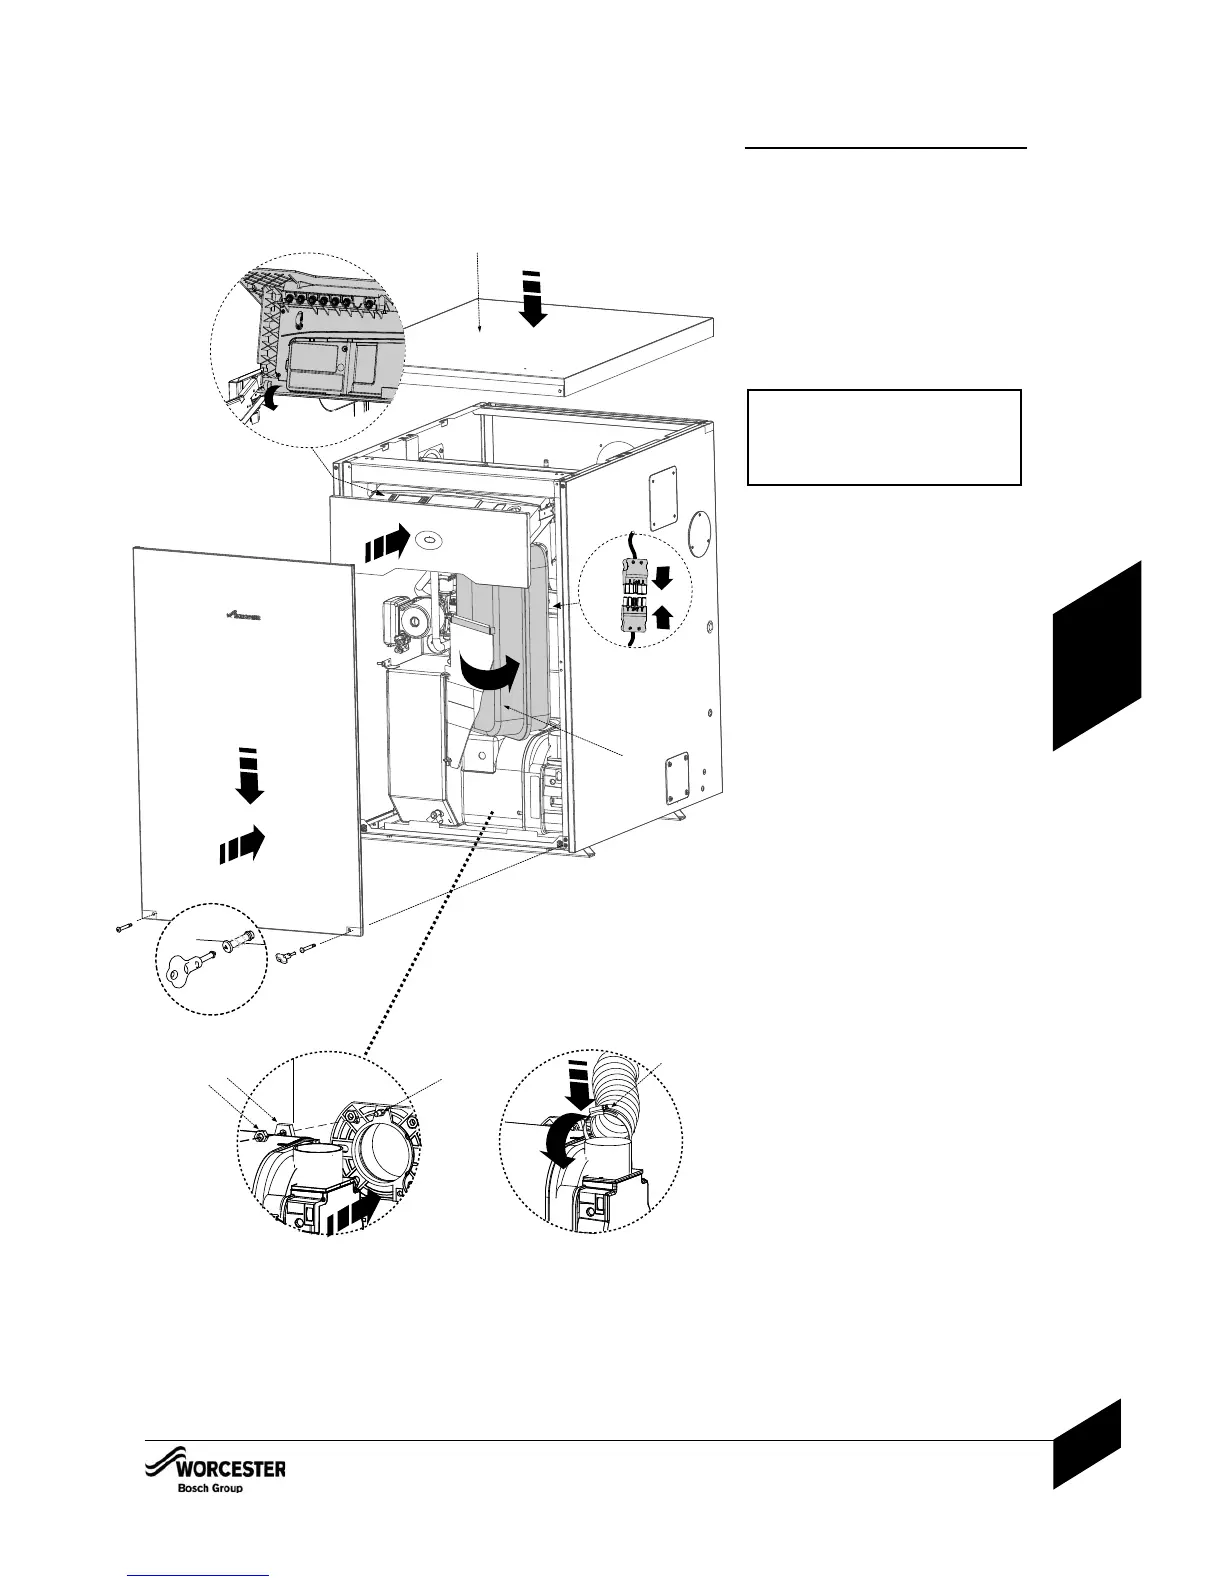
14 Align burner combustion head into the boiler
collar.
4 Locate the burner retainer (A) over the
threaded lug on the collar (B), push the burner
firmly into the flange and secure in place with
the retaining nut (C). Tighten sufficiently but
do not over tighten.
4 Check that the burner is seated correctly
on its mounting flange and that the oil
hose/s are routed correctly as shown on
page 27.
IMPORTANT: Ensure the o-ring seal
between the burner collar and mounting
flange is in good condition to prevent flue
gases escaping from the combustion
chamber into the cabinet.
2 4 Refit the flexible air duct and secure with
clip (D).
34 Plug burner lead (F) into connector (G).
44 Swivel the expansion vessel (H) back into
position taking care not to kink the flexible
hose or snag electric cables.
54 Refit control box.
4 Rotate the box towards you ( J ).
4 Slide control box drawer back into
position.
Refit panels.
64 Refit the top panel and press down to
compress the seal when fitting the
securing screws (K).
74 Push the front panel ( L ) up behind the top
panel and push in at the base to secure
with the screws (M) using the tool
povided.
Always apply pressure at the edges of the
boiler panels when securing to avoid
accidental damage
REFITTING COMPONENTS
INSTALLATION & SERVICING INSTRUCTIONS FOR GREENSTAR HEATSLAVE II EXTERNAL 12/18-18/25-25/32
6 720 805 210-01
29
INSTALLATION
2
A
B
C
D
1
4
H
G
F
3
5
J
6
K
N
M
M
L
O
P
7

 Loading...


