Replacing the
Clea n ing Unit
3-19
Periodic Maintena nce
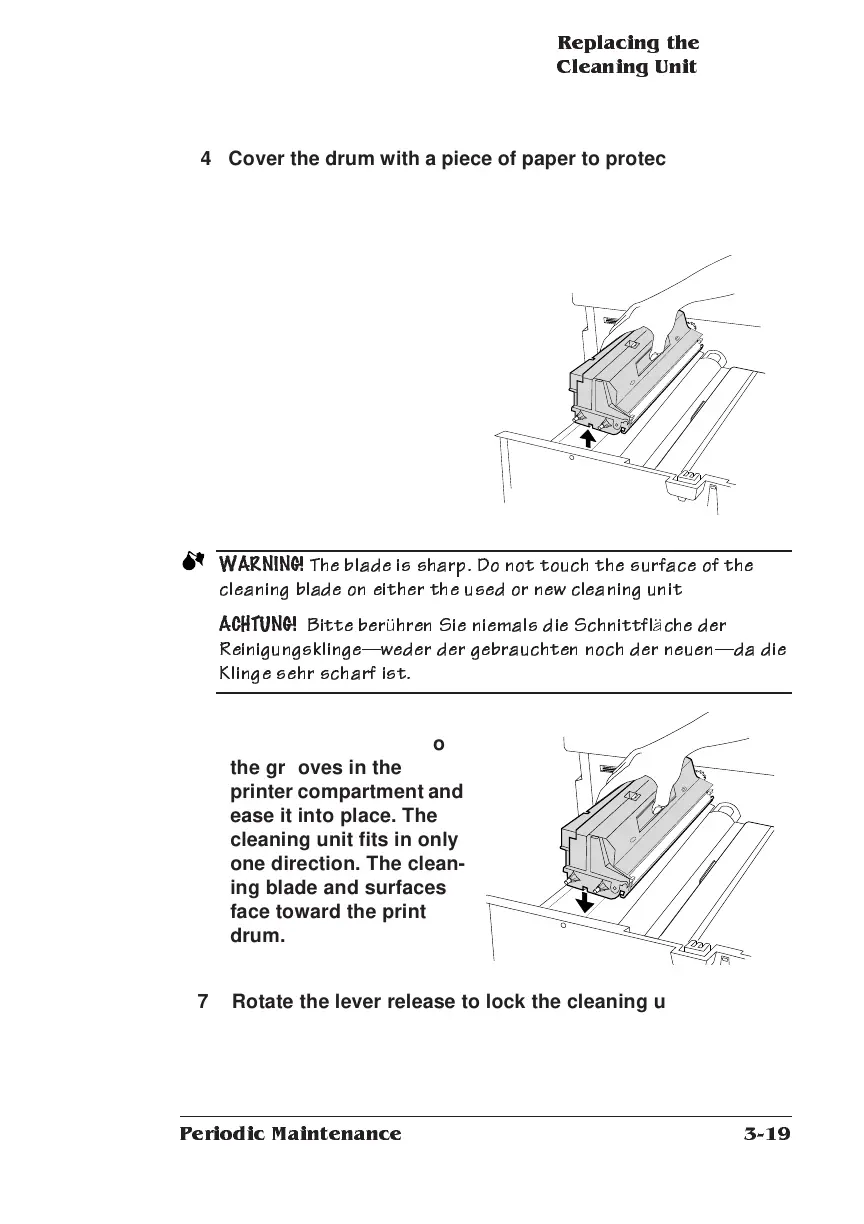
4 Cover the drum with a piece of paper to protect it from light
and any handling damage. Remember to remove the paper
after installing the new cleaning unit.
5 Lift up the used cleaning
unit to remove it. If the
cleaning unit does not
easily come out when
lifted, check to make
sure that the release
lever on the outside of
the compartment is in
the upright position. Dis-
pose of the used clean-
ing unit properly.
WA RNING!
The blade is shar p. Do not touch the s urface of the
cleanin g blade on either the u sed or n ew c leanin g un it
ACHTU NG!
Bitte berühren Sie niemals die Schnittfläc he d er
R einigungsklingeweder der gebrauchten noch der neuenda die
Klinge sehr sc harf ist.
6 Place the new cleaning
unit straight down into
the grooves in the
printer compartment and
ease it into place. The
cleaning unit fits in only
one direction. The clean-
ing blade and surfaces
face toward the print
drum.
7 Rotate the lever release to lock the cleaning unit back into
position.
 Loading...