General Procedures / Information
6-8 12/04 FaxCentre F110
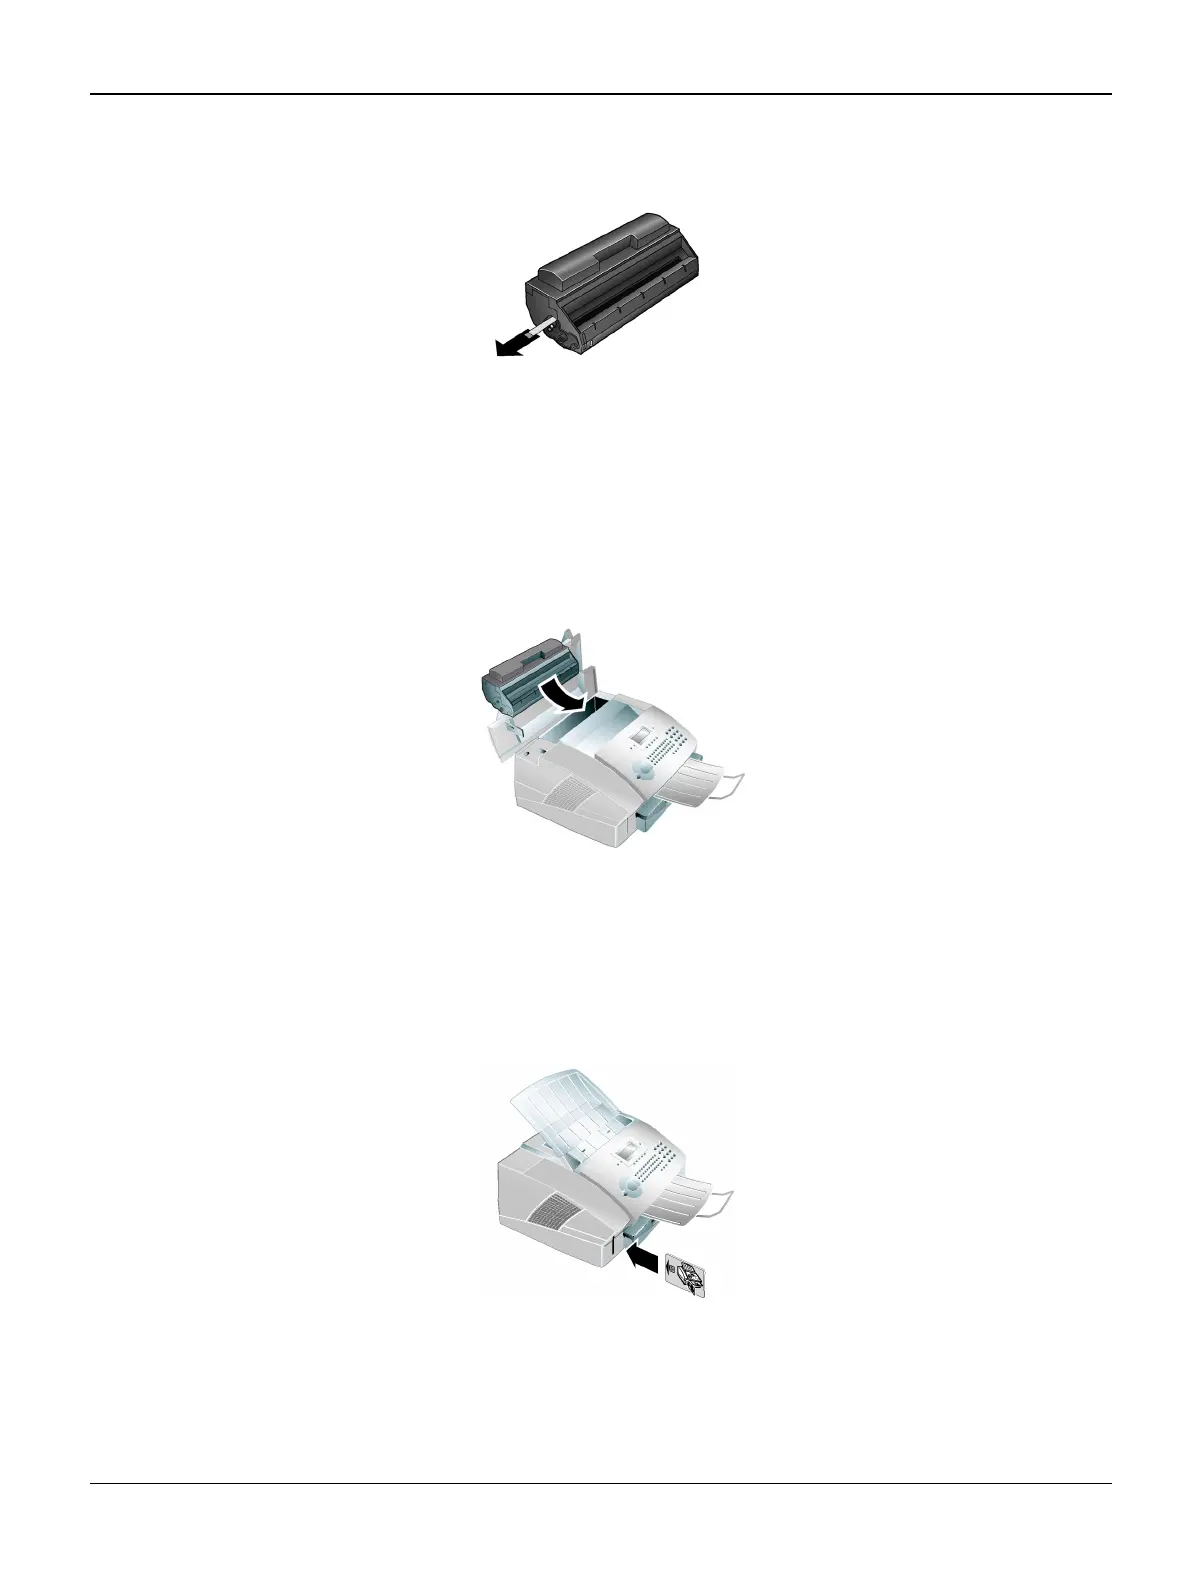
5. Completely pull off the protection strip located on the left side of the cartridge.
Figure 3
WARNING
Once you have removed the protection strip, do not shake the print cartridge any more. It is pos-
sible that toner dust will be released into the air.
6. Place the print cartridge into the FaxCentre F110. The cartridge should snap securely into
position.
Figure 4
7. Close the cover. Make sure that the cover snaps securely into position on both sides.
8. NEW CARTRIDGE? appears on the display. Confirm with OK.
9. Wait until INSERT CARD appears on the display. Push the Plug ‘n’ Print card of the new print
cartridge into the opening on the left side next to the paper tray, with the contacts facing to the
left. (Only the starter cartridge can be used without inserting a Plug ‘n’ Print card).
Figure 5

 Loading...