5. Select either Delete Outside or Delete Inside.
6. If the originals are 2-sided, select the applicable option:
• Both Sides
• Side 1 Only
• Side 2 Only
7. Select the Area 1 button.
The Delete Outside/Delete Inside Area 1 screen is displayed; use this screen to define
the first area for deletion (omission) from the copy output.
8. To define a specific area, enter the two X/Y coordinates within a range 0.0-17.0 inches
(0.0-431.8 mm). Navigate fromcoordinate to coordinate by selecting each X/Y button:
a) Select the Y1 box and use the numeric keypad on the control panel to enter the
value for Y1.
b) Select the Y2 box and use the numeric keypad on the control panel to enter the
value for Y2.
c) Select the X1 box and use the numeric keypad on the control panel to enter the
value for X1.
d) Select the X2 box and use the numeric keypad on the control panel to enter the
value for X2.
Clear a deletion area by selecting the Clear Area X (1, 2, or 3) button.
9. Select Save.
10. Select Save again.
11. Select any other desired copy features/options.
12. Enter the quantity.
13. Press Start.
14. Retrieve the copies from the output area.
Scan
Scan Overview
The Scan feature supports several methods for scanning and storing an original
document. This machine supports the following scan capabilities:
• Email: Scans a document and sends the scanned data as an e-mail attachment after
convertingthe data to TIFF, JPEG, PDF, DocuWorks
®
, or XPS (XML Paper Specification).
• Network Scanning: Scans a document using a job template that was created using
CentreWare
®
Internet Services (CWIS). When Scan to Home is enabled and the
Remote Access feature is available, the scanned datacan be transferred to a different
destination according to an authenticated user.
• Scan to PC: Scans a document and sends the scanned data to a network computer
via the FTP or SMB protocol.
• Store to Folder: Scans a document and saves the scanned data in a folder on the
machine.
3-29Xerox
®
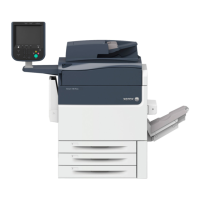
Versant
®
180 Press
User Guide
Press Apps

 Loading...


