Page 13
PREPARING TO RUN YOUR RAIL bRUShLESS Off-ROAD bUGGY
n
Installing the Body and the Wing
For your convenience, some of the decals have already been applied to the body shell. To apply the remaining decals to the body
shell, simply remove them from the protective backing and apply them to the body shell as desired.
q Fit the wing onto the wing mount, using the long body clip pushed through both wing
mounting posts, to hold it securely in place.
q Install the body shell onto the chassis, using the ve body clips provided.
In some cases, if the battery retaining straps are left too long, they can interfere
with the correct t of the body shell. If this occurs, cut away the excess material
from the battery retaining straps prior to tting the body shell.
The battery you use should be a 4 ~ 5 cell (4.8v ~ 6.0v) receiver battery. In addition, for the ESC programming card to work properly,
you MUST plug the ESC throttle lead into the ESC programming card rst, then plug the battery lead into the ESC programming
card, otherwise, no digits will display in the 'MENU' or 'VALUE' screens.
Powering the ESC Programming Card from a Separate Battery
If desired, the ESC programming card can be powered from a separate battery. This is convenient if you don't want to use your motor
battery to power the ESC programming card. Since using a separate battery bypasses your motor batteries completely, there is no
chance of the motor accidentally powering up, so you don't need to remove the pinion gear for safety in this instance.
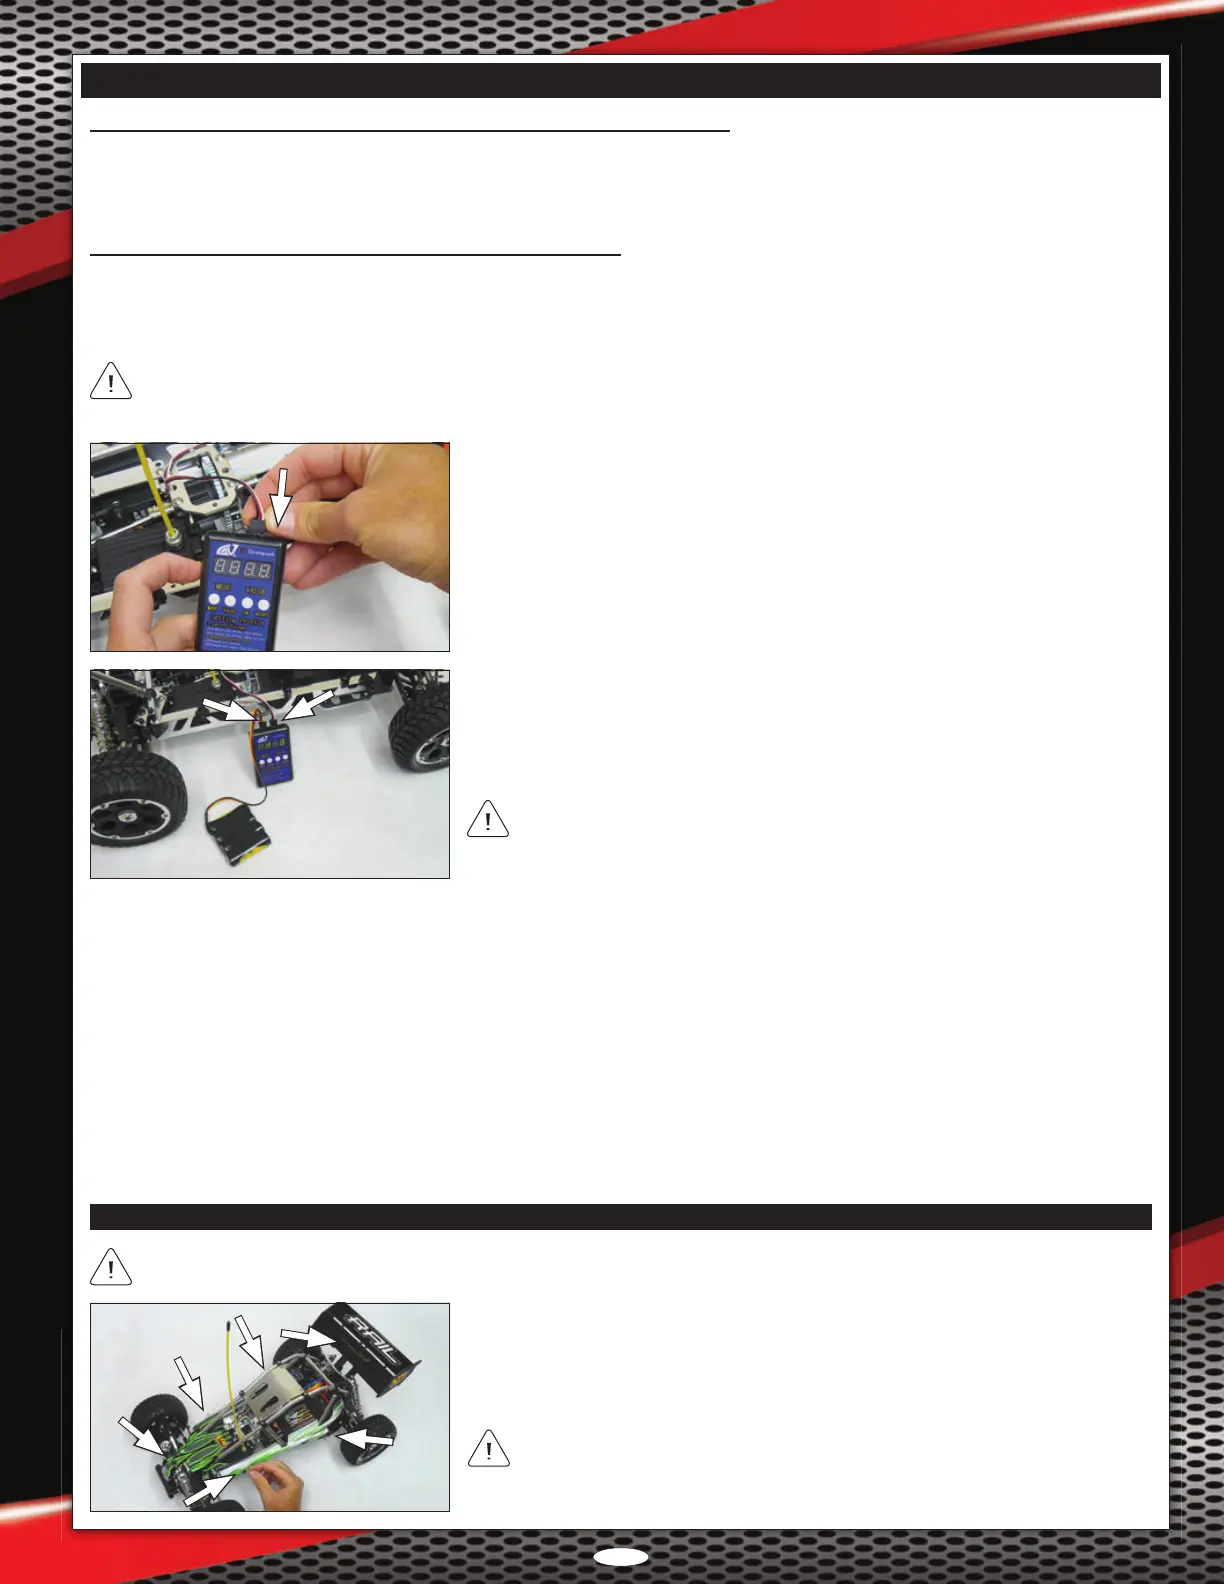
q Remove the receiver box lid and unplug the ESC throttle lead from the receiver.
q Plug the ESC throttle lead into the 'prog-card' connector on the ESC programming
card, observing correct polarity (the white signal wire should be toward the outside
of the ESC programming card as indicated).
To make changes to the different programming options, follow the procedures below:
q Press the 'MENU' button to cycle through the various menus 1 ~ 10. The current menu will be displayed in the 'MENU' screen.
q From with the desired menu, press the 'VALUE' button to cycle through the various menu values. The current value will be displayed
in the 'VALUE' screen.
q After changing the selected value, press the 'OK' button. The red LED on both the ESC programming card and the ESC will ash.
q Repeat the previous procedures to change the value in the other desired menus. If you prefer to reset the menu options to the default
values, press the 'RESET' button.
q Turn the ESC 'OFF'. The new settings will be saved in the ESC's memory.
When powering the ESC programming card with a separate battery, it is not
necessary to turn the ESC 'ON'. In addition, for safety, you should disconnect the
Rail's battery/batteries from the ESC.
q Plug your separate receiver battery into the 'Car' connector on the ESC programming
card, observing correct polarity (the negative wire should be toward the outside of
the ESC programming card as indicated). The red LED on the ESC programming
card will illuminate and digits will be displayed in the 'MENU' and 'VALUE' screens.
Powering the ESC Programming Card from the Motor Battery, Continued....
q Turn the ESC 'OFF'. The new settings will be saved in the ESC's memory.
q Apply threadlock to the grub screw, then reinstall the pinion gear, making sure to tighten the grub screw against the at spot on the motor shaft.