EasyManua.ls Logo

Yamaha Jupiter MX - Engine Assembly

Yamaha Jupiter MX
349 pages
Print Icon
To Next Page IconTo Next Page
To Previous Page IconTo Previous Page
Loading...
4-4
ENG
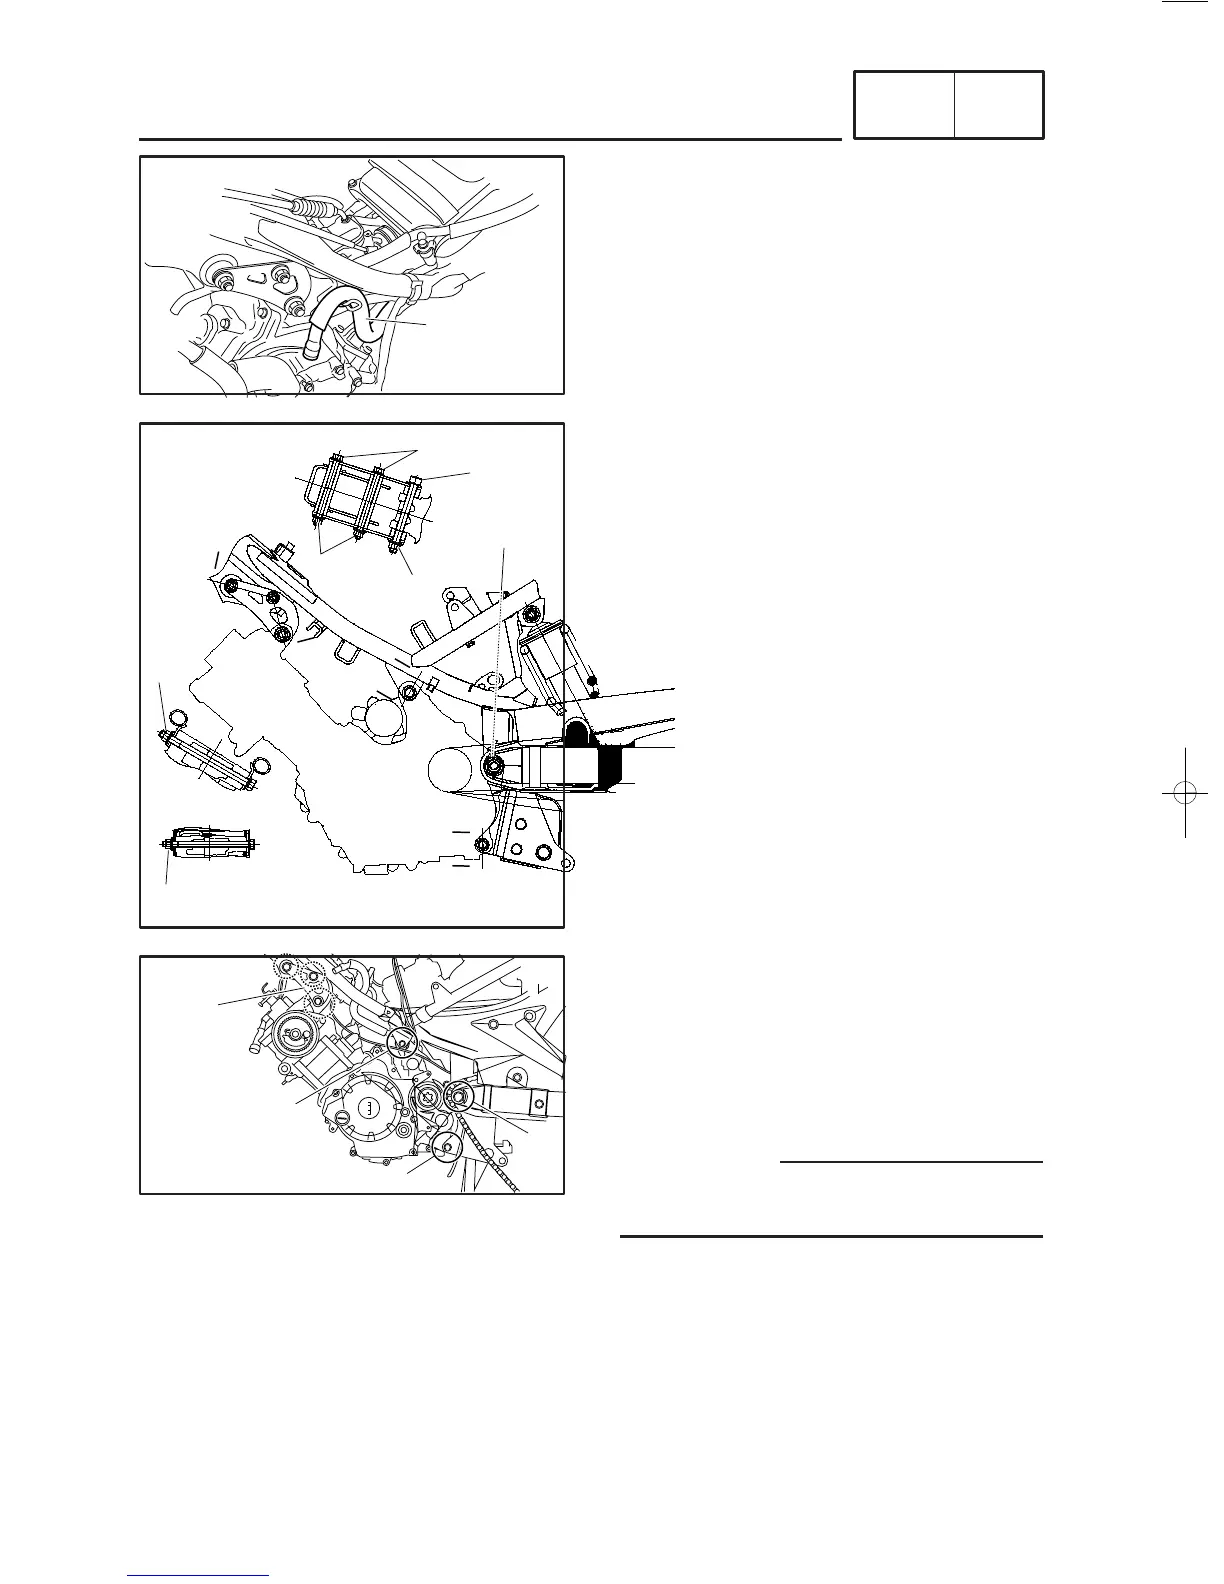
REMOVING THE ENGINE
6
0
q
9
ENGINE ASSEMBLY
1. Loosen:
9
rear lower mounting nut
1
9
plate nuts (front and rear)
2
9
front mounting nut
3
9
rear upper mounting nut
4
9
pivot shaft nut
5
2. Remove:
9
rear lower mounting nut
1
9
washer
9
rear lower mounting bolt
6
9
plate nuts (front and rear)
2
9
washers (front and rear)
9
plate bolts (front and rear)
7
9
front mounting nut
3
9
washer
9
front mounting bolt
8
9
plate (left and right)
9
9
rear upper mounting nut
4
9
washer
9
rear upper mounting bolt
0
9
pivot shaft nut
3
9
washer
9
pivot shaft
q
9
engine assembly
w
Securely support the vehicle so there is no
danger of it falling over.
1
5. Remove:
9
crankcase breather pipe
1
A
A
B
B
C
C
C-C
A-A
B-B
5
1
4
3
2
7
8
http://www.motorcycle.in.th

Table of Contents