4-36
ENG
CYLINDER AND PISTON
1
2
3
5
4
1
2
5
3
4
1
3
2
a
4. Calculate:
9
piston-pin-to-piston-pin-bore clearance
Out of specification
→
Replace the piston
pin and piston as a set.
EAS00267
INSTALLING THE PISTON AND
CYLINDER
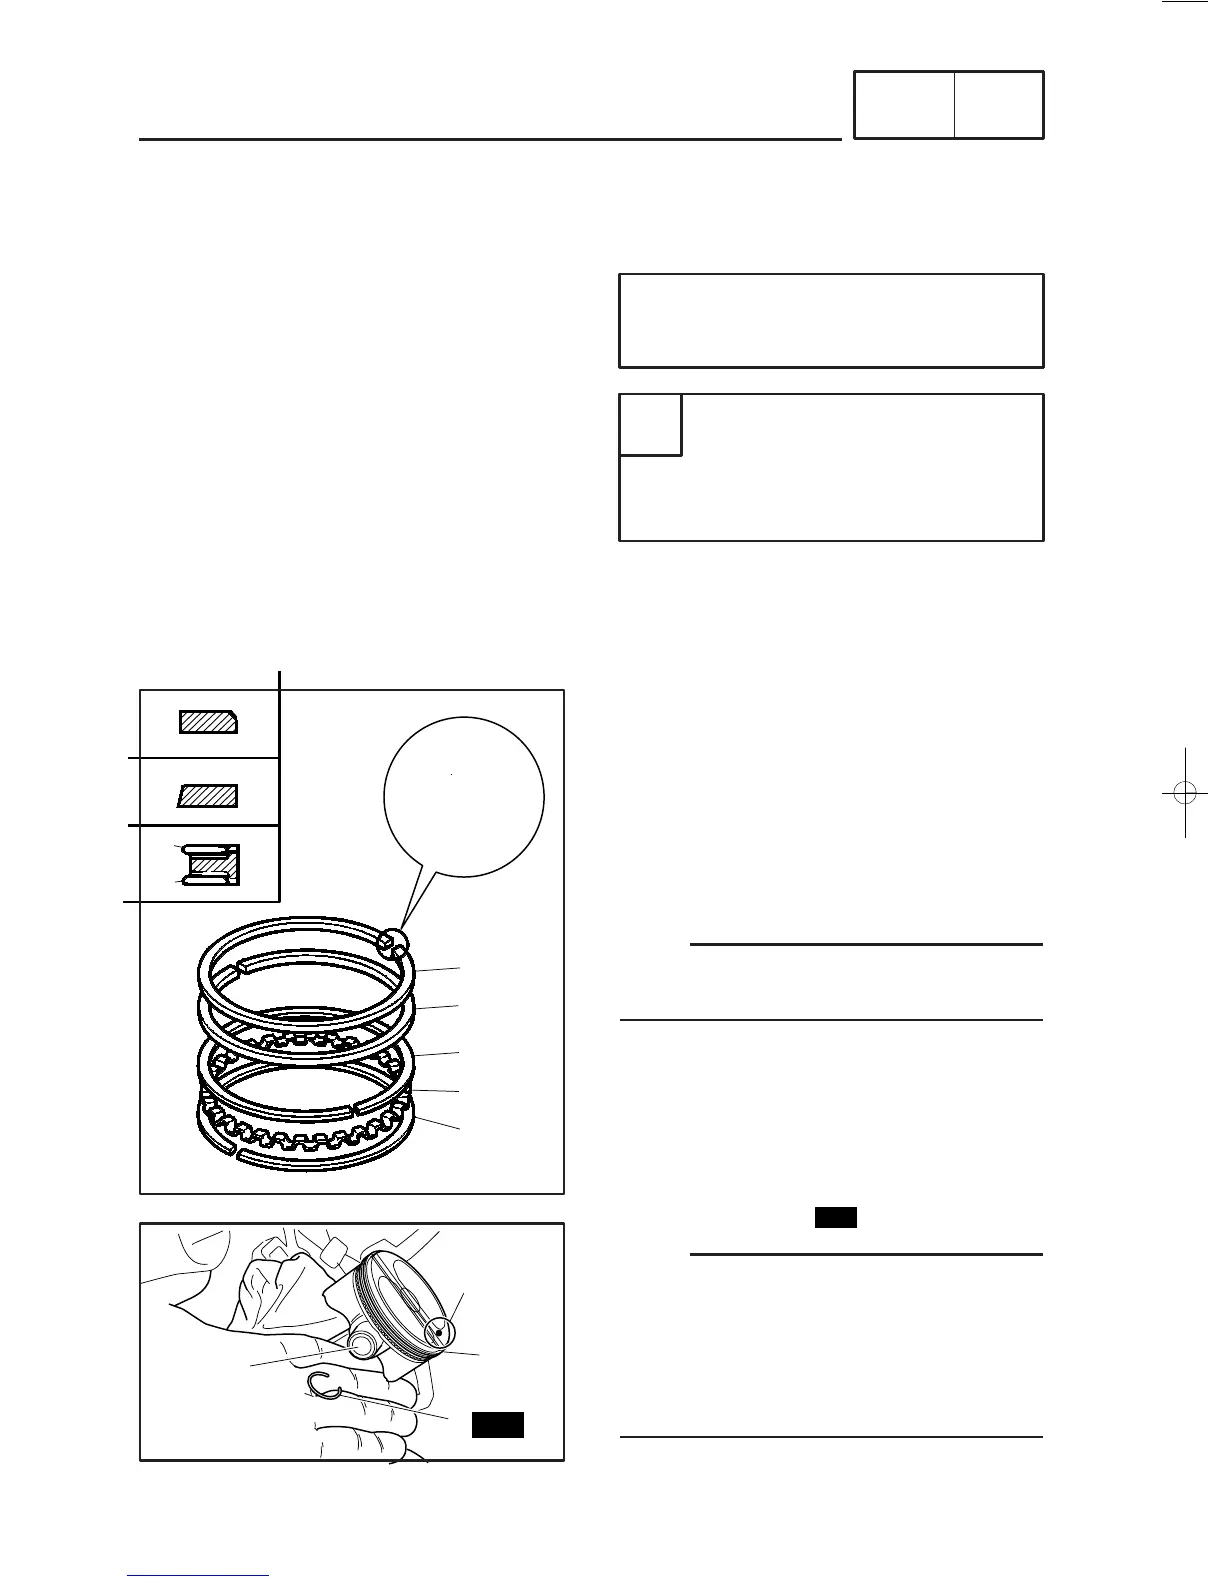
1. Install:
9
top ring
1
9
2nd ring
2
9
oil ring expander
3
9
lower oil ring rail
4
9
upper oil ring rail
5
NOTE:
Be sure to install the piston rings so that the
manufacturer’s marks or numbers face up.
2. Install:
9
piston
1
9
piston pin
2
9
piston pin clip
3
NOTE:
9
Apply engine oil to the piston pin.
9
Make sure the mark
a
on the piston points
towards the exhaust side of the cylinder.
9
Before installing the piston pin clip, cover the
crankcase opening with a clean rag to prevent
the clip from falling into the crankcase.
Piston-pin-to-piston-pin-bore clearance =
Piston pin bore diameter
bb
–
Piston pin outside diameter
aa
Piston-pin-to-piston-pin-bore clear-
ance
0.002 – 0.018 mm
(0.0001 – 0.0007 in)
<Limit>: 0.068 mm (0.027 in)



 To Next Page