b
a
1
2
CHK
ADJ
3-30
ADJUSTING THE REAR BRAKE LIGHT SWITCH/
CHECKING THE FRONT BRAKE HOSE
2. Adjust:
9
rear brake light operation timing
✭✭✭✭✭✭✭✭✭✭✭✭✭✭✭✭✭✭✭✭✭✭✭✭
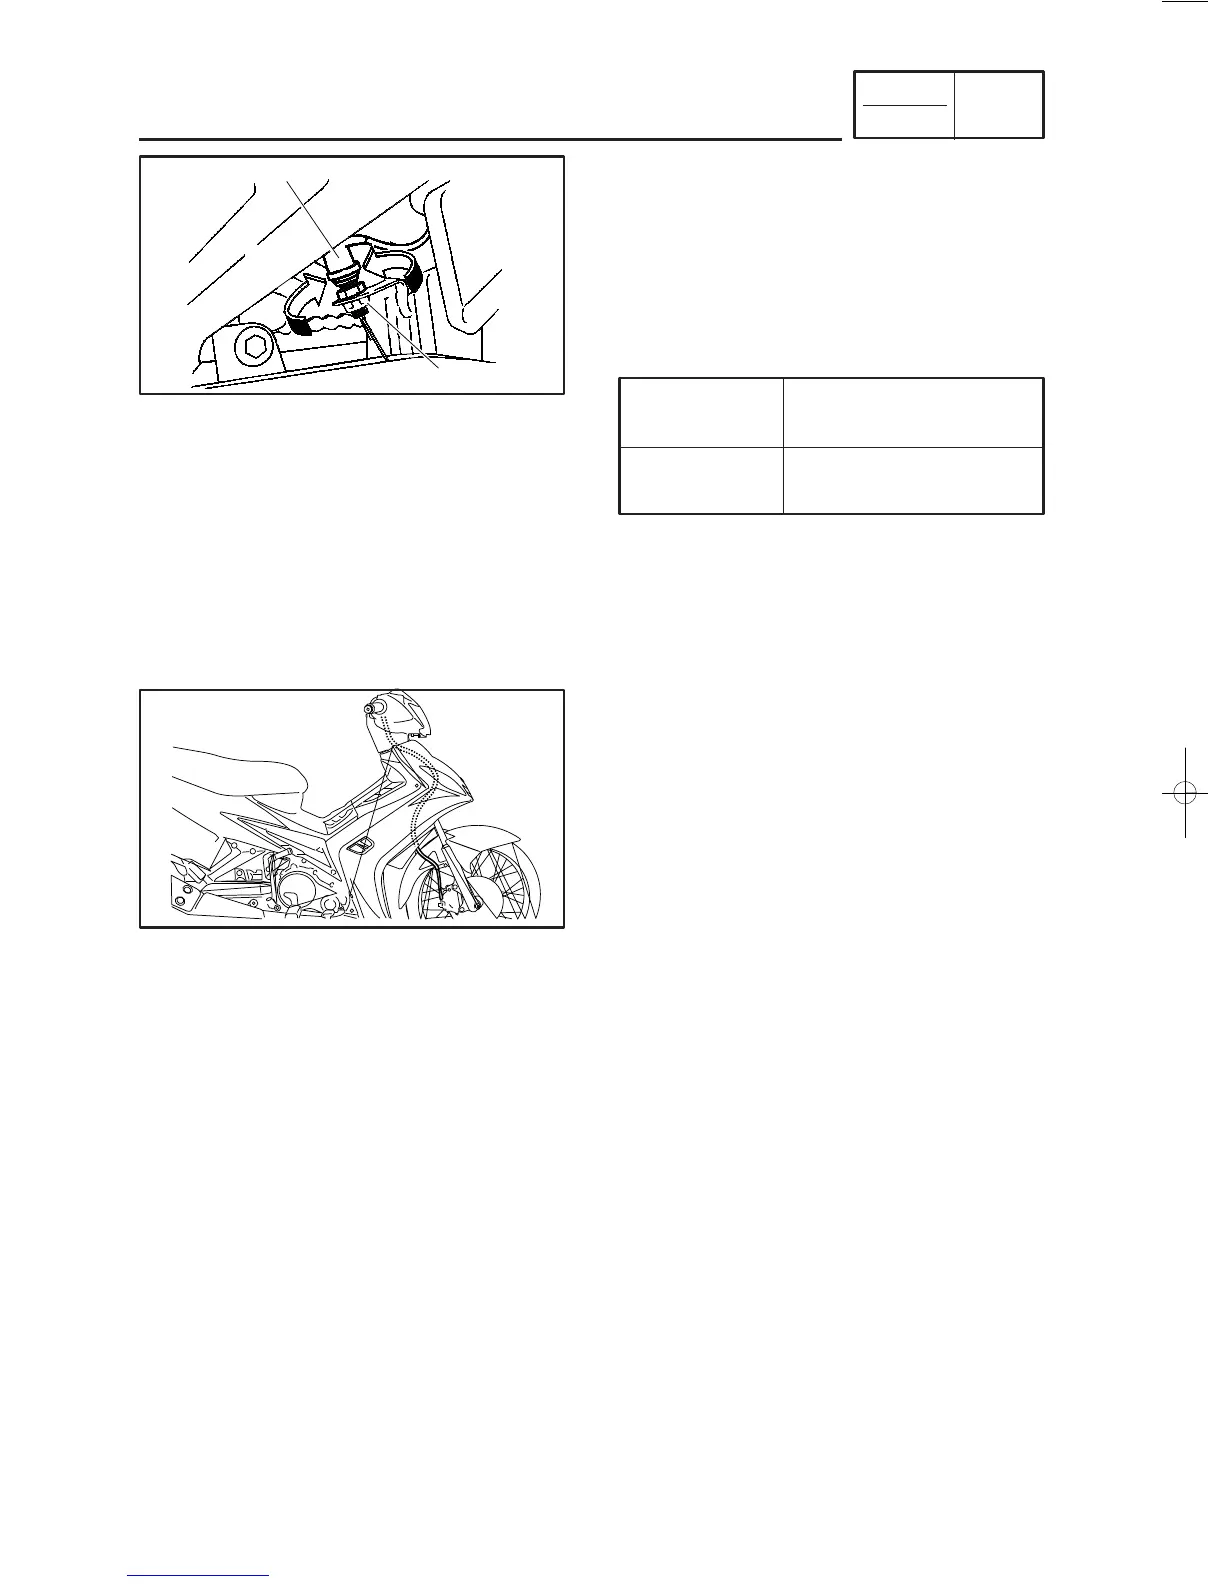
a. Hold the main body
1
of the rear brake
light switch so that it does not rotate and
turn the adjusting nut
2
in direction
a
or
b
until the rear brake light comes on at the
proper time.
✬✬✬✬✬✬✬✬✬✬✬✬✬✬✬✬✬✬✬✬✬✬✬✬
Direction
aa
Brake light comes on
sooner.
Direction
bb
Brake light comes on
later.
EAS00129
CHECKING THE FRONT BRAKE HOSE
1. Check:
9
brake hose
Cracks/damage/wear
→
Replace.
2. Check:
9
brake hose clamp
Loose Connection
→
Tighten the clamp
bolt.
3. Hold the vehicle upright and apply the front
brake several times.
4. Check:
9
brake hose
Brake fluid leakage
→
Replace the dam-
aged hose.
Refer to “FRONTBRAKE” in chapter 7.



 To Next Page