CHAS
REAR WHEELAND BRAKE
7-14
1
EAS00570
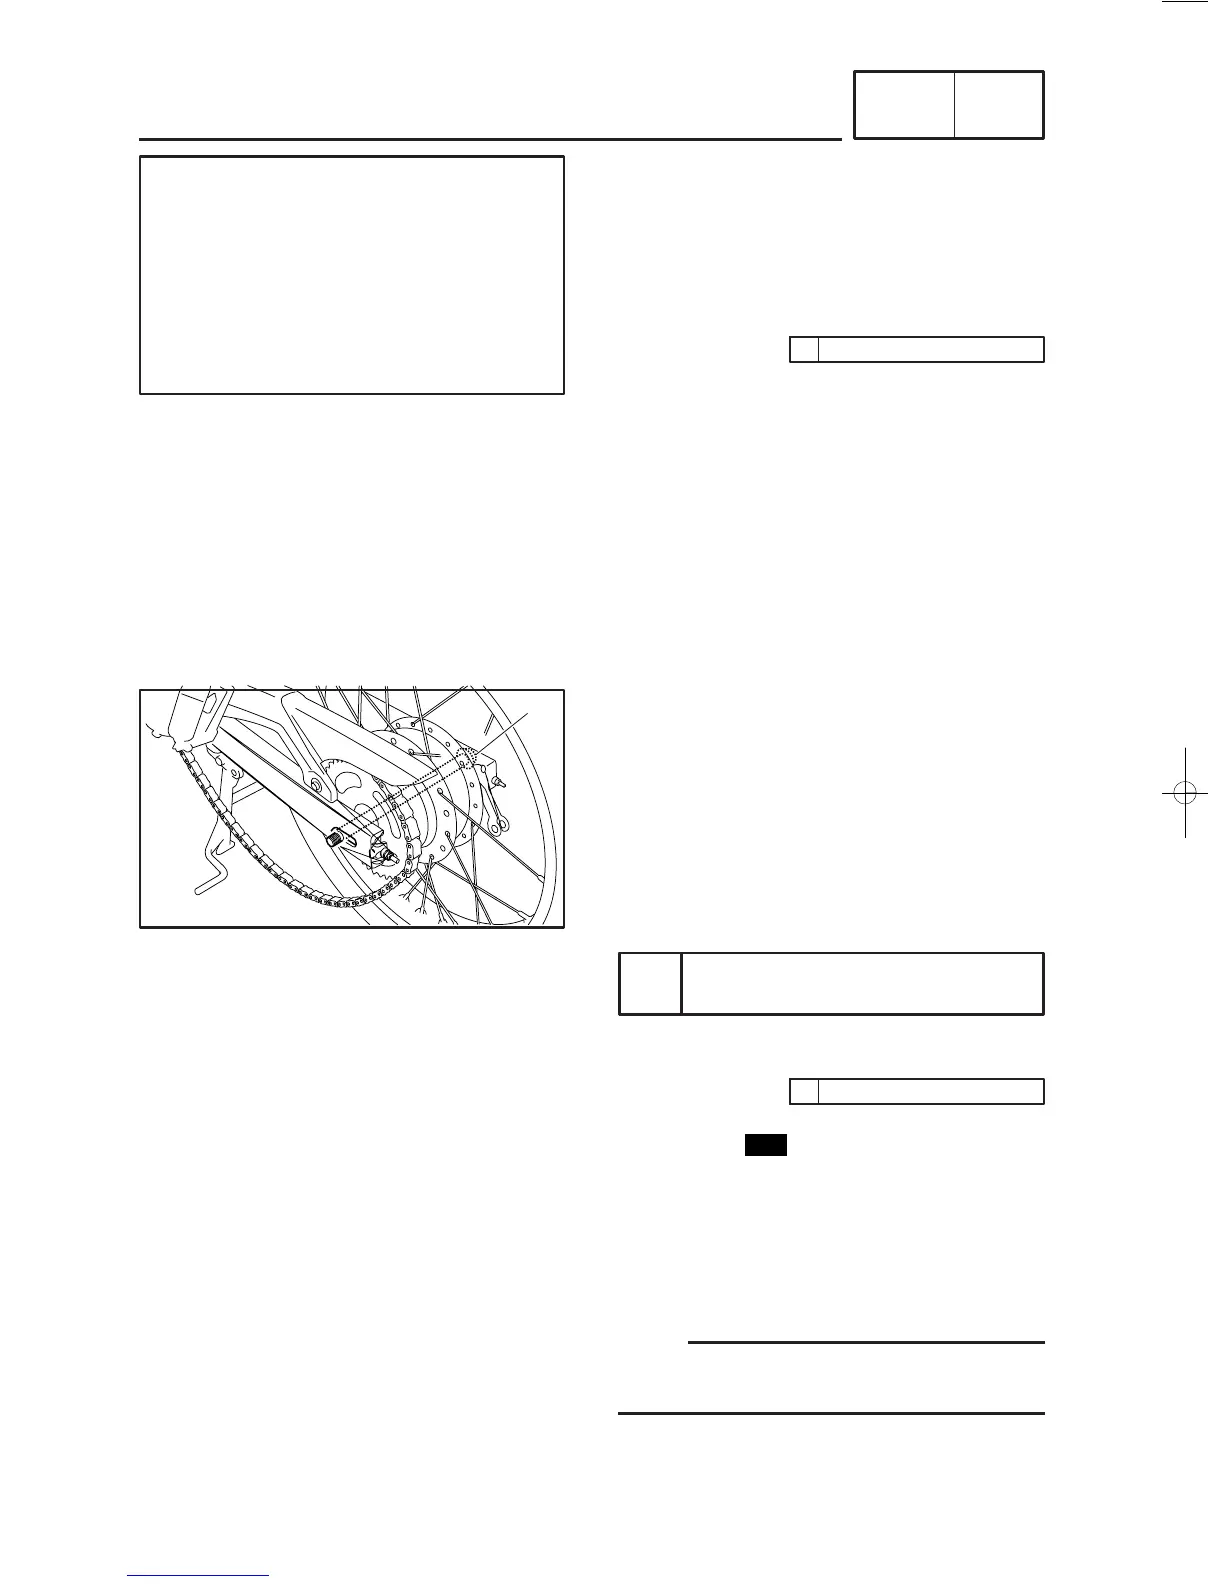
ASSEMBLING THE BRAKE SHOE
PLATE
1. Install:
9
brake camshaft
1
9
brake shoe wear indicator
2
9
brake camshaft lever
✭✭✭✭✭✭✭✭✭✭✭✭✭✭✭✭✭✭✭✭✭✭✭✭
a. Install the brake camshaft so its punch mark
a
is positioned as shown.
b. Align the projection
b
on the brake shoe
wear indicator with the notch in the brake
camshaft.
c. Align the punch mark in the brake camshaft
with the mark on the brake camshaft lever.
d. Check that the brake shoes are properly
positioned.
✬✬✬✬✬✬✬✬✬✬✬✬✬✬✬✬✬✬✬✬✬✬✬✬
EAS00571
INSTALLING THE REAR WHEEL
1. Lubricate:
9
spacer
9
collar
9
wheel axle
1
9
wheel bearings
9
rear brake camshaft
9
brake torque rod bolt
9
oil seal lips
2. Install:
9
brake torque rod (to brake shoe plate)
9
washer
9
cotter pin
3. Install:
9
pin
9
washer
9
compression spring
9
brake rod
9
brake rod adjusting nut
NOTE:
Press down on the brake pedal to install the
brake rod.
Recommended lubricant
Lithium-soap-based grease
19 Nm (1.9 m·kg, 14 ft·lb)
7 Nm (0.7 m·kg, 5.0 ft·lb)



 To Next Page