2-6
2
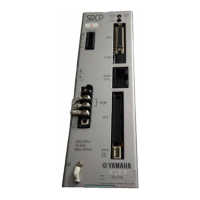
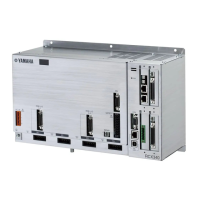
INSTALLATION AND CONNECTION
2-5 Connecting to the Robot
2-5 Connecting to the Robot
First make sure that the power to the SRCP controller is turned off, and then connect the robot cable
to the robot I/O connector and motor connector on the front panel of the SRCP controller. Fully insert
the robot cable until it clicks in position.
* When the robot cable is disconnected from the controller, an alarm (15: FEEDBACK ERROR
2) is issued.
2-5-1 Robot I/O connector and signal table
Mating connector type No. : 0-174047-2 (AMP)
Mating connector contact type No. : 0-175180-2
SRCP’s connector type No. : 0-174055-2
Signal table
Terminal No.
Signal name
Description
Terminal No.
Description
PS+
PS-
PC+
PC-
+5V
GND
Z+
Z-
DG
DG
NC
ORG
+24V
+24V
0V
0V
BK+
BK-
NC
FG
Position SIN input (+)
Position SIN input (-)
Position COS input (+)
Position COS input (-)
+5V
GND
Linear scale Z+
Linear scale Z-
Digital ground
Digital ground
No connection
Origin sensor input
Origin sensor, +24V
Origin sensor, +24V
Origin sensor, 24GND
Origin sensor, 24GND
Brake (+)
Brake (-)
No connection
Frame ground
Signal name
1
2
3
4
5
6
7
8
9
10
11
12
13
14
15
16
17
18
19
20
2-5-2 Motor connector and signal table
Mating connector type No. : 1-178128-4 (AMP)
Mating connector contact type No. : 1-175218-5
SRCP's connector type No. : 1-179277-5
Signal table
Terminal No.
Signal name
Description
Terminal No.
Description
FG
MU
MV
MW
Frame ground
Motor U-phase output
Motor V-phase output
Motor W-phase output
Signal name
1
2
3
4