CLUTCH
5-49
with clean or new clutch fluid.
● Never use solvents on internal clutch com-
ponents as they will cause the piston seals
to swell and distort.
● Whenever a clutch master cylinder is dis-
assembled, replace the piston seals.
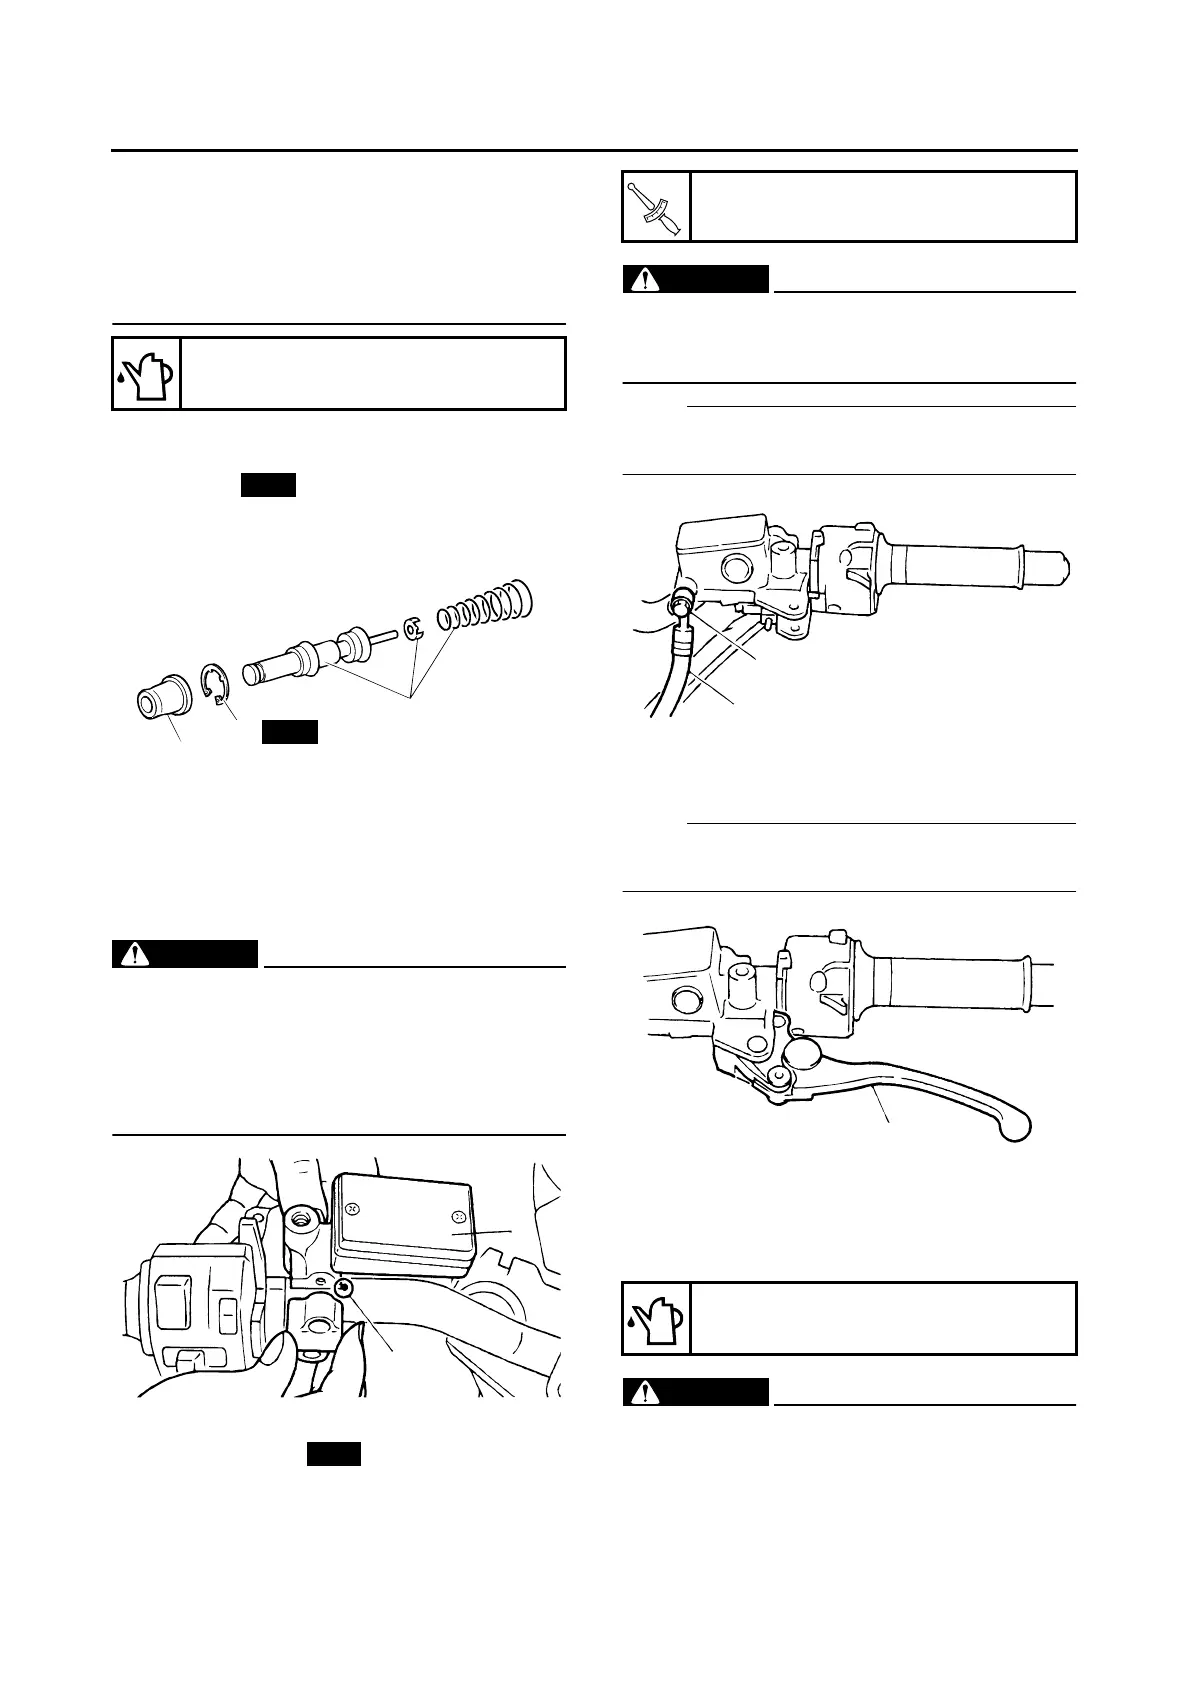
1. Install:
● Master cylinder kit “1”
● Circlip “2”
● Dust boot “3”
EAS25310
INSTALLING THE CLUTCH MASTER
CYLINDER
1. Install:
● Clutch master cylinder “1”
WARNING
EWA13350
● Install the clutch lever holder with the “UP”
mark facing up.
● Align the end of the clutch lever holder with
the punch mark “a” in the handlebar.
● First, tighten the upper bolt, then the lower
bolt.
2. Install:
● Copper washers
● Clutch hose “1”
● Union bolt “2”
WARNING
EWA13360
Proper clutch hose routing is essential to in-
sure safe motorcycle operation. Refer to
“CABLE ROUTING” on page 2-31.
NOTE:
While holding the clutch hose, tighten the union
bolt.
3. Install:
● Clutch lever “1”
NOTE:
Lubricate the clutch lever pivot bolt with silicon
grease.
4. Fill:
Fill with the specified amount of recommend-
ed clutch fluid.
● Clutch master cylinder reservoir
WARNING
EWA13370
● Use only the designated clutch fluid. Other
clutch fluids may cause the rubber seals to
deteriorate, causing leakage and poor
clutch performance.
● Refill with the same type of clutch fluid that
Recommended fluid
DOT 4
New
1
3
2
New
1
a
New
Clutch hose union bolt
30 Nm (3.0 m•kg, 22 ft•lb)
Recommended fluid
DOT 4
T
R
.
.
1
2
1
 Loading...